In what container is it better to cook jam so that it turns out tasty, healthy and can be stored for a long time? To solve this problem, manufacturers produce a wide range of cookware every day.
Kitchen utensils for such purposes vary in size, shape and raw materials. To figure out which model to choose, we recommend that you familiarize yourself with the listed parameters in more detail.
We choose in which container to cook the jam.
Pan or basin
The type of container is selected taking into account the number of berries and fruits that the consumer plans to prepare for a long or short term. The same can be said about the volume of the product.
If you decide to make jam from 1-2 kilograms of berries, then it is preferable to use a saucepan. However, if we are talking about cooking a delicacy from 5-10 kilograms of fruits or berries, then you cannot do without a massive basin.
The basin is used when making jam from 5-10 kilograms of fruits or berries.
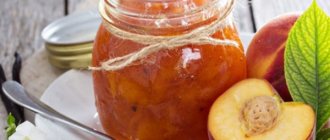
Apple jam, cooked in slices
This recipe requires a long preparation time - about 3 days (personal time involved - about 2 hours). If you strictly follow all the steps specified in the recipe, the result will cover all the inconveniences associated with the process of cooking the dessert. The jam is obtained in pieces; fruit slices can be eaten as dessert or added to baked goods.
For those who care about their figure, you should be careful with the delicacy - the calorie content exceeds 260 kcal per 100 g of jam. To make jam in slices, you need to choose firm, freshly picked fruits from the tree. The ingredients are taken in equal proportions.
Components:
- apples – 3 kg;
- granulated sugar – 3 kg.
Recipe:
- Prepare the apples - wash, remove skins and seeds. Cut medium-thick fruits into slices.
- Place apple slices in a container and cover with granulated sugar. Leave the food for 10-12 hours (overnight is possible). The fruit should give juice.
- After the allotted time has passed, place the product on the stove, turning on medium temperature. The syrup should boil, and a characteristic white foam will form on the jam. After boiling, boil the apples for another 5-6 minutes and remove from the stove.
- Do not stir the jam. Using a wooden spoon, you need to drown the apple slices that are on the surface in the syrup mixture.
- Leave the jam for 10-12 hours.
- After this period, bring the jam to a boil again at medium temperature. Boil for 5 minutes. Gently stir the apple slices into the syrup and leave to cool for another 12 hours.
- Boil the jam again and cook it for 15 minutes at medium temperature until fully cooked.
- Place the finished product in sterilized jars and roll up. Once completely cooled, place in storage.
Preferred container sizes
The size of the container is selected taking into account the number of household members or the desired volume of the prepared mass. If you want to make jam for quick consumption, use a small cauldron. In addition, it will not take long to wash it.
If you decide to stock up on such a delicacy for the winter and pour it into jars, give preference to massive containers. It’s a little harder to wash, but you won’t regret it later.
It is believed that jam turns out better in a wide and shallow container.
“Pyatiminutka” - apple jam
Young housewives should arm themselves with this recipe. The features of “Five Minutes” are quick preparation, which allows you to preserve vitamins, a minimum amount of ingredients, the opportunity to experiment with spices and an excellent taste in the end.
When choosing sour apples, the amount of sugar can be increased (at the same time, the calorie content of the product increases, amounting to 260 kcal per 100), you can add lemon zest, vanillin or cinnamon to the jam. You can store apple sweets in the refrigerator under a tight lid, or roll up the jam and put it away for future use to pamper yourself and your loved ones with summer flavors in winter. Jam is a great addition to pancakes and desserts.
Components:
- apples – 4 kg;
- granulated sugar – 750 g;
- spices (cinnamon, lemon zest, vanilla) – according to preference.
Recipe:
- Wash the apples, peel the skins and remove the seeds.
- Coarsely grate the fruit.
- Place grated apples in a container and sprinkle with granulated sugar. Leave the fruit for 2 hours.
- When the apples release their juice, add the necessary spices to the mixture (you can do without them) and place on the stove. Cook the jam at the lowest temperature. After boiling, boil the apple mixture for 5 minutes while stirring without stopping. Remove the jam from the heat and place in sterilized 500 ml jars. and roll up.
Materials used to make such pans
When buying containers for making jam, it is imperative to take into account the raw materials from which the product is made. This is due to the fact that there are a lot of recipes for jam and marmalade. Some require several stages of cooking, while others, on the contrary, can be prepared in an hour.
Focus on this parameter so that you don’t end up having to expose the dishes to temperature fluctuations. Because some metal products lose performance from sudden thermal influences.
Stainless steel jam utensils have good technical characteristics.
Stainless steel
Stainless steel jam utensils are considered the most optimal container option, as they have good technical characteristics. Steel is not subject to corrosion, mechanical damage and oxidation, which is very important when cooking. Since steel pans do not react with acids, you can cook sweet and sour berries in them: cherries, currants, etc.
Glossy and matte products are produced from stainless steel. This design fact does not affect the quality of the prepared food in any way. Which of the vessel options to choose is up to the buyer to decide for himself.
During the washing process, drops of water remain on the shiny surface, which must be removed immediately to avoid stains.
As for the thickness of the walls and bottom, you should choose thick-walled structures. The presence of a dense bottom allows you to cook fruit for a long time.
It is prohibited to store cooked foods in an aluminum pan for a long time.
If there is no steel cookware: aluminum or copper
If you don’t have steel containers at hand, then utensils for making jam made from aluminum and copper are suitable. Both metals have individual characteristics and advantages, which we will discuss below.
Let's consider the main advantages of copper structures:
- The metal is characterized by a high level of thermal conductivity. In a few minutes, kitchen utensils can both cool down and heat up.
- Temperature control is easy due to thermal conductivity.
- Copper has excellent antifungal and antibacterial properties. Even without heating the dishes, the risk of infection by pathogenic bacteria and viruses is minimal.
Nowadays, copper structures are used less and less during the cooking process. This lack of demand is due to the fact that the metal oxidizes during operation. Harmful chemicals can get into food and have negative effects on the human body.
Cooking in a copper pot will require less energy.
In order to minimize the risk of oxidation, the products are coated with tin. Despite the fact that the coating is considered protective, metal utensils require careful care.
Although aluminum alloy cookware cannot be used for making jam, some consumers take the risk. However, during operation they cannot do without certain rules:
- Boil sweet fruits, without sourness, if you choose aluminum containers.
- Use the product on the stove, having previously placed the berries in it and covered them with sugar.
- Stir the jam from time to time with a wooden spatula so that it does not stick to the walls and bottom of the dish.
- Use instant recipes.
It is prohibited to store cooked foods in an aluminum pan for a long time. After completing the cooking process, immediately pour the mixture into a separate bowl or distribute into jars.
Enameled pans should absolutely not be used for cooking jam.
Enameled utensils for making jam
Enameled pans should absolutely not be used for cooking jam. But what to do if there are simply no other dishes? As a possible option, you can use an enamel basin, if you follow some operating nuances:
- Cook over low heat.
- Stir the mixture constantly to prevent it from burning.
- Use silicone spatulas for stirring.
If you are convinced that you cannot follow simple rules, then use an enamel structure for pre-processing berries and fruits. You can store sugar-covered foods in such a container for a long time.
If chips, microcracks or scratches are found on an enamel pan, you should not use it in the future.
Enamel is often applied to cast iron and steel products. Cast iron is more suitable for cooking sweet syrups and jams, as it has natural non-stick properties.
Cast iron is perfect for making jam.
Cast iron
As mentioned earlier, cast iron is perfect for making jam, if all precautions are taken. Have you decided to make jam in a cast iron cauldron? After cooking, do not forget to pour the mixture into glass or enamel containers.
And also do not overuse the preparation of acidic foods in cast iron structures. When reacting with acids, cast iron releases harmful substances.
All consumers prefer kitchen utensils with non-stick coating.
Non-stick cookware
All consumers prefer kitchen utensils with non-stick coating. Moreover, its variety is quite wide: Teflon, titanium, ceramics and marble. Each of them has features and advantages.
As you know, there are no specialized utensils for cooking jams and syrups, so housewives often use multicookers. However, there are nuances here too:
- Use only non-metallic ladles to pour the mixture into jars.
- The non-stick coating is not resistant to sudden temperature changes.
- Not every coating is suitable for leaving the mixture to sit.
Experts recommend focusing on models suitable for quickly preparing jam and other sweets. And also choose an oversized design.
As experts say, the most wear-resistant protective coating is ceramic. It can withstand temperatures up to 400 degrees. The non-stick ceramic layer requires prompt maintenance.
Modern utensils for jam, which is better: Teflon or ceramic
When using utensils for cooking syrups and jams, it should be taken into account that the non-stick layer does not protect the food, but the structure itself. Which spraying should you prefer? Of course, if you choose from tetrafluoroethylene and ceramics, then the second option is most suitable for this purpose.
However, do not forget that with the slightest flaw in the container body, it becomes dangerous for use. Try to avoid using sharp objects while cooking.
Ceramic dishes should be washed in warm water using dishwashing detergents.
Material selection criteria
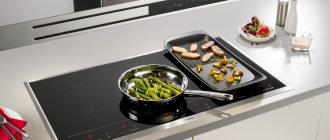
In which container it is better to cook jam depends on the type of product and the planned volume of preparation. It is also worth considering the features of the home stove.
For gas equipment, you must choose a basin or pan with thick walls and bottom so that the jam is cooked evenly. In this case, stainless steel containers are suitable. Using glass or ceramics on an open fire may cause them to break.
On a glass-ceramic stove, use dishes with a bottom diameter equal to the diameter of the burner, plus or minus a few millimeters. Glass or ceramic pots are perfect here.
Induction cookers require appropriate cookware. For cooking on such equipment, a stainless steel bowl or container with a ferromagnetic bottom is suitable. If you have a container for jam, but it cannot be used on an induction cooker, you can purchase a special adapter disk.
Shape and volume of containers for making jam
The container for making jam should have low sides, but wide. In such a container, excess liquid will evaporate faster and the fruit will not lose its shape. Tall pans are not suitable because... their bottom and top are much narrower than the sides. The larger the area of contact with the fire, the faster the dishes will heat up, and the lower layer of jam will not be overcooked. To prevent the mass from burning, you need to choose containers with a whole, even, flat bottom.
For an average family of four people, 20 liters of different preparations will be enough. The volume of the dishes must be chosen based on these calculations, and then in winter you can warm up with a cup of tea and tasty and healthy home-made jam.
Utensil shape for making jam
Wide containers with low sides are considered suitable for making jam. The liquid in it evaporates very quickly and the mass begins to thicken in a matter of minutes.
That is why many people prefer medium-sized basins. Their massive, flat bottom warms up evenly. This way, all the berries can be cooked until tender.
Designs with a thin bottom cannot be used for making jam.
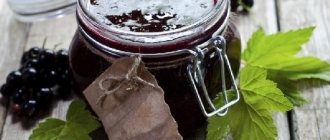
Classic apple and plum jam
Thick ruby-colored jam, for which it is better to use homemade apples. Fruits need to be cut coarsely so that they do not lose their shape during heat treatment. Apples and plums contain a natural thickener - pectin, and therefore it is not advisable to overcook the jam. After some time it will thicken on its own. The dessert is served with pancakes, pancakes, cottage cheese casserole or cheesecakes.
Components:
- apples – 1.5 kg;
- plums – 600 g;
- sugar – 1 kg.
Recipe:
- Wash and prepare the fruits. Remove seeds from apples and pits from plums.
- Cut the apples into large slices, plums into quarters. If the plum fruits are small, you can cut them in half.
- Place plums and apples in a container and sprinkle with sugar. Leave for 2.5 hours. The fruits should give a lot of juice.
- Place the container with fruit on the stove and bring to a boil at low temperature. Then increase the temperature to the maximum value and boil the jam for 10 minutes, be sure to stir so that the fruit does not burn.
- Remove the container with fruit jam from the stove until it cools completely (you can leave it overnight).
- Boil the cooled jam and simmer for 10 minutes. Then cool and put into sterilized jars. Roll up.
How to make plum jam at home
Which basins and pans are unsuitable for making jam?
Avoid using narrow, tall pans. You will not be able to prepare jam according to the recipe in them, since the moisture evaporates slowly and incompletely.
Designs with a thin bottom also cannot be used, since the sugar mass can burn, even if you cook on low heat. In addition to the thickness of the bottom, consider its shape - it must be perfectly flat and smooth for uniform heating.
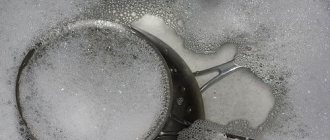
After preparing the jam, the pan must be thoroughly washed.
Apple and orange jam
An unusually tasty delicacy can be prepared by combining apples and oranges. This jam will surprise you with its aroma and flavor tones. It contains a large number of useful substances. The dessert can be served as an independent treat or in addition to pancakes and pancakes. Jam is also used for filling pies.
Components:
- apples – 1.5 kg;
- oranges – 750 g;
- granulated sugar – 750 g.
Recipe:
- Choose whole apples, without rot or blemishes. Wash the fruit, cut out the cores with seeds, cut into medium-sized cubes.
- Peel the oranges and remove, if possible, all the white films from the fruit.
- Divide the orange into slices and cut them into medium-sized slices. This should be done over a bowl so that the juice from the sliced orange flows into a common container.
- Add chopped oranges to apples. Sprinkle with sugar. Mix the ingredients.
- Leave the fruit with sugar for several hours so that they release their juice.
- After the time has passed, place the fruit mixture on the stove and turn on the lowest temperature. Bring to a boil over low heat and simmer for 10 minutes.
- Remove the container from the heat and set aside the mixture to cool and drink the juice for 2 hours.
- Then return the fruit mass to the oven. Cook for at least 40 minutes on low temperature. The mixture should become golden brown. To avoid jam burning, it should be stirred frequently with a wooden spoon.
- Cool the delicacy. And in this state, decompose into sterilized 0.5-liter cylinders. Roll up the lids. If you do not plan to store the jam for a long time, you can cover the jars with plastic lids and put the sweet mass in the refrigerator.
Apple pie, step by step recipe with photos
Recommendations for caring for dishes
After preparing berry or fruit jam, the pan must be thoroughly washed. But since structures made from different materials are used for cooking, the rules for care also vary. We have put together some general recommendations that are suitable for any type of kitchen utensil.
- Use cleaning products that contain acid or alkali less often. Ideally, it is better to completely eliminate their use.
- Do not wash dishes in the dishwasher as they may be seriously damaged and deformed.
- Wipe items dry.
- Do not use hard metal scrapers. They provoke the occurrence of microcracks.
- Powder compositions are not recommended for use when cleaning kitchen utensils.
To wash metal utensils that are unstable to sudden temperature changes, it is recommended to first cool the structure. Then gradually pour in water, increasing its temperature. This way it will be easy to remove the remaining sugar and syrup from the walls of the cauldron or basin.
What to look for when choosing containers for jam
Several important parameters will help you make a choice.
Type of jam
First of all, you need to decide whether the jam will take five minutes to cook or jam, which requires longer cooking .
Important! Almost any utensil is suitable for five minutes, but complex recipes require special ones.
Slab type
Much depends on the type of stove.
Form
Pan or basin? It all depends on the quantity
and type of fruit.
If you need to make a couple of liters of jam, of course, it is more convenient to use a saucepan . But if a larger volume , then it is better to take basin , but it is more suitable for fragile berries that wrinkle easily, for example, cherries or strawberries.
Important! For cooking, it is not recommended to use dishes with uneven, shaped walls. The walls should be flush with the bottom and lid. Otherwise, the sugar may not disperse or the workpiece will burn.