Apples are the most popular fruit that is dried.
Dear readers! For you, we have created communities on social networks in which useful articles and interesting ideas are published several times a day! Subscribe and receive useful content in a convenient format!
In dried form, apples are used in cooking to prepare the filling of pies, dried fruit compotes, etc.
The process of drying these fruits itself is not too complicated. But the apples must be properly prepared for the procedure.
In today's article we will talk about how to properly prepare fruits for drying, and how to carry out the procedure itself correctly.
What apples and apple varieties are suitable for drying
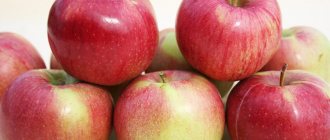
In general, any variety of apples can be dried. But medium-sized fruits are most suitable for the procedure. You can take big ones too.
Specimens with thin skin and a small seed pod dry well. In addition, there will be less waste from them.
If we talk about varieties, then in principle you can choose any one. But more often they give preference to those that have a pronounced sourness. And when dried, such apples retain their taste characteristics.
ON A NOTE.
But sweet varieties become mostly bland after drying.
The best variety for such processing is Antonovka. Pepin, Slavyanka, Anis and Aport are also quite good.
How to prepare apples for drying at home
So, you have collected the fruits. Now we need to sort. We set aside suitable specimens, and send the rest for processing or cooking.
Now the selected fruits must be prepared for drying.
The first rule is don’t try to process all the fruit at once. Everyone knows that apple pulp quickly oxidizes in the fresh air. Divide into portions and process the harvest in parts.
Wash the fruit and dry with a towel. Wet fruits will take much longer to dry.
IDEA!
To prevent apples from darkening, use a saline solution (10 grams of salt for every liter of water). This treatment will allow the apples to retain their light color and protect them from midges. You need to soak for no more than 4 minutes. Then the water is drained.
Next you need to remove the core. If you do not have a special tool, then cut the fruit into several parts and remove the core from each segment.
Also cut with a sharp knife
If you are drying store-bought fruits, it is better to peel off the peels, as nitrates may accumulate in them. There is no need to clean specimens from your garden.
Now cut the slices no thicker than 5 mm.
Also, before placing them for drying, apples can be soaked in an aqueous solution of sulfurous acid (1 gram of the drug for every liter of water). This soaking should take no more than 3 minutes.
Preparing apples for drying
A device that combines the functions of a slicer and a core extractor is an ideal tool for preparing apples for drying.
Preliminary preparation for drying includes several stages of fruit processing. They are necessary to prevent the decomposition of nutrients in apples, as well as to optimize the process of drying them for the winter.
You should not process the entire volume of available apples at once, since they quickly oxidize in air and begin to turn brown. To avoid this, apples are dried in portions, no more than 2-3 kg of raw materials (half a bucket) at a time.
The following preprocessing stages are discussed in more detail:
- The fruits need to be washed and dried, removing as much moisture as possible from them.
- Apples are cored using a special device. If it is not there, the apples are simply cut into two parts and the core is cut out with a knife. If the dried fruit will be used only for preparing compote, it does not need to be removed at all.
- To maintain the maximum concentration of nutrients, it is not recommended to remove the peel of fruits (especially those grown independently). This procedure is only necessary for store-bought apples whose origin is unknown.
- Slicing apples is done with a thin knife or a special device (slicer). The thickness of the slices should be no more than 5 mm
- After slicing, apples must be treated with a clarifier, which will preserve their appearance and prevent insects from becoming too interested in them. To do this, use a 1% solution of salt in water. The apple slices are kept in it for about 4 minutes.
How to dry apples correctly, what you can and cannot do
Prepared and chopped fruits are laid out in 1 layer.
If you dry outside the home, you can use trays, baking sheets, nets, pieces of cloth, etc.
If you use an oven for drying, it is better to cover the baking sheet with parchment paper. You can use foil, but be careful and careful, the apple slices can burn on it.
Ideally use a mesh or lattice.
Drying fruit should not be allowed to come into contact with rain or any other water.
Do not use polymeric materials: cellophane, plastic.
How to Air Dry Apples
The simplest way to carry out the procedure is to air dry the fruit. It's very easy to do.
Arrange the slices in one layer. Ideally, the slices should not touch each other. Apples need to be turned daily, or better yet twice a day. It’s inconvenient, but this way the fruit is guaranteed to dry evenly.
It is also very important that the weather is hot. If there is a danger of rain, the workpieces must be brought under a canopy.
On average, such drying will take about 4-8 days. It all depends on the air temperature and the number of sunny days.
IDEA!
To prevent midges from landing on apple slices, cover them with gauze or a light cloth.
How to use an electric dryer
If you have a special electric dryer, it is better to use it.
The advantages of the device are obvious:
- Apple slices will not get wet, midges will not sit on them;
- the fruits will dry evenly;
- there will be no burnt or raw copies.
Everything is simple here. We put the fruit on the grid, set the parameters on the dashboard and turn on the device.
How long to dry apples in an electric dryer
An electric dryer saves your time significantly. Drying with this device will take approximately 2 hours.
The exact time is indicated in the instructions for the electric dryer.
How to dry apples in the oven
If you don’t have an electric dryer, and you don’t want to waste time on regular drying, then you can use a gas or electric oven.
Place the slices on a baking sheet or mesh (if you have one). No need to do more than one layer. Even apples folded in 2 layers will not dry properly.
Turn on the oven, but do not close the door tightly. Leave a gap of a couple of centimeters.
The entire procedure will take about 7 hours. Periodically, the slices need to be stirred so that they dry evenly.
At what temperature should you dry apples?
When using an oven, it is important to set the temperature correctly. Too high values are not needed. In this case, the apples will simply get baked.
Most of the time you need to maintain the temperature at 70-75 degrees. In the last hour and a half, you can turn down the heat and lower the temperature to 50-55 degrees.
Useful secrets and recipes for delicious delicacies made from dried apples
If the microwave drying method does not suit you, and you do not have enough time to monitor the process when cooking in the oven, there are some useful tips on how to speed up the cooking time so that the fruits do not lose their properties. Wash the fruits well, then cut them into slices and put them in boiling water for a few minutes, then cook them for 10 minutes over low heat. Next, remove the slices and immediately cool them under running cold water. Once the apples have cooled, place them in the oven on a baking sheet or wire rack, following the above sequence. With this approach, the drying time will be reduced to approximately 3-4 hours.
Another method involves using steam. Keep the sliced fruit under the intense steam of boiling water using a special strainer or colander. Then also cool them with cold water and put them in the oven. This method is best suited when the fruit is cut into circles rather than slices.
And finally, we will describe several delicious and healthy “grandmother’s” recipes, where the main ingredient is dried apples. Wash a kilogram of juicy fruits, peel the center, cut them into neat circles and place them in a bowl or other container. At the same time, pour 200-300 grams of granulated sugar into a saucepan with water. Boil the water for a few minutes until the sugar turns into syrup and pour it into a bowl of fruit. Let it brew for several hours, and then send the resulting “rings” to dry. The end result will be very tasty and ready-made sugar circles, which will be an excellent dessert in the cold winter.
Dried apples can also be an excellent substitute for sweets, marmalade or regular jam. In addition to juicy fruits, you will also need cinnamon, citric acid and granulated sugar. Place the washed and cut slices on a baking sheet with parchment paper. Then, in a separate container, thoroughly mix the cinnamon, granulated sugar and citric acid. Sprinkle the resulting mixture evenly over the fruit slices and place them in the oven or dryer in a new form. After several hours of baking, remove the dessert from the oven and leave it to dry naturally for a couple of days. Then pack the slices into jars or bags, and your delicious winter treat is ready!
There are many other useful recipes, as well as all sorts of ways to dry such a wonderful and tasty fruit like an apple. But even without additional seasonings, apples dried naturally or traditionally are healthy, tasty and inexpensive!
How to use a microwave to dry apples
An even more democratic way is to use a microwave oven.
Take a plate and place the chopped fruit pieces on it. Place in the microwave and set the timer for a minute. Power should be approximately 90% of maximum.
Turn on the microwave. After the specified time, take out the apples, turn them over and put them back for 3 minutes and at full power.
If this is your first time drying apples in this way, set the timer for a minute and check the readiness of the fruit each time.
ON A NOTE.
The disadvantage of this method is that it is necessary to constantly monitor the condition of the fruit so as not to dry them out.
Also, apples dried in the microwave are very slightly different in taste from fruits dried in the open air or in the oven. It's all about the physics of the drying process itself.
Methods
There are several ways to dry apples, and each housewife chooses the most convenient one for herself.
On open air
Drying apples in the sun is the easiest way to stock up on dried fruits for the winter. It is especially popular among residents of the southern regions, where there is always a hot summer turning into a warm autumn.
This method is more suitable for summer varieties that are harvested before autumn and have time to wither while there are still enough sunny days and no heavy rains. The advantages of drying apples in the sun are the unlimited space and the fact that the entire crop is dried at once.
Technology includes:
- preliminary cutting of apples into slices or circles;
- laying fruit on baking sheets, plywood sheets, mesh, grates and other flat surfaces;
- Turn the slices daily to prevent them from rotting.
Apples can be dried in the sun
You can dry sliced apples in the open air, strung on strings and hanging so that they do not come into contact with anything. Such a homemade device requires compliance with one condition - protecting the crop from insects. For these purposes, the fruit is covered with gauze.
When drying the apple crop in the open air, moisture should not come into contact with it. If all conditions are met, dried fruits will be ready in 3-4 days in bright sun and 7-8 days in the shade.
In the oven
Most housewives prefer to dry fruits in an electric oven, laying the fruits cut into thin slices in an even layer on a wire rack or baking sheet lined with parchment. The required temperature is 70-75 °. During cooking, the oven door is opened slightly, leaving a small gap for air circulation.
It takes about 7 hours for complete readiness. Moreover, in 5 hours, a large proportion of the moisture from the fruit evaporates. A couple of hours before the end of drying, the temperature is reduced to 50 °. From time to time it is necessary to turn the dried fruits so that they do not burn.
After turning off the oven, it is better to leave dried fruits in it for another 2-3 hours.
In an electric dryer
An electric dryer is a special device that allows you to quickly and effectively dry fruits in your apartment without expending any effort. To put in the dryer, apples are cut up to 5 mm thick, laid out in an even layer and set to the desired temperature.
Depending on the model and country of production, the electric drying process takes from 2 to 7 hours. This method has a number of advantages: the fruits do not burn, they do not need to be turned over, they are not damaged by insects, and they retain their original shape.
Device models
Every housewife selects an electric dryer taking into account the purpose of use. Many models are designed for drying different products. But there are also those that can be used only for one of their types.
The most popular models:
- "Self-assembly." A universal electric dryer of the simplest configuration is designed for drying fruits, fish, mushrooms, berries, root vegetables, bread and medicinal herbs. The operating principle is based on infrared radiation, the surface is heated to a depth of up to 4 cm. The size of 0.5×0.5 m allows you to process up to 2 kg of products;
- "Sukhovei". A universal-purpose electric dryer allows you to dry various products by blowing warm air, the effect of which is enhanced by a rotating fan. A tubular electric heater provides thermal radiation that absorbs moisture from products, and uniform drying at low temperatures from 30 to 70 ° preserves all vitamins. Depending on the configuration, the device makes it possible to prepare up to 3-4 kg of food;
- "Hello." The electric dryer is used not only for vegetables and fruits, meat and fish, but also for heating rooms. The operating principle is based on the operation of a heating element and a fan to pump hot air. Up to 3-4 kg of food can be dried on 4 pallets;
- "Breeze". Universal electric dryer for different products with air heater and fan. Has up to 5 pallets with a total volume of up to 30 l;
- "Rotor". Household equipment allows you not only to dry food, but also to heat the room. Depending on the configuration, it has 3-5 grilles.
On the air fryer
Instead of an electric dryer, some housewives use a convection oven, reducing the cooking process to 2 hours. The heating temperature is 100 °. You need to place the apple slices at a distance from each other, because... Due to their contact, the cooking process will take longer.
Microwave
You can speed up the process of harvesting fruits if you use a microwave: it takes less time, and the result is no less high-quality. In this quick DIY method for making dried apple chips, the most important thing is the right power and time. It is better to dry fruits in the microwave in 2 stages
- First, the fruits are cut and placed on a plate in one layer, setting the timer for 30-40 seconds. at a power of 250 W;
- then turn the pieces over, set the timer for 3 minutes, and set the power to 300 W.
Only ripe fruits can be dried
Usually this time is enough for the fruits to dry, but if they are not ready, they are dried for 0.5 minutes.
In a slow cooker
For quick drying of apples at home in an apartment, a multicooker in the “Baking” mode is suitable. Cooking time – 25 minutes. Cut the fruits into pieces.
How to dry apples on a string
An interesting way is thread drying.
Apple slices are strung on twine and hung to dry. This method is very similar to drying mushrooms.
The apples will dry in about a week.
To protect the product from insects, cover it with gauze.
By the way, you can use a thread to dry apples over a regular gas burner. But you need to hang the fruit higher so that the thread does not catch fire.
On average, this drying will take about 2 hours. But the method requires constant presence and certain experience. After all, you need to choose the right strength of fire, the height of the apples, etc.
How to dry at home
If the weather outside does not allow you to take the fruit out into the sun, you can dry the apples at home.
You will need some space where the apples will be laid out.
The disadvantages of this method are the very slow drying speed and the constant appearance of many midges.
In addition, this method is suitable for residents of private houses, who can lay out apple preparations on the veranda.
If you live in an apartment and want to get dried fruits, then use an oven, electric dryer or microwave.
Apples are darkening, what to do?
One of the reasons why fruits may darken was mentioned above. It depends on the variety, pre-treatment method and the degree of acid in the fruit. But another type of darkening also occurs - when the product is damaged by insects or spoiled.
We suggest you familiarize yourself with How to stretch a sweater that has shrunk after washing: how to return the previous size of a shrunken woolen item, what to do to prevent the product from shrinking?
Food moths may appear in the crop. Therefore, it is better not to store dried fruits in fabric bags or plastic bags, but to use glass, ceramic or plastic containers.
Polyethylene does not allow air to pass through, which is why the apple begins to rot and rot.
From time to time, stored products must be inspected for damage. Ideal home conditions for drying: warm and dry. But it is better to avoid high air humidity in the apartment if the goal is to dry it without subsequently throwing it in the trash.
How to dry outside
Taking trays (nets, bags, etc.) with apples outside and leaving them to dry there is the easiest way to get ready-made dried fruits.
By and large, this method is available only to residents of the hottest regions of our country. That is, those places where it is sunny for at least a week.
If it rains often in your region, then this method will not suit you.
To dry apples outside, take a baking sheet, tray or mesh and place the apple slices on them in 1 layer.
To protect against flies and midges, cover with 1-2 layers of gauze.
Place the trays in the sunniest spot that receives the most light during the day.
If there is a danger of dew falling, then trays of dried fruits should be brought indoors at night.
Outside, apples will dry in a week or a week and a half. All this time they need to be turned over regularly to dry evenly.
How to keep apples looking attractive
To prevent an apple from turning dark when cut, there are many harmless ways that do not impair the taste:
- Vitamin C neutralizes the interaction of oxygen with enzymes. There is a lot of it in citrus fruits - just grease the cut of an apple with the juice of an orange, grapefruit or lemon. It is possible to impart a fruity taste, a slight sourness.
- Dip the cut fruit in a solution of citric acid for 5-6 minutes.
- Place apple slices in sugar syrup - the taste will become sweeter, darkening will not occur.
- Sprinkle the cuts with sweet soda - the citric acid and sugar present there will prevent darkening.
- If you cut an apple, remove the core, fold it back, tie it tightly (for example with a rubber band) and place it in a tightly closed plastic bag, ensuring that the air comes out of it, the apples will be stored for a long time, without darkening.
We found out why an apple turns dark when cut - and if this happens, can you eat it?! Of course yes, the beneficial properties have not disappeared anywhere, the only thing is the visual effect. If the unappetizing appearance is repulsive, you can cut off a thin layer!
How to dry apples for dried fruits
Many people love dried fruit compote. It is best to use the varieties Zorka, Kisilevka, Vinnovka yellow and zhr for weaving processing.
The drying process itself is still the same. Apples are dried on the street or at home using household appliances. But there is one important nuance.
When preparing dried fruits, the core is not removed. That is, when preparing fruits, you just need to wash them, dry them, and cut them into thin slices.
Next, you choose the drying method that is more convenient for you: in the sun, in the oven, microwave, etc.
Storage conditions and rules are also no different.
Variety selection
Before you figure out exactly how to dry apples at home, you need to find out which varieties are considered the most suitable.
- These should be medium or large sized fruits. It is better if the skin is thin and the seed box is not too large. This will guarantee a minimum amount of waste when preparing fruits, which in the future will be cut into thin slices or circles.
- All sources write that sour varieties or sour ones with a little sweetness are dried as efficiently as possible for the winter.
According to the experience of housewives, it is best to dry fruits like Aport, Antonovka, Simirinko. Such apples can be used for compote, and for sweet pastries, and for other purposes.
How to dry in an air fryer
You can also make dried fruits using an air fryer. It's quite simple.
Slice the apples and remove the core. Carefully place the resulting slices on the air fryer grill so that they do not touch each other. This will significantly speed up the drying process.
Next, set the temperature to 80 degrees and the timer for 4 hours.
After the specified time, we take the dried fruits out of the air fryer and put them in bags or paper bags for storage.
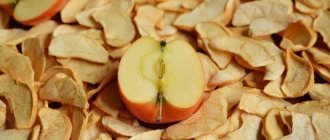
How to determine whether apples are dry or not
Before storing dried fruits, you need to determine whether the apples are dry or whether they still need to dry.
Look carefully at the slices. The skin should become darker. The pulp does not stick to your hands, does not flow, but remains elastic. It should also be soft.
If a slice breaks when bent, then it is overdried.
The color of the pulp itself may vary slightly. There are varieties that become greenish-cream after drying. There are varieties that become dark brown in color.
ON A NOTE.
Typically, a brown color means the apple slices are too dry. Such specimens contain fewer vitamins and nutrients.
Basic rules for preparing dried apples
Don't try to prepare a large number of apples at once. We recommend drying it in parts and also recycling it. The cut quickly darkens and loses its attractive appearance. Therefore, use 2-3 kilograms at a time. After laying out, proceed to the next portion.
Preparation instructions:
- We rinse. It is advisable to remove external contamination. Immediately wipe with a napkin.
- Let's cut it. The shape of the slices is at your discretion. You can first remove the stub with a special device, then make circles. Or immediately chop into slices. The slices look interesting. The thickness should not exceed 0.5 cm.
- Salt treatment. This is an optional step, but allows you to dry the apples without losing color. The prepared slices are immersed in a solution of 5 liters of water and 50 g of salt for 2-4 minutes.
- Soaking in a solution of sulfurous acid. The second way to keep the color light. For soaking, use 5 g of acid per 5 liters of water.
The disadvantage of processing in sulfurous acid is that the finished product will have to be thoroughly washed before use. The substance may also cause individual intolerance. Children are especially susceptible to reactions. Sometimes, to protect the color, the apple stock is simply sprinkled with lemon juice.
Clean or leave? The peel does not give rest. We recommend leaving the skin on. It dries quickly and contains a huge amount of useful substances. It is under it that pectin, important for the human body, is located.
Dried apple slices
How to store dried apples
Next, we’ll talk about the conditions and methods of storing dried fruits.
On an industrial scale, dried fruits are stored in standard 50-liter bags.
You can also use them at home if you have a lot of finished product.
Before sending dried fruits for storage, they are inspected and sorted again in order to set aside those specimens that still need to be dried.
First, for 10-15 days, all the apples are poured into one common “bag” (you can use a pillowcase). During this time, the dried fruits will become the same moisture level.
Then they are laid out in portions in fabric bags.
It is also allowed to place dried fruits in paper bags or cardboard boxes.
But plastic containers, plastic bags, etc. are not at all suitable for storing dried apples.
The storage place should be cool, with constant air circulation. It should also be dark.
How long to store dried apples
When dried, the fruit can be stored for quite a long time.
If all storage conditions are met, then dried apple fruits can be stored for several years.
But experienced housewives know that the optimal shelf life is 1 year.
Please note that rot may occur when stored in plastic bags.
Apples from the oven - an overview of the traditional cooking method
Drying apples in the oven is a slow process and requires some patience and preparation. You can dry fruits either in an electric oven or on a gas stove, but the first option is still more preferable, especially if the stove is equipped with an additional convection function. In addition, some models of gas stoves do not have additional temperature adjustment, which makes it difficult to control the process of uniform heating.
Regardless of the type of oven, carry out drying in compliance with the following rules:
- Preheat the oven to 60-70 degrees at the lowest possible temperature;
- prepare a baking tray with food paper or a wire rack; carefully place the slices on them in one, maximum two layers;
- put the baking sheet or wire rack in the oven and cook for at least 6-7 hours, gradually increasing the temperature in the oven to 90-100 degrees;
- if the stove is not equipped with additional ventilation, open the oven lid, this is necessary for normal evaporation of moisture;
- Shake the slices periodically, every hour, stirring them for more even drying.
Too high a cooking temperature or too much heat will quickly turn the juicy slices into small, tasteless coals. After the cooking time has passed, check the readiness of the dried fruits. The slices should be elastic, not break when bent, not release moisture or juice, and they should retain their flavor.
The resulting storehouse of vitamins must be stored in a dry place, protected from light, in glass jars, the bottom of which is previously covered with paper. You can also use food grade paper bags or special linen bags.
Common mistakes
- Apples are poorly prepared for drying. Here we can mention both insufficiently thorough washing of the fruit and the leaving of the core.
- The fruit is cut into slices that are too large. The optimal thickness is 5-7 mm. Thicker pieces will take much longer to dry. In addition, there is a risk that the middle of the workpiece will remain completely raw.
- The apples are drying out. Inexperienced gardeners believe that dried fruit should have dark flesh and be brittle. But that's not true. Ideal drying, when the slice has light flesh, retains its elasticity, but does not release juice and does not stick to your hands.
- Undried slices are stored for storage. An under-dried product is the source of all sorts of problems when storing dried fruits. Sooner or later it will begin to rot and ruin the entire batch of dried apples.
- Storage in plastic bags or plastic containers. To prevent dried fruits from spoiling, they must be stored in a dry, dark, cool place. Storage containers should be wooden, paper, canvas or glass. Storage in plastic or cellophane bags is unacceptable. The product will spoil. You can put some of the dried fruits into bags if you plan to use them in the near future, but such materials cannot be used for long-term storage.
- Apples are dried in several layers. The fruit will dry unevenly. There will be specimens that are well dried and those that will stick to your hands and release juice.
How to know when dried fruits are ready
It is not difficult to determine the readiness of the particles even visually - the skin darkens. It is better not to pay attention to the pulp; it may take on a different shade. You can press the dried part with your finger, if after pressing hard it does not spread, the dried fruit is ready.
See also
Description of the Eliza apple tree variety and its advantages, productivity and growing regionsRead
It should be remembered that too dark particles usually indicate overdrying. It is recommended to use them first; during storage they can lose their taste.
Answers to frequently asked questions
As a small FAQ, we will look at some of the most exciting topics about drying apples.
What to do if apples get caught in the rain outside
Fruits are often dried outside. No one is immune from the fact that it will rain unexpectedly and get the food wet. What to do next?
In general, soaked dried fruits can be dried. Of course, if they haven't started to rot.
But there is a point here. The environmental situation now leaves much to be desired. Therefore, along with rain, slags, toxins, and chemical processing waste fall out.
If you are not afraid of this, you can dry apples that have been caught in the rain.
If you care about your health, then it is better to throw out such dried fruits and start preparing a new batch of product.
Is it possible to dry unripe apples?
Unripe apples can be dried. Of course, if they are not completely green. Dried green fruits can be used to make compotes, but it is better together with other fruits, as unripe apples will sour.
What is the yield of dried apples
One of the most pressing questions regarding the procedure is the overall yield of apples.
Of course, the volume and weight of the fruit will be significantly reduced. After all, apples are a very juicy fruit with a high liquid content. During the drying process, fruits lose about 75-80% of their weight.
On average, it is believed that 1 kg of fresh fruit produces 130 grams of dried fruit.