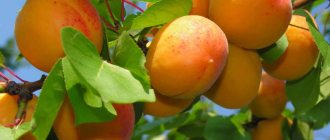
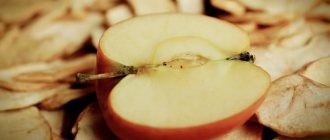
Dried fruits are not just store-bought raisins with dried apricots and prunes. There are actually a huge number of species. It is not necessary to consider overseas delicacies. Our dried apples, pears, peaches, and melons contain no less valuable substances, also delight in taste and benefit health.
Let's figure out how to dry fruits in the oven. At the same time, we’ll look at a couple of other methods and learn how to properly prepare, process, and store crops.
How to prepare fruits and berries for drying
It is recommended to dry ripe, but not overripe fruits. High juice content slows down the process. In the oven, the fruits stick to the baking sheet, flow, and stick. The surface of overly sweet foods becomes covered with a sticky coating. Green specimens do not have a pronounced taste or aroma. It is necessary to choose a golden mean.
Features of preparation:
- rinse. It is better to dry clean products in the oven. It is important not to soak it. Excess moisture negatively affects the quality of the workpiece;
- remove the bones. It is allowed to dry some fruits along with them. Only the process takes longer, the product is more difficult to use, and it is stored worse;
- cut. The berries can be dried whole. It is more convenient to divide most fruits into halves or quarters. It is better to prepare small pieces in the oven - slices, plates.
Do you know how to dry fruits and berries in the oven?
Not really
Below we will consider in detail how to dry different fruits. Initial quality is of great importance. Do not dry limp apples, broken and crushed apricots, or wormy cherries. But it is allowed to trim off the damaged areas. A tasteless, astringent pear will not improve after drying. Is it worth wasting time making useless, unclaimed preparations?
You can dry various fruits and berries in the oven; preliminary preparation is required. The optimal temperature is 50-70 degrees. It is recommended to store fruits in a dry, cool place.
How to prepare fruits for drying
Before drying apples in an electric or gas oven, you need to select and prepare the fruits correctly. To do this, you need to follow a few simple recommendations:
- For harvesting, look for apples of winter, sour or sweet and sour varieties with dense pulp and without a tart taste. Sweet fruits are not suitable for drying, as they ultimately lose their taste and become tasteless. Excellent for drying varieties:
- "Anise";
- "Antonovka";
- "Papering";
- "Aport";
- "Pepin saffron"
- Before drying, be sure to sort out the fruits. Damaged ones should be trimmed away from rotten areas.
- Rinse the fruit under running water and dry it, scattering it on a towel.
- Peel the apples from the peel, “tail” and seed box. Apples of summer varieties can be used for drying along with the peel.
- To avoid darkening of the fruits, they should be placed in water slightly acidified with vinegar, lemon juice or lemon juice.
- Some chefs suggest blanching the fruits before drying. To do this, transfer the prepared fruits into a colander. In parallel, prepare two pans of water: boil the liquid in one pan, and cool it with pieces of ice in the other. Dip the colander with the fruit first into boiling water for 2-3 minutes, and then into the ice solution. Dry the apples naturally. At the end of the process, the apples become softer, do not lose their shape when dried, and the drying process itself will be halved.
- The last step is to cut the fruits into circles, slices or thin slices.
How to properly dry fruit in the oven
It is better to dry any food in electric convection ovens. Fanning speeds up the process, heating occurs on at least two sides. Gas ovens only distribute heat from below. As a result, pieces of fruit stick and require constant turning.
Step-by-step instruction:
- Place the fruit pieces on a baking sheet. It's better to use a wire rack. If the product actively releases juice, it is allowed to place a baking sheet.
- Turn on the oven to 70 degrees, open it slightly, and start drying.
- We'll check in a couple of hours. If the surface of the fruit has dried, reduce the temperature to 50-60 degrees. It is advisable to turn the pieces on the baking sheet to the other side.
- Continue drying until ready. Dried fruits remain soft and spring back when pressed. Dried analogs are tougher, but also retain elasticity.
When arranging pears, peaches, and apricots, try to first place them cut side up and skin side down. Then nothing will stick to the sheets.
How to dry berries in the oven
Drying various berries in the oven raises no less questions. The technology is a little different. It is important to pre-sort. Do not pour small and large specimens onto one baking sheet.
We lay them out separately or make a partition on the sheets. Otherwise, the large berries will remain wet and the small ones will dry out. Varietal strawberries are often cut in half or quarters. Sometimes cherries are disassembled into two parts. Other types, for example, strawberries are planted whole.
Step-by-step instructions for oven drying:
- Place the berries on baking sheets lined with baking paper.
- First, turn the oven temperature to 40 degrees. Let's start drying.
- After 3 hours, increase to 60 degrees.
- After an hour, increase the temperature in the oven by another 10 degrees.
- Next, we continue to dry at 70 degrees until ready. Do not close the oven tightly, steam should escape.
We are often asked how to dry frozen berries. In fact, this is not the best raw material for dehydration. It has already lost some of its useful substances and has been subjected to heat treatment.
If defrosted incorrectly, the product loses its taste and aroma. Plus, plant fibers soften significantly and sugars are lost. If you need to dry it, we recommend squeezing the excess moisture out of the food after thawing, then follow the general instructions.
We recommend boiling sour, tasteless or defrosted berries and fruits in sugar syrup and only then putting them in the oven. The result will be something like candied fruit. It can be crushed, the output will be marshmallow.
Dried fruit bars at home
Nutrition bars
If you love sweets, but are watching your figure, or for some other reason you cannot eat chocolate and cakes, or maybe you just lead a healthy lifestyle and have little time for snacks at work, homemade dried fruit bars are yours the rescue. They don't take much time to prepare, and you don't have to waste time going to the store to find a healthy snack that suits your needs. The preparation technology for bars with any dried fruit is the same, so don’t be afraid to experiment.
Bar with raisins and dried apricots
The ingredients for such a bar don't cost much, and they're not hard to find. For 10 bars you will need: 100 g. raisins, 200 gr. dried apricots, 50 gr. ginger and 50 gr. rice cereal. You can use nuts instead - to your taste.
Place all ingredients in a food processor.
You can also use a blender or, as a last resort, a meat grinder. Mix the dried fruits and nuts until they become mushy and have a uniform consistency.
Distribute the mixture over a baking sheet.
Place the resulting mass on a baking sheet and place a press on top so that it is leveled and approximately 1.5-2 cm thick. Leave it for several hours for the mass to set. If it fits, you can put it in the refrigerator or on the balcony if it’s cold outside. After this, cut the mass into 10 bars of equal size and shape. They can be stored for up to several weeks in a food container or in the refrigerator, and you can treat yourself to healthy and nutritious snacks at work or school.
Drying berries and fruits in an electric dryer or dehydrator
The option of drying various fruits in the oven does not suit all housewives. It is necessary to constantly monitor the temperature and turn it over. The oven cannot be left on. It is much more convenient to dry the workpieces in special devices. They make the task much easier. Let's look at the electric dryer first.
Step-by-step instruction:
- We place the prepared products in the electric dryer. Distribute evenly on trays.
- Turn on the device to medium mode, about 50-55 °C.
- Let's start drying. You can forget about fruit for 7-8 hours. Next, move the lower trays to the top.
Drying time can take a day, sometimes even more. Thin apple and pear chips and ingredients with low moisture content are quickly prepared. Juicy, fleshy fruits, especially large ones, require much more time. To speed up the process, we recommend increasing the temperature to 70 degrees for a couple of hours.
Drying berries and fruits in the oven
Cooking in a dehydrator is not much different. The advantage of the device is the ability to set the exact temperature down to a degree. There will be no overheating. Horizontal models have a built-in fan on the back wall, which ensures uniform airflow. There is no need to swap trays.
You can dry fruits in the microwave, on the stove; there are recipes for a slow cooker. The main disadvantage of these methods is that it is difficult to regulate the temperature; the ingredients are easy to overheat, fry or bake.
Simple, but not fast
As for the solar-air method, there is nothing complicated in the process. You need to select high-quality fruits and berries. Chop everything. It is advisable to string it on strings.
Or lay it out on plywood sheets. Place the blanks in a sunny place.
Verandas, balconies, and roofs are good for this. Typically, fruits and berries that have been dried in this way are of excellent quality and unsurpassed taste.
But you will have to wait a long time for the finished product. Before three days, fruits and berries will not dry out. Sometimes the drying process can take half a month.
And you need to make sure that unfavorable weather conditions do not damage your goodies. As soon as hail or heavy rain is expected, the preparations must be hidden from the tricks of the elements.
How to properly dry fruits and berries in the sun
Progress is sweeping the planet. Only people never cease to be interested in how to properly dry fruits at home in the sun. It is still considered to be one of the most useful, simple methods. It does have its advantages. Just no less shortcomings.
Pros of sun drying:
- cheapness;
- simplicity;
- fruits taste better.
Minuses:
- dust gets in;
- insects land;
- weather dependence;
- constant monitoring is required.
A random cloud or even the lightest rain will instantly ruin the workpiece. Therefore, many people prefer to dry in electric dryers and ovens. Natural conditions are more suitable for southern latitudes. The temperature should not fall below 25 degrees. A ventilated place is required. Otherwise, the fruit will become mold faster than lose moisture.
Step-by-step instruction:
- We take grates, sheets of plywood, oven trays, and any other trays. If necessary, spread out the paper. Let's go to the sun.
- Lay out the ingredients prepared for drying. Distribute in one layer. Pieces may touch. Very soon they will become smaller and there will be a lot of free space.
- Let's start drying. We turn it over to the other side every day and check it. In cloudy weather, we bring it indoors and put it under the roof. Do the same if there are cold nights.
Some fruits can be dried by stringing them on a string. The method is suitable for slices of apples, apricots, pears, and plum halves. The advantage is that there is no need to turn it over; just hang the ropes in a ventilated place.
What about special dryers?
There is such a very useful invention on sale as solar dryers. A huge number of gardeners and gardeners use them in everyday life. Dryers allow the sun's rays to pass through perfectly.
And they do everything to prevent dust and dirt from getting on the products. Insects will not get to your berries and fruits.
This type of fire drying is quite reliable. But, again, it takes too much time until the goods are in the proper form. Hot air is generated in ovens and drying cabinets.
At high temperatures, products are dried in several stages. They are laid out on baking sheets or sieves. As a result, it turns out that fruits and berries retain everything useful that they contain. And in dried form they can be stored with proper care for a very long time.