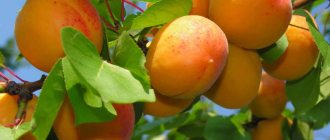
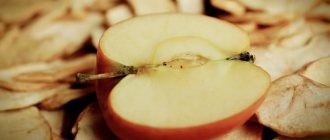
Plum is one of the oldest cultivated plants grown by humans. It grows almost everywhere, except in the Far North. Plants up to 4.5 meters, the fruit depends on the variety. Most often about 5 cm, oval in shape. The pulp is juicy and soft, with a hard bone inside. The fruits can be of different colors - from yellow, white to dark red and purple. The taste qualities are very high - cultivated varieties have a very sweet taste. Wild plum is sour with a tart aftertaste.
Plum can be prepared in the form of jam or aromatic compote or jam. Juice is prepared from fresh fruits and delicious wine is made. Since ancient times, people dried fruits and obtained tasty and healthy prunes.
The benefits of prunes
Dried fruits - raisins, dried apricots, prunes, figs - were a favorite delicacy in winter. They are a source of vitamins and mineral salts. Dried fruits improve immunity and help fight viruses and bacteria.
Prunes are known for their positive effects on the digestive system. After eating, prunes, rich in dietary fiber, remove toxins and cleanse the intestines of old fecal debris.
Prunes are recommended for obesity and cardiovascular disorders. Dried plums, despite their sweet taste, do not increase blood sugar. For this reason, it can be recommended for patients with diabetes. The ability of plums to lower cholesterol levels in the blood has been noted.
There are a large number of antioxidants that bind free radicals. This prevents early aging and the possibility of developing cancer. Plums are good for brain cells and increase learning ability. Prevents the development of Parkinson's or Alzheimer's disease.
Plums are known to improve bone health. This can be very important for people with osteoporosis. The high content of minerals strengthens the skeletal system. Most often, osteoporosis occurs in women over 50 years of age, caused by hormonal imbalance.
Preparing prunes for storage
To ensure that preserved prunes do not lose their taste, they should be properly prepared. First of all, choose the container in which the fruits will be stored. The ideal solution is glass and metal options, as well as paper bags and sacks of natural materials, such as cotton or linen.
In addition, you can use special plastic containers and bags designed for storing food. When using glass jars and metal containers, they must first be washed and disinfected with hot water.
Read also: Pruning plums: timing, tips, features
The place where prunes will be stored should be dry, cool and dark. It is best to choose a place that will be ventilated from time to time.
Prunes should be chosen responsibly and carefully. Choose whole fruits, separating spoiled dried fruits with defects. If prunes are damp, they must be dried, otherwise the service life of the product will be significantly reduced.
Sun-dried prunes cannot be stored in ordinary plastic bags, as the fruits will quickly spoil or become sticky. The shelf life of prunes at home is no more than 12 months, provided that all storage rules have been followed. Dried prunes have the longest shelf life, so if you plan to keep them in this form, it is better to completely dry the fruits first.
Dried options should be purchased to be used immediately for cooking, and not stored for a long time. At home, these fruits can be dried in the oven at a minimum temperature.
It is rare to find completely dried prunes on sale today. The fact is that when dried, it loses its mass, so it is not profitable for sellers to sell it in dry form. Dried prunes can be stored in the refrigerator, strictly observing storage conditions, otherwise they will become unsuitable for further use.
History of prunes
It is believed that prunes were first produced in Egypt. People have noticed that dry plum fruits do not spoil for a long time, are very tasty and nutritious. This was the first fruit that was dried for the winter. Dried fruits have been highly valued at all times. In the East, there is always a cup of raisins, dried apricots and prunes on the table. This is a favorite delicacy of children and adults. It is added to meat dishes and vegetables.
Prunes were brought to Russia in the 17th century from the countries of the East and France. High-quality French prunes were highly valued.
Currently there are no problems with prunes. It can be bought almost everywhere. It is packaged in sachets and can be used immediately. A lot of prunes are harvested in Central Asia. They grow plums on an industrial scale and dry them in the open sun or in special dryers.
To give it a marketable appearance and better preservation from rotting and fungal attack, plum fruits are fumigated with sulfur dioxide. This gives the product a shiny, appetizing look. Plums are better stored. But sulfur dioxide is a rather toxic product for the body. Especially you should not give such prunes to children. It is for this reason that children need to dry plums themselves. Another reason is the high price of prunes on the market. It is better to dry it yourself than to buy a low-quality product at an expensive price.
Cooking process:
Prepare the plum: wash, separate the pit, cut into 2 halves.
Line a baking tray with baking paper. Place the plum halves tightly on a sheet. Usually fits 1 kg. Place garlic slices on each half. You can lightly sprinkle with coarse salt.
Sprinkle with chopped dry herbs.
Sprinkle with vegetable oil.
Preheat the oven to 100 degrees. Place the plums in the oven. The oven must remain half-open to allow the liquid to evaporate. I place a matchbox between the door and the oven. Make sure that the temperature does not rise above 100 degrees. A large plum is dried for about 3 hours.
Keep an eye on it towards the end so as not to dry it out. The finished product resembles a soft prune.
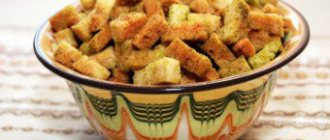
Place the plums on a plate if you are preparing a seasonal appetizer. Refrigerate. Serve with meat dishes as a side dish or serve as an appetizer for an aperitif.
If you plan to prepare spiced dried plums for the winter, place tightly in a sterile jar, add oil and roll up.
From 1 kg of plums comes a half-liter jar of the product. Store the cream in the refrigerator. After 1-2 months, the plum will infuse and become tastier and more oily.
Then use the butter from the can of cream as you would any flavored butter. It can be added to vegetable salads, seasoned with hot boiled potatoes, or greased with black bread bruschetta. Your loved ones will like dried plums and will diversify your usual diet.
Most often, varieties used for drying are Hungarian, cherry plum, Renklod and Kyustendil plums, but other varieties of plums can also be used.
Small fruits are dried whole, large ones are cut in half and pitted to speed up the process.
Regardless of the drying method, the plums are first sorted, selecting only strong, ripe fruits without damage.
Prepared fruits can be dried in the oven, electric dryer or in the sun.
Methods for harvesting plums at home
There are several ways to dry plums at home. You need to choose the most convenient one. There are certain rules that must be followed when performing this procedure.
How to prepare plums
Before you begin the drying process, you need to prepare the fruits.
It is known that not all plums are suitable for drying. You need to choose only the variety that is best suited. Sorting plums is an important process on which the entire result will depend. Too juicy and watery varieties are not suitable; it is better to make jam from them or use them for food.
It is necessary to select only good, ripe fruits. Do not use rotten or damaged plums. It is not recommended to dry too ripe ones. Unripe plums will be sour and hard when dried.
Plums affected by disease should be thrown away immediately and not trimmed. Fungi are known to attack the entire fruit at once, although there may be no obvious signs. By cutting off only the affected part, you expose yourself to the risk of eating infected fruit. If you don’t like something, it’s better to throw it away immediately.
The best option is to collect a fresh harvest of plums directly from the tree. On a sunny, clear day, you need to collect the required amount of fruit directly from the tree. No need to shake it to the ground. The fruits are very delicate and will immediately bruise when falling from the tree. Such plums can only be used for jam or preserves. Plums must be picked carefully so as not to crush the fruits.
The sorted plums are washed under running clean, drinking water, trying to remove all dirt and dust.
The second stage is removing the seeds. Using a sharp knife, cut the fruit lengthwise and carefully remove the seed. It is best to dry plums in halves. But the seed can be removed through the stalk without cutting the fruit. The result is prunes with the structure of the fruit preserved. This is a convenient method that allows you to dry it in the sun. The prunes turn out clean, nothing gets inside.
Small fruits are dried by removing the pit through the stalk. Large plums are usually cut into halves. This speeds up the drying process of the fruit.
Storage methods
You can preserve dried berries in various ways. They are stored in the apartment, refrigerator, freezer.
See also
How to prune plum trees correctly, timing and features
Read
In the apartment
In an apartment, prunes can be stored on a shelf in a closet. If the volume of dried product is large and it simply does not fit on a shelf or in the refrigerator, then it can be strung on a thread in the form of “beads” and hung in the pantry or cellar. In the room you need to place several plates or containers with salt, which will serve as protection against mold and excess moisture.
In a refrigerator
Storing in the refrigerator is one of the best options. Plum does not absorb the smells of other products, but the smell of plums is absorbed by bread, cheese, and dairy products. To prevent this from happening, you need to place it in a container with a tight lid. Dried fruits need enough coolness and ventilation, which is in the refrigerator. Top and bottom shelves, as well as vegetable drawers, are suitable for this purpose. One option for storing plums is to wrap them in foil, in which several holes are made with a toothpick.
In the freezer
The freezer significantly extends the life of prunes. After freezing, it does not lose its nutritional value and nutrients. This option is especially suitable for dried plums, the shelf life of which is slightly shorter than that of dried plums.
It should be taken into account that dried fruits permeate nearby products with their smell.
Therefore, they are packaged in airtight containers: a plastic container with a lid, a bag with a zipper, a glass jar with a nylon lid.
Important! To prevent a discovery in the refrigerator from being a surprise, it is recommended to label the container with a marker.
Blanching
For better storage, the method of blanching the fruit is used. Selected and washed fruits are dipped for 5 or 10 seconds in a hot soda solution (1 tablespoon of soda per 1 liter of water). After this, the plums should be rinsed in cold water.
Blanching causes cracks to appear in the thick skin of the plum. The drying process will be faster. Baking soda also prevents fungal infections.
After blanching, prunes retain firmness and elasticity, the color is rich, and the fruits are shiny.
How to prepare fruit
Wash the fruits thoroughly and remove the stems and leaves. The pit can be removed - drying will then be much faster, but the whole dried plum will have a richer taste and retain more nutrients.
Read also: Mirabelle plum (Mirabella)
In industrial conditions, fruits are blanched : dipped in a 0.1% solution of baking soda for several minutes. Due to this, cracks form on the skin, which accelerates the evaporation of moisture.
After blanching, rinse the plums with cold water and dry them with a paper towel or lay them out on a cloth.
The process of drying fruits in the sun
It is necessary to prepare a place where the plums will dry. Often a canopy is used for this, which protects from rain and dust. Can be dried outdoors on a bright, sunny day.
- The plum halves are placed skin side down, without touching each other, on a tray or baking sheet. If there is a lot of drainage, you can use a special flooring.
- Gauze is laid down, the plums are laid out and covered with a second layer of gauze on top. This method will help protect sweet fruits from insects. These could be ants, flies, various insects, wasps.
- You need to dry it in a well-ventilated place. Air circulation will speed up the drying process.
- The drains must be periodically opened and checked to see how they dry. You can stir them a little to speed up the process. You can switch sides, so the process will go faster.
- If the nights are cool, then it is advisable to bring the plums home. Morning dew may wet the fruit or it may rain at night.
In the open air, plums dry for about a week.
Drying methods and technology
There are several ways to properly dry plums at home with your own hands. The choice of technology is determined by the capabilities of the housewife and the properties of the product. Below are the features of preparing prunes using various means and without them.
In the microwave
To cook in the microwave, in order not to end up with porridge, you need to select unripe fruits that remain sufficiently hard. A flat shallow container is covered with paper, the plums cut into slices are placed with the cut side up. The dishes are placed in the oven for three minutes, the heating intensity is medium.
See also
Description of the best varieties of cherry plum for the Moscow region, planting, cultivation and careRead
Then the paper is removed and the process continues for another minute, but at maximum power. If, after sixty seconds, the plums have not reached the required condition, the procedure continues at short intervals until they are completely ready.
In an electric dryer
The fruits are laid out in a tray in a similar way, but without using a lining in the form of paper or a napkin. The process is performed in three stages, at different temperatures:
- for four hours at fifty-five degrees. Periodically, the trays are swapped (if prunes are prepared on several trays), the fruits are turned over;
- about six hours with higher heat - up to sixty degrees, the halves are mixed in the same way;
- about the same time, increasing the heat even more - up to eighty degrees, until the prunes are fully cooked.
Note! It is important to maintain the specified temperature increase sequence to ensure quality cooking.
After each stage, the pallets are removed, the fruits are cooled naturally, and only then the process continues.
In the sun
The easiest way is to dry plums in the sun. The fruits are laid out on wooden floors in an open place in sunny weather, divided in half and the seeds removed. The cut parts should be directed upward so that moisture is not lost.
It is necessary to protect the plums from insects by covering them with gauze. The drying process lasts about five days until the product is completely ready. At night, plums should be removed indoors to prevent morning dew from forming on them.
It is impossible to predict the exact duration of cooking using this method. It depends on the intensity of sunlight, the strength of the wind and the quality of the fruit. The readiness of prunes is periodically checked so as not to subject the plums to excessive processing.
In the oven
To cook prunes in the oven, the prepared fruits are first poured with boiling water with two teaspoons of soda dissolved for a couple of minutes. Then the plums are washed in running cool water and dried on a towel. As a result of this procedure, small cracks appear on the surface to ensure subsequent evaporation of moisture.
Blanching is not necessary if the fruit is cut in half and the seeds removed.
The technology is similar to the process used in the case of an electric dryer. But the duration of each stage is slightly longer - about five hours, and the temperature is slightly lower. Treatment begins at fifty degrees, later increasing to seventy and seventy-five. The duration of cooling after each stage is approximately equal to the duration of heating. The duration of the last stage depends on the readiness of the prunes.
See also
Description of the Honey plum variety, planting technology, care and pruning, pollinatorsRead
In a convection oven
If you use an air fryer to cook prunes, the finished product will have a smoked flavor. But the output quantity will be very small - the volume of the finished product will decrease five times compared to the initial one.
The temperature is set to sixty-five degrees. The duration of the first stage is forty minutes. After that, it takes an hour to cool, then processing for the same amount of time and at the established settings is performed one more time, and the dish is left for a day.
The next day, the procedure is repeated three more times in a similar manner. The finished product is laid out on a paper napkin for another day, then placed in canvas bags for storage.
How to store prunes
The best way to store prunes is to store them in clean and dry glass jars. They need to be covered with plastic lids. The jars need to be shaken periodically to prevent the fruits from sticking together.
Some housewives store it in thick canvas bags that allow air to pass through. Prunes store well in a dark, dry place. You can use thick paper bags.
The main condition is the absence of moisture and sudden temperature changes.
Packing and suitable place
The material of the containers or containers does not matter at all. Prunes themselves are so aromatic that they are not afraid of foreign odors. But other products can become soaked. There is no doubt about it, the fragrant, juicy smell beckons. But bread or buckwheat with a prune aroma is not to everyone’s taste.
The only thing that will kill this magical smell is household chemicals. Therefore, even for a short time, do not leave the fruits in one place next to washing powder or dishwashing detergent.
Read also: Apple tree variety “Zhigulevskoe”. What is important for a gardener to know?
It is recommended to pack the treat airtight. For example, a glass jar with a tight lid, a metal container with a screw-on lid, or a ceramic pot with a silicone stopper.
- plastic bag with zip closure
- wooden or birch bark box
- cardboard box
- canvas or linen bag
More durable materials are subject to heat treatment. They are doused with boiling water and dried, naturally, after thoroughly washing them with hot water and baking soda.
Fragile materials are sprayed with a strong saline solution and dried thoroughly. Then you can apply the prunes and put them away for storage. Prepare the saline solution as follows:
- Dissolve 500 g of rock salt in 1 liter of clean drinking water.
- Iodized or extra are absolutely not suitable!
- Thoroughly soak the inside surfaces of the boxes and drawers.
- Fabric bags can be soaked entirely for 2 minutes, then dried thoroughly.
Large stocks of dried fruits can be stored in a specially designated pantry. Of course, if you have it. In this case, you don’t have to worry about packaging, but simply string the fruits on a strong thread. Then all that remains is to hang them like beads on a Christmas tree.
To avoid spoilage of the product, you need to quickly dip the strings with fruits in a weak solution of salt or soda, then dry them thoroughly. Before use, all you have to do is rinse the prunes thoroughly and you can eat.
You can prepare a solution using 2 tbsp per 1 liter of clean water. l. regular table salt or 1 tbsp. l. soda This treatment does not affect the taste of dried plums at all. But it protects well against all kinds of mold bacteria.
All this dancing with solutions and threads is not needed if you have a little dried fruit. But when you have dried three buckets of plums yourself, take this method into use. Because this amount of drying simply won’t fit in the refrigerator or on a shelf in a closet.
Advice. This method is suitable only for those who are sure that moths or ubiquitous bugs will not infest them, because salt will not stop these voracious comrades.
How to dry prunes in the oven
Many lovers of dried fruits prefer to dry the fruits in the oven. On the positive side, the process goes much faster, the fruits dry evenly and are not affected by insects or covered with dust.
Among the negative aspects, it is worth noting the high energy consumption; it is impossible to dry a large number of fruits at once.
Oven drying process
- Selected fruits are cut into halves and the pit is removed.
- Blanch for 20 seconds in a soda solution. After this, rinse the fruits in running cold water.
- Spread parchment paper on a baking sheet and place the plums cut side up. The halves should not touch each other.
- We set the temperature to 50 or 60 degrees. The above is not recommended, as the plum will simply cook at high temperatures. Leave for 3 or 4 hours. To speed up the process, you can turn on convection.
- The dried plum should cool for 3 hours, then it should be dried again at 70 degrees for 6 hours.
- The finished prunes are dried at a temperature of 100 degrees for 30 minutes. The skin of the fruit is shiny, the prunes are elastic to the touch and do not stick to your hands.
| Stages | Temperature(oC) | Oven time | Cooling down (hour) |
| Stage 1 | 50 | 4 hours | 3 hours |
| Stage 2 | 70 | 6 hours | 3 hours |
| Stage 3 | 100 | 0.5 – 30 min | 6 hours |
Correct cooking technology will ensure uniform drying of the product and preserve its taste. Prunes turn out sweet and aromatic. This is an excellent addition to meat dishes and desserts.
Preparing fruits for the procedure
To get a tasty product, it’s not enough just to dry the plums in the traditional way. It is important to properly prepare them for the process. Otherwise, the fruit will have a hard texture, and the surface will not be black, but red-brown.
Preparation of prunes includes simple operations:
- Only the most ripe fruits are collected;
- sort, removing damaged and rotten specimens;
- put in baskets (preferably made of wicker) about 15 kg each;
- the container is placed under a canopy and left for 3 days.
During this period, the plums will acquire a special softness, which will remain after drying. Next, the fruits are properly washed. The procedure is repeated until the water becomes clean and transparent. All plums are slightly dried and sorted, separating large specimens.
If the fruits are dried with the pit, they are blanched. To do this, dissolve baking soda in hot water; 1 teaspoon is enough per 1 liter. Dip the fruits into the solution for about 20 seconds and then wash them again. Thanks to the procedure, microcracks form on the skin, through which the plums lose moisture.
If you keep the fruit under a canopy for more than 3 days, fermentation will begin and they will be unsuitable for drying.
Drying in an electric dryer
An electric dryer is a special device that allows you to dry a large number of fruits in a short time. The process requires electricity consumption. The prunes are tasty, evenly dried, eliminating the risk of product spoilage.
- Good, dense, ripe plums are selected for drying.
- Rinse under running water to remove dust and dirt.
- Blanching in a soda solution followed by rinsing under cold running water. This will allow you to preserve the finished product longer.
- Arrange the halves cut side up, without touching each other, in one layer.
The cooking process takes place in three stages.
- Dry at 40 or 50 degrees for 6 hours, then cool for 6 hours.
- Drying at 60 degrees – 6 hours.
- The third stage – temperature 80 degrees – 6 hours.
| Stages | temperature (оС) | time (hour) | cooling (hour) |
| Stage 1 | 40 — 50 | 6 | 6 |
| Stage 2 | 60 | 6 | 6 |
| Stage 3 | 80 | 6 | 6 |
After cooling, remove the prepared prunes to a dark, cool place.
How to dry plums in the sun
In a natural way, plums are dried on wooden sheets. The seedless plum halves are placed on the sheet not too tightly, cut side up, so that the plums do not lose juice when drying.
Plums should be exposed to the sun for 4–5 days, depending on the size of the fruit.
You need to make sure that flies or wasps do not land on them, otherwise such a product may contain harmful bacteria.
They should be brought indoors at night, and taken out into the air in the morning after dew has fallen, otherwise the fruits will become damp.
During the drying process, the plums are periodically turned over so that they dry evenly on all sides.
After drying in the sun, the plums are dried in the shade for another 3–4 days.
Microwave cooking
This is one of the fastest ways. The plum is dried evenly without losing its beneficial properties.
Cooking method:
- Wash the prepared fruits well under running water and dry on a towel.
- Place the cut, seedless fruits on a microwave dish.
- Set the timer for 30 seconds and set the power to 250 W.
- After this, turn the plums over and set them again for 30 seconds at the same power.
- This must be repeated until completely dry. It usually takes from 3 to 5 minutes.
There is no need to increase the power, as the plum will simply cook.
Disadvantages - you can cook very little prunes at a time.
Determining the quality of dried fruits
The readiness of dried fruits is determined by the following criteria:
- when pressed, no cracks appear and no juice is released;
- dried fruits should be elastic, hard, but should not crumble when pressed;
- the fruits should not stick to your hands.
Dried plums should be stored in a well-ventilated area. Suitable containers include fabric bags, paper bags and boxes made of wood or cardboard.
Storage in glass jars is allowed, while the plums are sprinkled with granulated sugar. Products with a strong odor should not be placed near dried fruits, because dried plums can absorb it.
You can make marshmallow from plums - a delicious and healthy dessert. The recipes for its preparation are quite varied, but they all boil down to preparing plum puree, which is dried in thin layers.
Required ingredients:
- plums - 1 kg;
- sugar - 1 glass.
If desired, you can replace sugar with honey, and also add your favorite spices: cloves, cinnamon, etc.
Ripe plums must be washed and cleared of stems and seeds. The pastille puree can be prepared on the stove or in the oven.
In the first case, you need cast iron or non-stick cookware, pour 1 cm of water into the bottom and add chopped plums.
The dish is covered with a lid, the plums are cooked for 1 hour over low heat, there is no need to stir them.
Then the plum mass is removed from the heat and cooled.
The cooled plums are rubbed through a sieve. The puree is cooked with the addition of sugar over low heat for 1 hour with continuous stirring.
In the second case, finely chopped plums are placed in a heat-resistant container and simmered under a closed lid in the oven at medium temperature. After the juice appears, sugar is added to them, the mass is mixed and returned to the oven. When the sugar is completely dissolved, the plums are cooled and rubbed through a sieve.
The finished puree is laid out in a thin layer on a baking sheet. To avoid burning, it is pre-lined with parchment paper. The layer of puree should not be made too thin, otherwise the finished pastille will tear when removed. A layer of puree that is too thick will not dry well. The optimal thickness is 3–6 mm.
The pastille is dried in the sun or in the oven. The marshmallow should be air-dried on dry, hot days, bringing it indoors at night. This process usually takes several days. You can also dry the marshmallow in an oven preheated to 40 degrees.
The finished marshmallow sheets are rolled into tubes or cut into slices and stored in a cool, dry place. It is necessary to ensure that the pastille does not become damp during storage. If necessary, repeat the drying procedure.
Regardless of the drying method, properly prepared dried fruits can be stored for a long time. At the same time, they retain all the beneficial properties of fresh plums.
Everyone ran and I ran! Have you seen how everyone started drying plums with herbs and garlic this year? I’ve already seen these plums on Facebook ten times, if not more! Considering that plums are universal and good both sweet and savory-spicy, it was impossible not to try them, and they really turned out to be absolutely wonderful! If you like sun-dried tomatoes in oil, then you will also like these plums, and before they disappear anywhere, run to the market! Take 2-3 kilograms at once, so that for the whole dryer, I still had to run to the market twice, because, having done it once, I immediately decided to repeat it. Both large sour ones and small sweet ones are suitable; small ones, however, dry faster, but you can clean them for now! I dried both types and was very pleased.
For three trays of the Stockli Dorrex Pro T
I needed:
2.5 kg. medium-sized plums;
5-6 medium heads of garlic;
50 gr. olive oil (you can use any you like) for greasing
Sea salt;
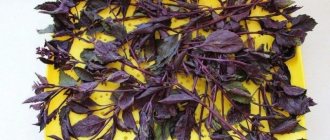
dried Italian herbs or your favorite posto herbs
I filled dried plums with oil and made it from this:
200-250 gr. olive oil (take any oil that is not overly aromatic);
1 fresh chili pepper;
1 head of garlic;
Dry herbs: thyme, rosemary, sage, etc.
Process:
- Wash the plums, cut into halves, remove the pits.
- Peel the garlic and cut into thin slices.
- Place the plums on the dehydrator tray, cut side up, and place 1-2 cloves of garlic on each plum. Brush the plums with oil and sprinkle with salt and herbs.
- I dried it for about 12 hours at 70 degrees. These plums need a fairly high temperature so that they dry out on the outside and retain some moisture on the inside, so I didn’t dry them at 40 or 50 degrees.
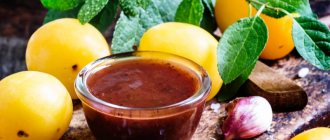
Dried plums will smell amazing, it’s very difficult to ignore this aroma, but try to carry it as little as possible, then you won’t regret it. Place them in small, clean jars (you can even sterilize and dry them), pressing them down slightly, and prepare the oil. Place garlic (peel and cut into slices), chopped chili, herbs into a ladle, add oil and bring to a boil. Pour this oil over the plums so that the oil completely covers the contents of the jar, close the lid and let cool.
I didn’t dare to store these treasures in the pantry, I put them in the refrigerator so that they wouldn’t spoil. Can you imagine how great it is to give such jars to friends, take them with you when visiting, or treat those who drop by for a visit! And with good homemade bread, this is something unimaginable, a real delicacy!
Dried plums, or, in other words, prunes, are a very healthy delicacy. But are you 100% sure that you are purchasing a quality product in the store that has not been treated with any chemicals to improve its appearance? I think that no one can answer this question unequivocally. Today we propose to consider ways to dry plums yourself at home. Such a product will certainly be of the highest standard, since the entire preparation process will be controlled by you personally.
You can dry any variety of plums, but fruits that are hard and dense to the touch will hold their shape best. In this case, the product must be completely ripe.
The preparatory stage consists of several steps:
- Sorting. When sorting through fruits, you should immediately exclude specimens with rot and various damage. Only the best fruits should be dried.
- Cleansing. Fruits are washed under running water and dried with paper towels.
- Removing seeds. Cut the plum in half and remove the core. This completes the preparation of pitted plums for drying. You can proceed directly to dehydration. If you plan to dry prunes with pits, then skip this step and follow all the other steps.
- Blanching. Dissolve 1 teaspoon of baking soda in a liter of boiling water, and place the plum in this solution for 20 seconds. The amount of liquid is calculated so that the fruit is completely immersed in water. If necessary, increase the portion several times. This procedure is necessary in order to remove the wax layer from the surface. The skin should crack from being in boiling water, which will facilitate better evaporation of the liquid.
- After blanching, the plums are washed under running water.
- Finally, the fruits are thoroughly dried with paper towels.
Cooking in an air fryer
- For drying, you can use small fruits with pits; large ones are best cut in half.
- The plum is dried at a temperature of 65 degrees for 40 minutes. Then you need to leave it to cool for 1 hour.
- The procedure must be repeated 2 times. Then leave the plums until the next day.
- The next day, dry 3 times for 40 minutes at the same temperature with an interval of 1 hour.
First day:
| Stages | Temperature | Drying time (min) | cooling (hour) |
| Stage 1 | 65 | 40 | 1 |
| Stage 2 | 65 | 40 | 1 |
Second day:
| Stages | Temperature | Drying time (min) | cooling time (hour) |
| Stage 1 | 65 | 40 | 1 |
| Stage 2 | 65 | 40 | 1 |
| Stage 3 | 65 | 40 | 1 |
Place the prepared prunes on the table and let them cool completely, only then put them into dry glass jars and close with lids.
Dried pitted prunes can be stored for up to 2 years.
All methods of drying plums
In the sun
The prepared plums are placed on racks or in well-ventilated boxes and placed in the sun. Every evening, containers with fruit are brought into the room and put back out only the next day, not before the dew has disappeared.
The total drying time is from 4 to 6 days. This depends on weather conditions and the size of the fruit.
After drying is completed, dried fruits need to be finally dried in the shade. This will take about 3-4 more days.
In the oven
To keep the baking sheet clean, cover it with baking paper. Drying can also be done on special racks. The prepared fruits are laid out in one layer. If the plum was cut in half, then it is laid skin side down.
Oven drying consists of several stages:
- 5 hours at a temperature of +50ºС;
- 6 hours at a temperature of +70ºС;
- until the product is ready at a temperature of +75…+80ºС.
Between stages, remove the pan from the oven, turn the prunes over and allow them to cool completely. Afterwards, continue the process according to the instructions.
Watch the video from the channel “Men in the Kitchen!” — How to cook prunes at home
In an electric dryer
The plums are also laid out on special pallets in one layer. If you are drying fruit halves, they must be placed cut side up.
The temperature during the entire drying period will vary:
- Stage 1: dry for 4 hours at a temperature of +50…+55ºС. We swap trays and turn the pieces over.
- Stage 2: dry for 4 – 6 hours at a temperature of +60ºС. We change trays and turn the plums over.
- Stage 3: until the product is ready, approximately 4 – 6 hours at a temperature of +75…+80ºС.
Watch the video from the channel “Ezidri Master” - Drying plums
In the microwave
To dry using the express method in the microwave, you need to use only hard fruits, otherwise the plum will turn into porridge.
So, remove the seeds from the fruit and place them in a flat bowl lined with a paper towel. The slices should be placed cut side up. Cover the top of the slices with a paper napkin.
Turn on the microwave oven at medium power for 3 minutes. At the end of this time, remove the napkin and place the food in the oven again for the same amount of time.
After the microwave beeps, set it to full power and dry the plums for another 1 minute. If this time is not enough, you can continue drying, checking readiness every 60 seconds.
Preparing plums for drying
To prepare such delicious and healthy prunes, you must first sort out the plums, choosing only large berries . It is worth making sure that they are not soft or overripe. If such berries are found, juice will soon begin to flow out of them. Then you won’t get high-quality prunes.
Usually, berries of approximately the same size are chosen for drying prunes. All berries that have been selected for drying are washed well and their tails are removed. They must also go through the blanching process . To do this, they need to be placed in a colander for several minutes and in boiling water, to which a little soda has been previously added.
This process will get rid of the waxy coating.
The recipe for this treatment of plums is very simple: one tablespoon of soda is required for one liter of boiling water. The berries are usually kept in water for no more than 30 seconds. After this, it is thoroughly doused with cold running water and laid out on a dry towel, allowing the berries to dry. If this procedure was done correctly, then there will be cracks on the surface of the drain through which moisture will be removed.