Preparation
Homemade cheese chips are sure to please all those who love cheese. You can cook them in a frying pan, in the oven, or even in a waffle iron. You can purchase ready-made chips, which are presented on store shelves in a large assortment. However, they are not entirely beneficial for the human body, especially if consumed quite often. In order not to deny yourself your favorite delicacy, we suggest preparing cheese chips at home according to the recipe.
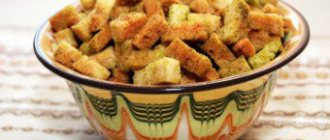
Start cooking by pouring wheat flour into a suitable sized bowl and laying out softened butter. Grind them well until smooth. Add to them chicken yolks separated from the whites, Italian herbs with paprika, grated Parmesan or Pecorino cheese. Knead the combined ingredients into a dough. Form it into a ball, wrap it in cling film and put it in the refrigerator for thirty minutes. Now, you need to turn on the oven so as not to wait for it to heat up to the desired temperature.
After the dough has cooled well, it should be removed from the refrigerator and divided into two parts. Lay a sheet of parchment on the table, place half of the dough on it and roll out thinly. Punch holes in it and cut into small triangles with a pizza cutter. Transfer them to a baking sheet, which also needs to be covered with parchment. Prepare chips from the second part of the dough in the same way and place them on the second prepared baking sheet. Place both in the oven.
At 180 degrees, the cheese chips will be ready in ten minutes. These crispy homemade chips can complement the taste of a salad or even a first course. In addition, this is a great snack to accompany a glass of chilled beer.
Bakery
This is the easiest and fastest step:
A Brazilian travels 36 km by bike every day to take his loved one home.
Rare shot: Viktoria Isakova showed her grown-up daughter from Yuri Moroz (new photo)
The money tree pleases with lush flowering: my secret is in caring for the leaves
- Bake the chips on the center rack of the oven for 3-5 minutes. They are ready when they turn golden. If the chips are not crispy or golden enough for you, leave them for another 1-3 minutes.
- Let the chips cool on the baking sheet and then remove them with a thin metal spatula. If they are too greasy, place them on a sheet of paper towel to drain. Once the chips have cooled to room temperature, you are ready to serve them.
Depending on your preferences, you can complement the original taste of these chips with fresh herbs and dried tomatoes.
Cooking according to recipe
Cheese chips “Balls” can be safely called an excellent snack both on the everyday table and on the holiday table. This tasty and appetizing delicacy goes perfectly with different types of alcohol. At the same time, by changing the composition of the ingredients, it can be included in the children's menu.
There are a lot of cooking options, which allows you to make them a table decoration at a variety of events. These cheese chips “Balls” are made from choux pastry with the addition of cheddar cheese, which makes their taste piquant and slightly spicy.
When starting to prepare the cheese balls, you need to pour the amount of water specified in the recipe into the pan and put the butter in it. Set the heat to medium and wait until it boils. Remove the pan from the stove and add wheat flour. Turn on the mixer and beat the mixture with it until it stops sticking to the walls of the pan and acquires a shiny, homogeneous consistency. Set it aside for a while to cool.
In a separate container, beat all eight yolks. Mix them thoroughly with a whisk and pour them in small portions into the cooled flour mixture. Stir after each added portion. Then grate the cheddar cheese on a fine grater and place it in the pan with the dough, add black pepper and salt. Knead the dough and form it into balls with a diameter of two centimeters.
Now you need to pour vegetable oil into the frying pan and heat it up very high. Dip a portion of cheese balls into it and fry until dark golden brown. Place on several layers of paper towels to remove excess grease. Then you need to break one or two balls and make sure that they are well fried inside. Then continue and fry all the formed cheese pieces.
If the dough is damp inside, it is necessary to reduce the heat, thereby increasing the cooking time. After drying, place each portion on a beautiful plate, generously sprinkling with grated Parmesan cheese.
Fragrant and piquant cheese balls are ready to take their rightful place on the table. If desired and to your taste, when kneading the dough, you can add garlic, various spices or seafood, thereby making the taste of the delicacy even more rich and piquant.
Cheesy Chips, Complete Guide
Cheese chips for cheese maniacs and lovers of everything crunchy. Only keto, only benefits!
I've already written a million times and will write again - I may be the biggest crunchy fan in the world. This is offset by an almost non-existent love of sweets, but - deep-fried cod skin? pork rind chips? cheese popcorn and cheese chips? Please bring everything and more!
It's great that we have so many healthy (and not so healthy) alternatives to chips on keto. I still miss my favorite American peanut snacks a little, but that's because I haven't tried this keto Cheetos recipe, most likely. And in general, I read that it is better to sometimes treat yourself to something like this than to die of boredom, stress, or suddenly find yourself with a pack of Pringles in your hands. Or already in your mouth. We've been forming bad habits our whole lives, why would they just stop meaning something to us? Hooray for non-harmful substitutes!
How can you use cheese chips? To start, I really like to divide the chips into several servings at once (I put them in small paper bags or Ikea ziplock bags) and use them as a snack. It’s great to take them with you on a walk to the sea, drink coffee (or armored broth) with them, or take them in the car as a snack on the road. These chips are great to spread with cream cheese and aromatic butter, they go great with wine and are just perfect for most creamy soups. You can also just mindlessly chew them at the end of a long and hard day.
What kind of cheese can I use? In general, almost any high-quality hard cheese will do. I've tried making chips from cheddar, gouda, maasdam and elemental - these are the most common varieties. Cheddar and aged gouda chips taste best; The more aromatic and richer the cheese itself, the better the finished chips. Elemental and maasdam are also great - but they taste better with extra spices.
I also plan to find sliced cheese like Parmesan, but in our stores it’s hard to find, I’ll have to try. Goat and sheep are also next in line, but this seems to be an unreasonable use of these beautiful species.
Soft cheese for sandwiches, soft cheeses such as Mozzarella, are not suitable Cheese that is too cheap (a cheese product, I came across one in Moscow) may melt strangely or not dry out. Please read the ingredients of what you plan to eat.
Let's move on to the chips recipe . The original recipe that I used is taken from this blog, it uses very thinly sliced cheddar cheese and a temperature of 120 degrees, you need to bake the cheese for 30-40 minutes, cool for another 10-15 and voila - your drug snack is ready. But we will not stop at this option.
You can always use spices to improve and enhance the taste of cheese chips. You can use proven combinations that can be found in any supermarket - in the chips section. These are paprika, barbecue, green onions and garlic, black pepper and truffle (we also have such chips in Barcelona!). I always add a little salt to the cheese, but you can also use one of these spices:
Liked this:
Like
Similar
How to cook chips
Cheese chips prepared in the microwave according to the recipe in the photo turn out crispy with a spicy taste. You will be surprised how quickly and quite simply they are prepared. Once cooked, they can be served as an accompaniment to main courses or separately with any white sauce.
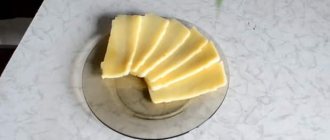
First, a whole piece of sbrinz cheese must be cut into very thin slices using a well-sharpened knife. It's not that difficult to do. Just to make the process of cutting hard cheese easier, the knife should be periodically doused with boiling water.
Next, cover a flat dish with parchment and place the plates on it, at some distance from each other. Because during heat treatment the cheese will melt and may stick together. Mix all the spices in a small bowl and generously sprinkle the cheese slices. Place the dish in the microwave and cook at maximum power for three to four minutes.
Then take out the dish and after cooling, transfer the chips to a plate. Prepare the remaining plates in the microwave in this manner. Now you know how to make cheese chips at home.
Simple recipes will help you prepare a delicious snack that can also become a full meal. By preparing cheese chips at home, you can consume them without worrying about their harm.
Description
Cheese chips
prepared from almost any type of hard cheese.
Even the combination of several types of cheese is not prohibited. The recipe for this delicious snack is quite simple and will not be difficult to prepare even at home. And you can experiment endlessly with the options for additives, each time getting a new snack option. Meat, seafood, mushrooms - all this will look interesting on top of the cheese lattice and will combine perfectly in terms of taste. In addition, such a dish will help out when relatives or friends come to visit. All you need is a piece of cheese, a filling (in our case, meat) and 10 minutes of free time.
You can cook this dish in a frying pan, in a microwave or oven, and even in a waffle iron. If you don’t have a non-stick frying pan on hand, then cooking cheese chips in the oven is much more familiar and healthier than in the same microwave. The option with a waffle iron is immediately ruled out, because it presupposes the presence of flour in the recipe, which means extra calories and extra time, which we don’t have enough of.
In order to make cheese chips with your own hands, you just need to use our step-by-step photo recipe with a detailed description.
DESCRIPTION
This recipe for cheese chips will help you prepare a wonderful independent snack and addition to any salad. Cheese chips will not last long on the table, you can be sure!
Cheese chips in the microwave
INGREDIENTS
- hard cheese – 300 g;
- salt, pepper - to taste.
COOKING
- Cut hard cheese into thin slices
- Sprinkle the cheese pieces with salt, pepper or other spices as desired and place in a flat microwave-safe dish.
- Turn on the microwave oven at maximum power for about 4 minutes.
- Let the chips cool slightly. The dish is ready!
Note:
Use only hard types of cheese, otherwise it will melt and spread throughout the dish.
Cheese chips in the oven
INGREDIENTS
- Hard cheese – 250 g;
- Paprika – 10 g;
- ground black pepper – 10 g.
COOKING
- Grate hard cheese on a fine grater
- Line a baking sheet with parchment paper
- Using a teaspoon, place the grated hard cheese on non-stick paper at a sufficient distance from each other.
- To make the chips flat in the oven, press them down a little
- If desired, sprinkle the cheese with spices, paprika, and ground pepper.
- Bake in the oven for 5-7 minutes at 170˚C.
- Remove the pan from the oven and give them a minute to cool. Next, use a thin spatula to transfer the chips onto a plate and serve.
Chef's tip:
To give oven-baked cheesy chips a classic look, you can wrap them around a rolling pin while they're still warm.
Crispy spicy cheese will be an excellent addition to a wide variety of salads, meat, fish, and is also suitable as an independent dish. They are surprisingly easy and quick to prepare. There are three options - chips in the microwave, in a frying pan and in the oven.
CHEESE CHIPS IN THE MICROWAVE
For one serving you will need 300 grams of cheese and any favorite spices. The cheese needs to be cut into thin slices, to make it easier to cut hard varieties of cheese, you need to pour boiling water over a sharp thin knife. Place on a dish so that there is space between the pieces; the cheese will melt and should not stick together; it is advisable to use a completely flat dish. Sprinkle generously with your favorite spices on top; paprika, basil, and parsley are great.
Turn on the microwave at maximum power and cook the chips for about five minutes. Maybe less, you need to make sure that the cheese doesn’t start to burn.
We take out the dish with cheese, let it cool a little and remove the finished chips.
CHEESE CHIPS IN A FRYING PAN
We also take 300 grams of cheese, spices or chopped parsley to taste. Grate the cheese on a coarse grater, add 1 tbsp. chips at a decent distance from each other on a hot dry frying pan with a non-stick coating, sprinkle with spices. Fry over high heat until golden brown, turn over, lightly fry on the other side and remove.
CHEESE CHIPS IN THE OVEN
The ingredients are the same as in previous recipes. Grate the cheese on a fine grater. Place 1 tbsp on parchment paper. cheese at a good distance from each other, sprinkle with spices, bake in the oven at 180 degrees for 5-7 minutes. Instead of parchment, you can use a silicone mat.
A light snack during the day or evening gatherings with friends over a pleasant conversation - in such cases, chips often come to our aid. Crispy, tasty, spicy and aromatic, salty or sweet - they quickly satisfy your hunger and help you have fun. We are used to buying chips in the store, but more and more often we hear outrage about the harmful additives included in the finished product. Well, let's take matters into our own hands and make the chips ourselves, without preservatives or flavor enhancers. And a microwave will help us with this.
Cooking process
Preheat the oven to 205°C and line a large baking sheet with parchment paper. You can also use a silicone baking sheet instead of paper, choose what you are more used to.
- Place a tablespoon of cheese on a baking sheet. Try using coarsely grated Parmesan cheese. Do not use powdered, finely grated Parmesan cheese. It will melt, but it won't create that beautiful lace design.
- Level the mound until it is 2 inches wide. Gently press the back of a spoon into the cheese and swirl until the desired shape is achieved. Don't worry if you notice gaps in the cheese layer. It will melt and create a beautiful design.
- Continue making similar mounds on the baking sheet. Each mound should be at a distance of 5-10 cm from each other.
- All that remains is to season the top with freshly ground black pepper. This is completely optional, but many people find it adds extra flavor to the chips. If black pepper isn't your thing, consider using some of these delicious herbs: basil, rosemary, or thyme.
What you need to know
Traditionally, microwave chips are made from potatoes, thinly sliced or finely grated, and topped with a thin layer of cheese on a hot surface. Since you and I are not looking for easy ways and love to experiment, we will also consider unconventional options. For example, a crunchy fruit treat. Such chips can be classified as dessert dishes. They will be sweet and the kids will surely love them, as they will be an excellent addition to juices, lemonades and other sweet soft drinks.
All you need is, in fact, the main product and, if desired, your favorite seasonings
. Vegetable oil may come in handy - it will make the crust golden.
Without oil, the chips will come out drier, but this will not affect their main qualities - crunch and aroma.
Now let's move on to the cooking method. Why microwave? After all, chips can be fried in a frying pan or, in extreme cases, in the oven. Yes, because in both the first and second cases you will have to turn over each plate after some time has passed. Firstly, no boiling fat, it contains a lot of harmful substances. Secondly, cooking in the microwave is much faster and easier than the traditional way.
As is known, vegetable oil, when exposed to high temperatures, forms substances with carcinogenic properties. Therefore, cooking chips in a microwave oven will not harm the quality of the product and your body.
A little about safety rules:
- do not use foil in the microwave;
- Place chopped potatoes or other products on a dry plate suitable for a microwave oven, preferably glass;
- You can place a sheet of parchment paper on the dishes.
And one secret: to make the chips light and crispy, cut the food as thin as possible
. A long knife, previously sharpened, is suitable for this. It’s even better if you have a special vegetable cutter or chopping board: with their help you will cut the potatoes as thinly and accurately as possible.
Any chips in a few minutes: step-by-step recipes with photos
Let's move on to the most interesting part. As you understand, cooking chips in the microwave is not at all difficult. We offer you some interesting recipes that will delight family and friends.
Involve your children in culinary creativity: they will definitely cope with these simple recipes.
Classic potato
Let's start with a traditional and simple recipe for our usual potato chips.
You will need the following:
- 2–4 medium-sized potatoes;
- salt, pepper, seasonings (paprika, dried herbs, garlic powder) - to taste;
- vegetable oil (if desired);
- knife or chopping board;
- sheet of parchment paper.
Preparation:
- There is no need to peel the potatoes - it makes the chips even tastier. Just be sure to wash each tuber thoroughly. It’s faster and more convenient to do this with a sponge or brush.
- Now cut each potato into thin slices.
- Line a microwave-safe dish or plate with a circle of parchment paper and grease it with a small amount of vegetable oil.
- Place potato circles on parchment and sprinkle them with salt and seasonings. By the way, you can try making the chips without salt and spices so that they get a pure potato taste - it turns out great!
- Set the microwave to 700 W, load a plate with chips and cook for 5 minutes
. The surface of the chips will turn golden brown. Remove them from the device and place them on paper towels. Excess oil will remain on the paper, the chips will cool and acquire their crispy fragility.
Well, in just 10 minutes in total you have prepared excellent chips that will appeal to adults and children, and will help you pass the time with a glass of cold beer or soda. Serve with an interesting movie or an exciting game of your favorite team!
Video: how to make potato chips in the microwave
Cheese
A very simple quick recipe! Almost everyone loves cheese, so why not make it into crunchy, savory chips? They are much easier to cut than potatoes, and they cook much faster, which means it will take you even less precious time.
All you need is:
- hard cheese (for example, Dutch);
- spices - to taste and desire;
- parchment paper (required).
We will not regulate the quantity of ingredients. It all depends on how much cheese you have on hand and how many chips you need to be happy. You don’t need to add salt, there is enough of it in the cheese itself
. And do not overdo it with spices, so as not to interrupt the spicy cheese aroma.
Preparation:
- Try to choose a product with low fat content, optimally no more than 9%. This cheese will rise perfectly, bake and become light and airy. Cut it into thin slices of suitable size.
- Take a sheet of parchment, cut out a circle and line a plate with it. There is no need to lubricate the surface with vegetable oil, because the cheese releases a sufficient amount of fat during heat treatment. Place the cheese slices at a short distance from each other. If desired, add salt and spices.
- Set the microwave to 800–900 W for 2 minutes. Load the bowl with pieces of cheese. When the device notifies you that cooking is complete, take out the chips and check them for doneness by prying them with a fork - they should be firm and easily pull away from the parchment. If the chips are still soft after cooling, microwave them on the same setting for another 10–20 seconds
.
You can experiment with different types of cheeses. Believe me, the taste, aroma, and even appearance depend on the variety! Chips can take the form of an airy pillow or a flat openwork pancake.
Also try this method. Do not cut the cheese into thin pieces, but grate it. Small or large - as you wish. Mix the grated cheese with seasonings and spread with a tablespoon, distributing the piles into a thin layer. Then do the same as described above - put it in the microwave and wait for it to be ready. In any form, these chips will be an ideal beer snack or a separate dish for the kids, especially if served with ketchup or white sauce.
Video: cheese crunches
From thin Armenian lavash
These chips are very easy to make; just cut the pita bread into pieces, grease it and put it in the microwave until ready. But you can spend a little more time and ingredients to get something so delicious you’ll lick your fingers!
Take these products:
If desired, you can also add 70 g of hard cheese to grate it and give the chips a piquant cheese taste and aroma.
Preparation:
- In a deep bowl, mix butter, salt, sugar, spices.
- Cut out circles from parchment paper the size of a microwave-safe plate.
- Cut the pita bread into pieces of any shape - triangles, diamonds or squares.
- Place all the pieces in the bowl where you mixed the oil and spices. Knead with your hands so that each piece is evenly coated with oil.
- Place the pieces on the parchment in an even layer. Right now you can sprinkle future chips with grated cheese if you decide to use it
. - Place the plate of chips in the microwave, set it to full power and cook for 2 minutes. During this time, you will just have time to prepare a new portion of lavash pieces.
- When all the pita bread is used up, transfer the chips to a plate and serve. Children will happily eat them just like that, and adults will eat them as a snack with foamy beer.
Video: Lavash chips - even children can handle it
Apple without oil
And such chips are perfect for those who care about their figure as a light snack. They are sweet, and at the same time low in calories. Of course, you can’t serve them with beer, but with tea, coffee or light wine – that’s just right!
You will need:
- 2 larger-than-average apples;
- 2 tablespoons brown sugar;
- ½ tablespoon cinnamon.
This amount of products is needed for 4 servings. Now let's start cooking.
- Wash the apples, wipe them with a napkin, cut them lengthwise and remove the core. Cut the fruit into very thin slices, no more than 2 millimeters. It will be more convenient to use a vegetable peeler.
- Mix cinnamon and sugar in a deep bowl.
- Roll both sides of the apple slices in the cinnamon sugar mixture.
- Arrange the plates in one layer in a plate (you can cover it with parchment). Microwave for 5 minutes with the device set to full power.
- When the microwave turns off, remove the apple chips and let them cool. When hot they are soft, but when cold they become crispy and light.
Banana
Well, how can you do without a banana option? After all, banana is a favorite delicacy of children and adults, and chips made from it will certainly become one of the most favorite snacks for your family.
You will need:
- 2 bananas (preferably green, not yet ripe);
- 2 tablespoons of vegetable oil, preferably olive, but refined sunflower is also possible;
- 1 pinch of salt;
- ¼ teaspoon turmeric.
Let's start cooking:
- Place unpeeled bananas, straight in the peel, in a pan filled with water so that it completely covers the fruit. Wait for it to boil and cook for 10 minutes.
- After this, turn off the heat under the pan. Remove the bananas and wait until they cool.
- Peel the bananas and cut into thin slices. Do not forget that the circles must be of the same thickness, otherwise they will not cook evenly
. - Sprinkle banana pieces with vegetable oil, sprinkle with salt and turmeric.
- Take a flat plate that can be used in the microwave. Place banana slices on its surface so that they do not touch each other.
- Place the plate inside the microwave. Set the power to the highest setting and the time to 8 minutes. Every 2 minutes you will need to take out the plate and turn the chips over to the other side to ensure even browning.
- When the chips are ready, remove them from the microwave, transfer them to a dry plate and let cool. They will harden and become crispy.
Video: how to make banana chips at home
Me and my men liked the chips! My son was especially happy because we don’t buy him store-bought ones in principle. And here - such happiness, dreams come true! girl_haha In some ways they reminded me of Soviet chips, which were then sold in paper boxes and were terribly tasty! I just made it with salt. I greased the mold with oil, of course it stuck a little, but it comes off well with the edge of a knife. I have a 700 Watt oven, it took 7 minutes.
Carolinna
https://forum.say7.info/topic30476–100.html
And for spices, I highly recommend either Provençal herbs or 12 spices (which are a super set for everything). Then it turns out incredibly fragrant, my husband once came running from the second floor to the smell!
Making Crispy Parmesan Baskets
This variation assumes the presence of a filling, which will make the snack even more interesting and varied. The cooking method is as follows:
- Preheat the oven to 177°C and line a lightly greased baking sheet with parchment paper.
- The preparation is exactly the same as described in the first method. What changes here is the thickness of the cheese layer.
- A layer of cheese that is too thick will make the product stretchy but not crispy. Therefore, you need to smooth it well with a spoon, stretching it to the sides as much as possible.
- If in the first case it was possible to place a large number of chips on a baking sheet, then here it is better to limit yourself to 5-7 pieces. Once you take them out of the oven, you'll have to work quickly to turn them into baskets. If you make them all at once, by the time you finish folding half, the rest will only be good for chips.
- Bake on the middle oven rack for 4 minutes. They are ready when they turn a light golden color.
- Let the chips cool for 1 minute. They should be warm and pliable, but not so hot that you can't handle them. You can use a napkin to make sure you don't burn your fingers.
- Remove the chips using a thin metal spatula, then place them on the desired pan. The latter can be an inverted glass or a stack. Use your fingers (you can wrap them in tissue paper) to gently press the pieces into the top and sides of the pan.
- Allow the baskets to cool completely before carefully removing them. While your current batch is chilling, you can prepare the next batch. This way you will definitely make all the products beautiful and very tasty.
- Fill the baskets and serve them as appetizers. You can fill them with almost anything that goes well with Parmesan cheese, including mini meatballs, goat cheese, cherry tomatoes, and so on. On a platter they can be supplemented with fluffy rice, basil or parsley leaves.
