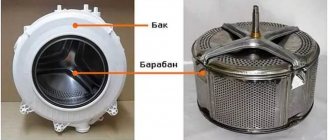
machines » The drum is loose in the washing machine
During the washing process, you noticed a knocking sound and increased vibration, and then you saw that the drum was hanging loose in the washing machine. This indicates a malfunction of the equipment, requiring urgent intervention from a service center for diagnosis and repair. Stop the machine, drain the water if possible and do not use it until the malfunction is resolved, because such a breakdown can lead to damage to other important parts.
Service company technicians provide diagnostic and repair services for washing machines at home in Moscow and the Moscow region.
Professional servicing of household appliances is carried out from 8.00 to 23.00 daily. Leave a request on the company’s website or call a specialist by phone +7 (495) 745-24-00 - your application will be processed shortly. The company provides guarantees for repair results and installed spare parts.
Why does the drum in the washing machine dangle and rattle?
Play in the washing machine drum occurs during operation due to wear of parts, mechanical components and fasteners. The suspension of the moving parts in the machine has its own characteristics - it compensates for most of the swings and shocks during rotation. The reasons for the strong swing of the drum can be found by sequentially eliminating different options, for which it is necessary to carry out a full diagnosis of the device:
- open the washing machine body by removing the front, rear and side panels;
- check the condition of shock absorbers, suspension dampers and tank compensating springs;
- make sure that the drum rotation bearings are operating normally;
- check for cracks or destruction of the bearing crosspiece on the tank body.
During diagnostics, the technician makes sure that the drum itself is not deformed, is installed in a normal balance position, and has no cracks or other damage.
Repair of a washing machine to eliminate drum play and accompanying troubles is carried out based on diagnostic results - mechanical breakdowns tend to cause a chain of problems due to additional loads that arise when the moving part does not work properly. The repair technology involves replacing damaged spare parts with new ones, which manufacturers of washing machines Samsung, Indesit, Bosch, Candy, LG, Ardo, Zanussi, Electrolux, Beko and other brands indicate in a special list for certain models.
Verdict
If you are not sure or difficulties arise during the process of replacing parts, it is better to leave your idea until the technician arrives. Incorrect manipulations and incorrect connection of the device to the system can lead to breakdown of vital parts for the equipment. It is better to entrust complex repairs to specialists.
Washing machines often break down. They can be serious and not very serious. You can ignore minor problems for the time being, since they will not lead to major troubles. But serious problems require immediate attention, because if you delay repairs, the washing machine may completely fail.
If you notice that the drum has started to loosen, wait until the wash is finished and do not start the unit until the problem has been fixed. It is recommended to immediately diagnose the machine: this can be done by contacting a service center, or you can solve the problem yourself.
Faulty bearings and crosspieces on the tank
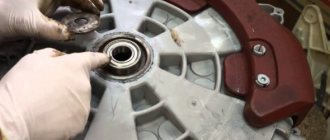
The washing machine drum rotates inside the tub, which means that it is supported by a bearing mounted on the supporting part of the axle. At the point where the drum pulley enters the tank body there is a reinforcing cross with space for a bearing. If the bearing itself bursts, loses its smooth sliding or is deformed, then first there will be a grinding noise and noise, then the vibration will increase, and eventually the drum will dangle or jam.
If the crosspiece is damaged, the bearing begins to move relative to the axis, causing lateral play of the drum. This leads to increased wear of parts. Due to heavy loads, a crack may form in the tank through which water can leak. In this case, in the spin mode, the vibration will be so strong that the machine will not be able to maintain speed and will begin to jump around the room.
Due to bumpiness and lateral forces, shock absorbers, dampers and tank suspension springs, which compensate for its swing, can come off. If you notice that the machine is knocking loudly during the washing mode, then a chain of breakdowns has probably already developed, the elimination of which will require serious work.
Replacing the part itself
Now you can proceed directly to solving the problem when the drum in the washing machine is hanging loose.
The disassembly process and bearing replacement may look like this:
- Unscrew the pulley bolts and remove it.
- Carefully knock out the shaft using a rubber hammer.
- Next you should deal with the bolts connecting the parts of the tank.
- Now you can see the bearing - it is knocked out with a chisel. After this, you need to remove the seals.
- At this stage, it is necessary to prepare a place for installing a new part by lubricating it with the selected product.
- Install new seals and bearings.
- This completes the repair procedure; all that remains is to reassemble everything in reverse order.
If the work seems simple, then you should not think for a long time and it is better to get down to business right away. Otherwise, if you have questions, it is better to call a specialist at home.
In addition, in some models the tank may not be dismountable, which significantly complicates the entire operation. In this case, if the drum of the Indesit washing machine is loose, then you should definitely seek professional help.
Replacing bearings in a washing machine
To replace the bearings, you will have to remove the back panel of the machine body, disconnect the drum axis from the motor shaft, and in some models, remove the electric motor. Since the bearing is firmly pressed into the mount during assembly, it will have to be knocked out. In some car models it is possible to remove the crosspiece, in some you have to completely remove the tank.
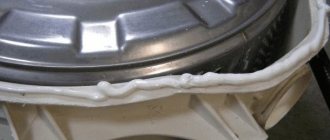
Particularly difficult are cases when the washing machine has a one-piece welded composite or plastic tank. To access the drum you will have to cut it. A new one is installed in place of the removed inoperative bearing, after which the rotation and rigidity of the drum installation are checked, reassembly is carried out and the machine is tested.
How to change the bearing yourself?
First of all, evaluate your strength. If you are not confident in yourself, then it is better to call a specialist. Also note that repairs will require specialized tools.
Important! Different models of washing machines may differ in internal structure.
Preparation
Required tool:
- sets of keys (socket, open-end and hex);
- regular and rubber hammer;
- various screwdrivers;
- a pair of adjustable wrenches;
- bearing lubricant (usually LITOL-24 is used);
- spare bearings and seals;
- chisel.
Prepare your workspace in advance. Disconnect the washing machine from the network and communications. Move it so that you can easily reach the back of the device.
Disassembly process
This stage includes the following points:
- First, unscrew all the bolts on the back panel and remove it.
- Remove the dispenser.
- Remove the control unit by unscrewing the screws that secure it.
- Remove the blockage.
- Remove any remaining mounting hardware and remove the front panel.
- Now you need to loosen the clamp, but first remove everything that interferes with this.
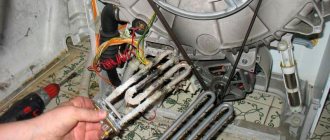
- Remove the counterweight and then the heating element.
The work of dismantling the heating element, although not too difficult, is very responsible. Be sure to remember or write down the order in which all wires are connected.
- Disconnect all wires, pipes and belt from the tank.
- Unscrew the engine and remove it from the mount.
- Now you can easily remove the tank and drum.
It is better to move the tank to another place, for example, a table, where it will be convenient to work with it.
This stage is simpler, so it should not cause you any difficulties. Sequencing:
- Remove the rubber seal (cuff) to avoid damage during disassembly.
- Place the tank so that the pulley is on top and remove all the bolts holding the pulley in place. Remove the last one.
- Now the crucial moment is knocking out the shaft. This must be done with a rubber hammer by lightly hitting the shaft.
We suggest you familiarize yourself with How and how to wash a carpet at home - tips and tricks
You can also use a regular hammer, but place a block of wood on the shaft, otherwise you may damage it.
- Once the shaft is free, remove all the bolts connecting the two halves of the tank. After this, separate them (the halves).
- Now the bearing is visible. But before you take it out, remove all excess grease and dirt that has stuck to the top.
Take the time to inspect all parts of the washing machine for damage. In order not to disassemble it again later, it is better to identify all the faults at once.
- Knock out the bearing using a chisel, then remove the seals.
- Wipe thoroughly and lubricate the area.
- Install new seals and bearings and press them in using a hammer and chisel.
The work is finished. Now you need to assemble everything in reverse order, connect it and check it in action.
Before starting repairs, read about your washing machine on the Internet. If the tank is non-separable, then repairing the bearing is much more difficult. It is better to take the device to a service center.
Damage to shock absorbers
The washing machine tank is suspended on several parts - compensating springs are installed on top, on which it swings, and shock absorbers and dampers restrain the vibrations from below. Rocking and a sharp increase in the backlash of the tank of the machine can occur for several reasons:
- breakage, damage, weakening of springs;
- breakage or destruction of shock absorbers;
- weakening of the shock absorbers as a result of wear.
All these breakdowns lead to a gradual increase in vibrations until you notice that the drum is dangling in the washing machine and touching the walls of the tank, knocking, and losing speed during the spin cycle. The longer the machine operates with such a malfunction, the greater the chance of bearing damage, drum deformation or tank breakdown.
What to do?
Having discovered the reason that the drum is loose, you can try to fix the washing machine yourself. Changing a bearing or shock absorber is quite easy; you can do it even without special knowledge in repairing household appliances.
Instructions for removing bearings and shock absorbers:
- disconnect the washing machine from the power supply and move it away from the wall;
- remove the back panel by unscrewing all the fasteners with a screwdriver;
- remove the washing powder feeder from the front panel;
- remove the control unit, having previously photographed the location of the wires, then secure the wires to the side wall of the device;
- remove the clamps that hold the rubber cuff.
- tighten the cuff itself;
- unlock the hatch;
- unscrew the fasteners that secure the front panel and remove it;
- remove the drive belt;
- disconnect the wires going to the heating element (before doing this, do not forget to photograph their location);
- pull out the pipe connecting the tank to the pump;
- remove the engine by unscrewing the bolts on which it is secured;
- remove the shock absorbers and return springs;
- Using a hammer and chisel, remove the drum pulley from the screw (to do this you need to slightly loosen it);
- using suitable tools, knock out the tank and pull it out;
- Now we need to remove the drum from the tank: if the tank is detachable, this will not be difficult, but for a solid tank we cut it along the weld seam, after which we carefully pull the drum out of it;
- We also carefully knock the bearings out of their sockets and take out the seals;
- Before replacing worn or damaged parts, we clean the fastening points from dirt.
To see the entire process of disassembling the washing machine and installing the shock absorber, see the video below.
The following video will help you remove and replace the bearing on a washing machine tank yourself, using Samsung as an example. For instructions on replacing bearings on machines of other brands, see our article “Replacing a bearing in a washing machine with your own hands.”
Minor swaying of the drum is provided for by the design of all washing machines, without exception, but a heavily dangling tank is a sure sign that the equipment will soon fail. It is important not to wait for an emergency stop or a water spill and to begin repairs immediately. The choice between “fix it yourself” or “seek help from specialists” depends on the complexity of the breakdown and the presence of associated damage, which can only be identified based on a thorough diagnosis.
Instructions for removing bearings and shock absorbers:
- disconnect the washing machine from the power supply and move it away from the wall;
- remove the back panel by unscrewing all the fasteners with a screwdriver;
- remove the washing powder feeder from the front panel;
- remove the control unit, having previously photographed the location of the wires, then secure the wires to the side wall of the device;
- remove the clamps that hold the rubber cuff.
- tighten the cuff itself;
- unlock the hatch;
- unscrew the fasteners that secure the front panel and remove it;
- remove the drive belt;
- disconnect the wires going to the heating element (before doing this, do not forget to photograph their location);
- pull out the pipe connecting the tank to the pump;
- remove the engine by unscrewing the bolts on which it is secured;
- remove the shock absorbers and return springs;
- Using a hammer and chisel, remove the drum pulley from the screw (to do this you need to slightly loosen it);
- using suitable tools, knock out the tank and pull it out;
- Now we need to remove the drum from the tank: if the tank is detachable, this will not be difficult, but for a solid tank we cut it along the weld seam, after which we carefully pull the drum out of it;
- We also carefully knock the bearings out of their sockets and take out the seals;
- Before replacing worn or damaged parts, we clean the fastening points from dirt.
We suggest you familiarize yourself with How to clean sheepskin fur at home: washing and processing sheepskin using improvised means.
See the video below for a clear look at the entire process of disassembling the washing machine and installing the shock absorber.
The following video will help you remove and replace the bearing on a washing machine tank yourself, using Samsung as an example. For instructions on replacing bearings on machines of other brands, see our article “Replacing a bearing in a washing machine with your own hands.”
Replacing shock absorbers in a washing machine
The shock absorbers and springs of the tank suspension cannot be restored - the service center technician must replace them with new ones. Temporary solutions don't help. It is necessary to remove the body panels, loosen and disconnect the springs one by one, making sure that their attachment points are not damaged.
After the tank is released, the shock absorbers are removed and replaced, the tank is suspended in place, and if necessary, the technician installs new springs to replace those that have lost their elasticity. During work, the specialist checks whether the integrity of the tank and the bearing support crosspiece has been damaged.
After assembling the machine, a test run is done.
There is a foreign object dangling in the washing machine
While the washing machine is operating, you may notice knocking and rattling noises. Sometimes it is caused by a foreign object getting into the tank or drum. Most often, this phenomenon is associated with the separation of the shock absorber or spring from the base on the frame of the machine.
With vibration and increased rocking, the detached part knocks on the body and tank quite rhythmically, and it seems to you that something foreign has got into the drum. If the part comes off completely, then the rumble may not be so noticeable and rhythmic, but you will notice a clear swing of the drum in one direction.
A characteristic sign of suspension problems is the drum swaying at low speeds in the washing mode. The deviation from the axis will be noticeable, and over time you will hear a knock from impacts on the body. The origin and consequences of these faults can only be determined during serious diagnostics.
Cause Detection
It should be noted that the presence of a certain backlash is provided directly by the manufacturer. When the washing machine rocks, the drum will also rock, but not much. This phenomenon is normal.
At the same time, you should open the door and twist the drum with your hands; if you hear grinding, knocking and other unpleasant extraneous sounds, this clearly indicates a breakdown. Why does the LG washing machine drum hang loose? Typically, this may be due to problems of the following nature:
- bearing failure;
- shock absorber wear;
- presence of foreign objects;
- failure of seals.
You can feel the “bumpiness” of the drum by moving it a little from side to side. But how can we determine what exactly caused the uncharacteristic behavior of household appliances?
Why does the washing machine drum shake a lot during the spin cycle?
In the spin mode, the washing machine sets the drum to high rotation speeds. The greater the deviation from the drum axis, the greater the vibration will be, which will gradually turn into rocking and jumping of the machine on the floor.
The first signal of a possible breakdown may be the drum shaking and swaying during the washing mode. If you notice this phenomenon, stop the machine and make sure that it is not overloaded, the laundry is stacked evenly, and large items have not shifted to one side in the drum. If this does not help, and you feel that the washing machine drum is shaking more and more, stop washing. It's time to call a specialist!
Call a technician to repair or replace the drum and components
What to do if there is strong rocking, rattling and play in the washing machine drum during washing and spinning?
- Stop the wash, drain the water in the mode without rotating the drum, turn off the machine and try to rearrange the laundry or unload the drum.
- Run the machine for a short time without loading - the drum should not hang or sway.
- If this does not help, you should call a service center technician. Professional diagnosis is required.
You cannot remove the body panels yourself, pull back and disconnect the springs, shock absorbers and tank suspension dampers, or try to separate the drum axis from the bearing. You risk breaking the fastening hinges, damaging the crosspiece on the tank, and being injured by a suddenly released spring. This will not provide real savings on repairs.
How much does it cost to troubleshoot problems with drum play and vibration in a washing machine? The cost of repairs is determined by what parts had to be replaced to fix the breakdown. Without a full diagnosis, the cost of operations and components can only be calculated approximately.
How to replace a bearing?
Bearing failure is diagnosed based on a number of criteria:
- Presence of backlash when swinging the drum by hand
Uncharacteristic hum when washing
The appearance of puddles under the machine
The bearing is considered a durable mechanism, the service life of which reaches 7-10 years. It breaks due to wear or flooding. Rusting of metal parts is a sign of a leaking drum or cracks in the powder reservoir. In this case, you should call a specialist who, based on professional diagnostics, will identify the causes of the washer failure.
You can install a new bearing instead of a faulty one yourself. However, you should read the instructions in advance to properly prepare the device for replacement. You should start by preparing all the necessary tools, as well as new parts, including oil seals.
After this, you need to disconnect the washing unit from the electrical network. The device should then be installed so that the rear panel is accessible. You need to unscrew all fasteners on it, and then remove the entire panel. You can then remove the detergent dispenser. Using a screwdriver, unscrew the electronic control unit and set it aside.
We invite you to familiarize yourself with Wake Up and Mine! How to keep your windows clean for spring
Once the lock is released, you can remove the remaining parts and then remove the front of the panel. To loosen the clamp, remove all interfering elements. Then you can dismantle the counterweight and heating element. However, it is important to remember how the main nodes are located. To do this, you can even take their photographs.
Replacing the bearing begins with unscrewing and removing the pulley. After this, the shaft is knocked out using a rubber hammer. Next, you need to unscrew the bolts that connect the parts of the tank. Now that the bearing is visible, it needs to be knocked out. A chisel is used for this.
At the last stage, the seals are removed. After which the place for the new part is prepared. First, it is cleaned and then lubricated with a special product. Now you can assemble everything, but only in reverse order.
