What kind of container can you use to make jam?
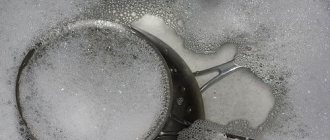
Aluminum pan or basin
There is a lot of disagreement about this type of utensils for making preserves and preserves. Even in Soviet times, many people prepared sweet desserts in such containers. However, later this method began to be questioned.
This is based on the fact that the material not coated with enamel has an oxide film, which is destroyed when interacting with fruit acids during cooking, and its remains end up in the finished product, which adversely affects not only the taste, but also the quality of the boiled berries.
If you don’t have any other cooking containers in your bins, don’t panic. You can still cook jam in an aluminum container. The main thing is to take into account a number of nuances so as not to correct the workpiece later.
- Under no circumstances should you use cookware with chips, clear scratches or cracks - these damages allow metal particles to penetrate into the product.
- Keep in mind that the walls and bottom of such containers are quite thin. Due to this, the jam may burn, and as a result, a burning smell will appear, which will completely ruin the entire flavor. To avoid incidents, stir the mixture regularly using a wooden spatula.
- Make exclusively “five-minute” jam. This type of container is not suitable for preparing recipes in several stages of cooking.
- After the jam is ready, immediately transfer it to jars, because over time the oxidation process starts. Aluminum is not suitable for food storage.
- Choose raw materials for cooking in an aluminum container with the lowest acidity. These can be: figs, peach, apples, cherries, plums.
Advice : if you are going to prepare jam in an aluminum container, then first cover the fruit with sugar to infuse in another container.
Enameled cookware
One of the best types of dishes in which it is recommended to cook jam. Such a container is also good for long-term preparation of a product, for example, jam, or if you follow a recipe that requires several boils.
True, there is also the other side of the coin.
With a new pan or basin you don’t have to worry about anything, but those that have been used more than once have several disadvantages.
- Enamel is a rather fragile coating. Under constant exposure to high temperatures, it can crack. As a result, small particles break off, invisible to the naked eye, which enter the human body when tasting the delicacy.
- Over time, chips form on the surface of enameled cookware, revealing the inner material – metal – underneath. In these places, the iron reacts with the product, and a burn is formed, which will be extremely difficult to get rid of later.
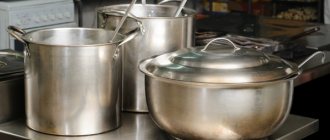
Stainless steel container
The best thing you can use for cooking dessert for the winter is stainless steel cookware. This material is also rightly called “food grade steel”, and for good reason.
It is resistant to high acidity foods, which is very important for making jam from ingredients such as cranberries, currants, cherries, lingonberries and many others.
With this utensil, you don’t have to worry about the jam acquiring an off-flavor or being “saturated” with undesirable substances.
But when choosing a container, keep in mind that its types may vary.
- For example, basins and other containers with thin bottoms are only suitable for cooking “quick” delicacies. Otherwise, you will have to quickly decide how to clean the pan from burnt jam.
- But dishes with a bottom in several layers are applicable for absolutely any type of dessert. In it, the temperature is distributed evenly around the entire perimeter.
Production of aluminum cookware
Depending on the manufacturing technology, dishes can be:
Production of kitchen items from extruded aluminum.
- It all starts with a round blank, which will become the bottom of the future product. It is marked with the volume and name of the manufacturer.
- The workpiece is placed in the lathe opposite the blank. There is a plastic roller on it that comes into operation. The blank spins at a speed of 1000 rpm. The operation of the roller is controlled by a computer. All this is reminiscent of the work of a potter on a pottery machine. Only rotation occurs not around a vertical, but a horizontal axis.
- The machine cuts off excess aluminum and tucks in the edges.
- After the final adjustment to the desired size, another cutter cuts off the sharp edges from the rim of the future product.
Stamped ware
Stamped kitchen items are made from whole sheets of pure aluminum through the mechanical action of presses and hammers. Products are formed into simple shapes. Under the influence of extrusion and pulling, the structure of the metal is disrupted. Such dishes are light, with thin walls and bottom. Therefore, it is susceptible to deformation from high temperatures and minor impacts. The cost of such products is low.
The non-stick coating is rolled onto the aluminum blank, not onto the finished product. Therefore, during the molding process, the integrity of the structure of not only the metal, but also the non-stick coating is violated. It turns out less durable.
The production of cast dishes is more expensive. The metal does not experience any mechanical stress, as a result of which its structure is integral.
- Aluminum is poured into a mold, where it hardens in 3 minutes.
- The frozen product falls out of the mold. A hydraulic press cuts off the excess.
- After trimming off the excess, the inner walls are coated with white aluminum oxide using 6 nozzles. It improves adhesion to the non-stick coating that will be applied later.
Cast ware
It is made of high quality aluminum, which is poured into casting molds. When solidified, durable products with thick walls and bottom are obtained. The metal does not experience any mechanical stress, so the integrity of the structure is not compromised. Products made from it are more durable and strong. Not subject to deformation from high temperatures and mechanical stress.
The non-stick coating is also more durable, as it is applied to the finished product by spraying.
Such dishes keep heat for a long time, food simmers in it, and the taste of the dishes turns out different, more rich and pronounced.
Today, some manufacturers make aluminum cookware from pure metal, while others add various alloys; apply internal and external coatings.
Pan or basin
The type of container is selected taking into account the number of berries and fruits that the consumer plans to prepare for a long or short term. The same can be said about the volume of the product.
If you decide to make jam from 1-2 kilograms of berries, then it is preferable to use a saucepan. However, if we are talking about cooking a delicacy from 5-10 kilograms of fruits or berries, then you cannot do without a massive basin.
The basin is used when making jam from 5-10 kilograms of fruits or berries.
Let's sum it up
Aluminum cookware will faithfully serve in the kitchen for a long time. Chemists are not against preparing various dishes in such containers. The main thing is that they are not sour or overly salty. And it is advisable not to store anything in these containers. Use pots and pans for cooking only! And for salting lard, fish, cabbage, it is better to use dishes made from other materials. The ideal option is glass. You can also use steel or enamel containers. And if there is absolutely nothing suitable, just cover the pan with a bag suitable for storing food.
We recommend: How to make the soles of winter shoes non-slip?
Briefly about the alloys used
The main types of alloys used in the production of kitchen utensils:
- Technical aluminum A5. A clean, soft metal with good thermal conductivity. Based on it, alloys AK7 and AK9 are produced (safe for health, but with greater hardness).
- Cast aluminum is used in the production of thick-walled cookware: duck pots, frying pans, cauldrons. The main advantages are increased heat capacity and low weight.
- Bimetallic sheets. They are used in the production of stamped products that retain the main property of aluminum - high thermal conductivity with increased strength.
Most of the old cookware was made from pure aluminum, while alloys are more often used in the production of new ones.
Features of aluminum and duralumin frying pans
It is customary to distinguish 3 technologies for the production of aluminum cookware:
- Stamped. This method is the cheapest and involves making a frying pan by cutting and stamping a finished aluminum sheet. As a result, the walls of the dishes are thin and excessively flexible. They are easily damaged and deformed, their service life is no more than 3 years.
- Forged. Forged aluminum products are quite durable. They are produced by pressing metal using a special apparatus. The bottom of the cookware is often equipped with steel plates.
- Cast. Making a cast aluminum frying pan is an expensive process that involves pouring molten material into molds of a specific configuration. During the production process, the metal retains its beneficial qualities. Cast cookware is characterized by durability and the ability to heat evenly.
Aluminum kitchen items are made of aluminum with an admixture of other metals: copper, magnesium, iron and silicon.
About the dangers and benefits of an aluminum frying pan
Aluminum and aluminum frying pans have the following advantages:
- low cost;
- light weight of products;
- uniform heating;
- cast aluminum does not corrode;
- possibility of preparing dishes without adding oil;
- harmlessness to human health;
- easy cleaning process.
The main disadvantages of aluminum frying pans:
- high probability of deformation under mechanical stress;
- Cookware made of duralumin without a non-stick coating may rust;
- the aluminum surface can be easily scratched with a sharp object;
- any damage to the coating negatively affects the quality of the food;
- Excessive heat causes food to stick;
- susceptibility to oxidation.
How to make jam correctly
Fragrant jam, smelling of sun and warmth, is especially pleasant to taste in the winter cold, remembering summer. It’s hard to imagine a family tea party without fragrant jam, which both children and adults love. Tea with a tempting dessert brings people together, provides an opportunity to socialize and enjoy a delicious dessert. Jam, which has preserved the taste of natural berries, not only lifts your spirits and gives you a piece of summer warmth, but also fills you with energy, because it contains all the necessary vitamins, minerals and microelements. Every housewife has her own secrets on how to properly prepare delicious jam from strawberries, raspberries, currants, gooseberries, cherries, and apricots, and especially discerning connoisseurs know how to properly prepare jam from rose petals or walnuts. But we will talk about making classic homemade jam, which will turn out tasty and aromatic if you approach the matter with soul.
Negative Impact
Modern science has long known the harm of heavy metals; aluminum cookware is also harmful to health, although aluminum itself is not a representative of this group of substances. In most cases, the substance enters the body with water, and dishes made from it only aggravate the situation. Aluminum coagulants are often called a factor of secondary pollution; they are used to purify water, but with large contamination, the aluminum itself becomes harmful.
There was a time when metal was considered safe because it was protected by a film of oxide. The Moscow Institute of Hygiene confirmed whether aluminum cookware is harmful to health. Scientists have proven that such a substance can disrupt energy exchange in cells. As a result, they cannot reproduce normally, and chaotic division begins, which can cause malignant tumors.
The harmfulness of aluminum cookware can cause a large number of serious illnesses:
- Metabolism deteriorates.
- The function of the nervous system is impaired.
- Impairs cell reproduction and growth.
- Cramps.
- Memory loss.
- Movement disorders.
An excess of aluminum in the body accelerates the removal from the body of a useful mineral - Calcium. The absorption of phosphorus decreases, at the same time aluminum begins to replace it and its accumulation accelerates by 10-20 times. Oversaturation with metal can cause brittle bones, disrupt the growth of bone tissue, and cause bone and dental fluorosis. At the same time, hemoglobin production is inhibited and kidney function is impaired.
For children and elderly
Children and elderly people are especially prone to the negative effects of aluminum cookware. The following changes have been observed in children and adolescents:
- Increased excitability.
- Motor skills disorders.
- Anemia.
- Frequent headaches.
- Liver and kidney diseases, colitis.
Teenagers suffer from aggressiveness, hyperactivity, and they are more likely than other children to have problems with their studies. Metal slows down growth and weight gain.
Elderly people who eat from aluminum utensils are more likely than others to suffer from dementia, memory loss and general personality degradation. In some cases, aluminum is called one of the provoking factors for the onset of Alzheimer's disease. Aluminum cookware is harmful to health and is one of the main sources of serious illnesses.
After scientists' discoveries about the dangers of aluminum cookware, most countries abandoned its production. But in the countries of the former USSR there are still many enterprises producing utensils from dangerous metals. It is still in demand and used in kitchens.
How to store jam?
It is best to store jam in small glass jars with a screw-on lid (the lids should be new each time). 250 grams is the ideal size, there will be enough jam for a week or two and it will not have time to spoil.
To prevent jam from turning into wine, be sure to sterilize jars and lids. It will take you 30 minutes, but you will be sure that nothing will spoil. The procedure is actually not very complicated, especially if you have a dishwasher. Place the jars and lids in the dishwasher on the hottest cycle, but without detergent. Or place the still wet jars and lids in the preheated oven for 15 minutes. If you prefer traditional methods, boil the jars and lids in a large saucepan. Remove the sterilized jars and lids with tongs and place them on a clean towel to dry.
Is it possible to put aluminum dishes in the microwave, oven, or wash them in the dishwasher?
Is it possible to put aluminum cookware in the oven or microwave and wash it in the dishwasher? Let's take a closer look at these issues.
- It is strictly forbidden to use a dishwasher to wash aluminum cookware. The reason is this - ordinary aluminum dishes, which were made several decades ago and inherited from us, tend to oxidize from the effects of alkali and oxidizing agents contained in detergents. Consequently, holes will appear on it very soon.
- If we talk about modern aluminum kitchen utensils, they will lose their beautiful appearance due to exposure to these substances - they will become cloudy and less shiny.
- It is advisable not to place metal utensils in the microwave oven. But there are exceptions, these include aluminum cookware.
Is it possible to put such dishes in the microwave?
- Now let’s figure out whether such dishes can be placed in the oven? Yes, you can. After all, you can cook porridge or soup in the oven, and the resulting dishes are nutritious and very tasty. Our grandmothers baked in aluminum dishes, baked Easter cakes, and cooked aspic. If you also want to bake, for example, a pie, after cooking, transfer the finished dish to another container. Are you afraid to cook in such dishes? Then choose one that has a protective surface.
How to prevent sweets from burning
To get the perfect jam, it is necessary not only to correctly select the raw materials and containers used for it, but also to observe an important condition - careful control over the process. The most common problem is burning of the contents. As a result, the sweetness will smell unpleasant and taste bitter.
Tip : You can get rid of the burnt taste by boiling the dessert in a separate clean container with the addition of any of the following products: lemon juice or acid, cinnamon, cognac, orange or lemon zest.
There are several cooking rules that are worth the attention of not only beginners, but also more experienced cooks.
- Give preference not to a saucepan with handles, no matter how convenient it may be. The best option is a wide basin with low walls. It may seem like a bad choice because it takes up most of the cooking surface. However, it is in the basin that the mass warms up evenly.
- Pay attention to the fire level under the cookware. It should not “lick” the walls of the container, but only heat the bottom.
- After the contents boil, set the burner flame control to medium. Ideally, the workpiece should be boiled over low heat for the first ten minutes.
- Stir throughout the entire thickness of the jam. The spatula or spoon, depending on what you use, should reach the bottom. Thus, berries or fruits will not stick to the basin and, as a result, burn.
- Observe the proportions of the ingredients. For one kilogram of berries, you need to add a similar volume of granulated sugar. And its excess can lead to irreparable results.
- Skim off foam regularly.
- Take your time to turn on the heat under the pan. Let the berries or fruits release their juice combined with sugar. Start cooking only when the sand is almost completely dissolved.
Advice : it is quite possible to save the situation if you did not take care of the jam and it burned, but only if the problem is detected in a timely manner. To do this, you need to pour the sweet mass into another clean container and continue cooking.
Repairing an aluminum pan
You can restore enamel at home using homemade putty. The following components will be required:
- white clay – 220 g;
- calcined borax – 50 g;
- sodium metasilicate – 25 g;
- slaked lime – 25 g;
- powder glass – 30 g;
- clean water – 15 ml;
- capacity;
- mortar.
All reagents can be purchased at chemical stores, as they are sold in bulk. The components must be placed in a mortar, crushed and mixed thoroughly. The chipped area should be treated with sandpaper, grease should be removed, the prepared putty should be applied and left for 48 hours. During this time, the putty will completely adhere to the enamel; all that remains is to sand the area to make it nice and smooth.
Even if you manage to repair the hole and restore the coating, such dishes will still not last long. In addition, food cannot be stored in it for a long time and exposed to high temperatures. Therefore, it is better to initially keep the pots in their original form and handle them with care.
- Enamel is destroyed by sudden temperature changes, so dishes with such a coating should not be placed on the fire empty.
- To avoid chipping the bottom of the pan, you can use wooden spoons and spatulas for stirring.
- If the enamel has already begun to fall off, then you should not use the dishes. You cannot cook food or boil water in it, as metal compounds can enter the body and cause poisoning.
- It is better to cook first courses, compotes and jelly in an enamel pan, as porridge and some second courses can burn strongly. Naturally, to wash off such deposits you will need hard brushes that destroy the coating.
- Before first use, the new pan must be washed with dishwashing detergent and wiped dry.
We suggest you read: How to clean a mattress from sweat stains?
To ensure that the enamel retains its qualities for as long as possible, dishes with such a coating can be hardened. To do this, you need to fill the pan with water, add salt at the rate of 2 tbsp. for 1 l. water and boil. You can drain the water only when it has completely cooled down. If you follow these recommendations, you can ensure that the dishes will serve for many more years.
Metal kitchen utensils can last a long time. With proper care, it practically does not fail. But still, during cooking, various troubles happen, including overheating, which can result in a hole appearing. After such an incident, the pan is most often thrown away, but is it always necessary to immediately run to the trash heap? Repairing an enamel pan is sometimes possible, and this is what will be discussed next.
The situation is much more complicated with aluminum surfaces. Soldering them is very difficult. Of course, if you have argon welding (and such a device can now be bought completely freely) - there are no problems. But it only makes sense to buy such expensive equipment if you are going to do this all the time - it’s definitely not worth doing this just for one aluminum pan.
Is it necessary to throw away a damaged pan? Not at all. It can be used for a variety of purposes - for example, it is quite suitable in the garden. You can use it to collect fruits and vegetables, as well as carry water for irrigation. For repair you need:
- piece of aluminum;
- bolt with nut;
- drill;
- hacksaw for metal.
You need to make two patches from aluminum. They must be larger than the hole:
- Apply patches to the hole from the outside and inside.
- Fasten them with one or more bolts - the nuts should be on the inside.
If you need to restore the appearance of aluminum cookware, simply clean it. The most common soda is suitable for this. Clean the pan and it will regain its former beauty.
In the same way, the spectacular appearance of stainless steel products is restored. In this case, you don’t even need soda - any dishwashing detergent is enough.
Enameled cookware is convenient, beautiful and affordable. But very often problems arise with cleaning such dishes. How to clean enamel cookware after cooking? We offer a few simple tips to help you with this:
- Allow the dishes to cool before washing them. If you immediately put it under water, it may be damaged by a sudden change in temperature.
- Enameled dishes should only be washed with warm water and liquid dishwashing detergent.
- Do not use metal sponges and brushes, or powdered dishwashing detergents. To clean enamel-coated dishes, use a soft sponge. Do not scratch the enamel under any circumstances.
- In order to clean enamel dishes that have become darkened from prolonged use, soak them in salted water or water with vinegar for several hours. The proportion is one tablespoon of salt per liter of water or 5 tablespoons of vinegar per liter of water, respectively. If you don’t have time to soak the dishes, then boil them in solutions prepared as described above. Then rinse the dishes thoroughly and wash with detergent.
If you follow simple rules of care, the dishes will not only serve you for many years, but will also delight you with their beautiful appearance.
We suggest you familiarize yourself with How to clean the oven from grease and carbon deposits at home? How to clean the oven from old burnt fat?
Modern utensils for jam, which is better: Teflon or ceramic
When choosing which pan to cook jam in, Teflon is not the best option. This coating does not withstand high temperatures. You can use such dishes to prepare a small amount of delicacy using the quick cooking method.
Ceramic cookware has many advantages:
- long service life;
- uniform heating;
- insensitivity to temperature changes.
But ceramics cools very slowly. Therefore, when cooking jam in several stages, it will have to be constantly poured.
Which capacity is better
When choosing a vessel for making jam, you should first decide on the volume of the container. If you plan to prepare delicacies from delicate berries (raspberries, strawberries), then to preserve their shape, it is better to choose small containers - up to 3 liters. You can cook fruits and berries with a rougher shell (apricots, currants, cherries, plums) in a container with a volume of 5 liters or more. If you need to cook a large amount of jam, then it is better to divide the batch into 2 times, it will be tastier and the berries will not be crushed under their own weight.
Pelvis
To make jam, you need a wide, shallow container with a flat bottom. The basin most closely matches the description. Thanks to the large bottom area, a large surface is created for the evaporation of liquid and contact with fire. The jam will cook quickly and will not burn. The low height allows all layers of ingredients to cook equally. Therefore, a bowl for jam is considered the best utensil. When choosing it, you should pay attention to the material of manufacture. It would be a good idea to purchase a lid along with the basin, since some types of jam require repeated cooking.
Pot
Despite the fact that a basin is more suitable for making jam, pans are used much more often. The main advantages of pans are ease of use and compactness. When using them, it will take longer to cook and the liquid will evaporate more slowly, possibly making the jam runny. It is better to use large pans filled halfway, so the jam will cook more evenly.
How to clean a pan made of different materials from burnt jam
There are several ways to wash dishes after burnt sweets, which vary depending on the material from which the container is made. It is necessary to clean not only the inner surface, but also the outer side.
Aluminum
You can wipe off carbon deposits from dishes made of this metal using purchased special preparations, but over time these begin to deteriorate the surface, and the products quickly become unusable.
There are several folk remedies that can more carefully clean the walls of the pan from stains formed after burnt jam.
- To remove light plaque, you can use regular milk whey. It is necessary to fill the pan with it overnight, and then rinse thoroughly.
- Another “handy method” involves a combination of laundry soap and PVA glue. To achieve the result, you need to mix half a grated bar of soap with 100 ml of glue and dilute the resulting mixture in a saucepan with water. The solution is then brought to a boil and left for a couple of hours.
- To remove more serious stains, use a mixture of ammonia and hydrogen peroxide. They are combined in equal proportions, half a bottle each, and poured into a pan filled to the brim, then boiled for 30 minutes and set aside for a couple of hours.
- If you need to clean the outer surface, simply place the damaged pan in a larger container and use any of the above options.
Enamel
This type of kitchen utensil is quite easy to clean. The following tools can be used for this:
- Powders with abrasive particles. A sufficient amount of powder is poured into the pan and a little water is added. Time is given for the carbon deposits to “melt” slightly, and then it is washed off with the rough side of the sponge.
- Lemon acid. 0.5 cups of its crystals are poured with the required amount of liquid and boiled in a contaminated container.
- Salt. Sprinkle a generous amount onto the burnt area, leave for 2-3 hours, and then rinse thoroughly. If necessary, repeat the manipulations. You can also make a steep saline solution (about six tablespoons per liter of water) and boil in a container for about 45 minutes.
Tip : if the enamel surface has darkened in places where carbon deposits have been removed, boil 1 tablespoon of bleach diluted in a liter of water in a bowl.
Stainless steel
Stainless steel can be returned to its original state after unsuccessful cooking in the following ways:
- Timely soaking will make the task easier. When the soot is wet enough, sprinkle it with salt, leave it for 4 hours, and then clean it off with a sponge. This method does not even require the use of special powders.
- Shavings of laundry soap or high-quality dishwashing detergent, which is filled with just three centimeters of water and boiled for 30 minutes, will also help.
Recipes for pickling cucumbers in a pan for the winter
We present to your attention six different recipes. Do not forget about the initial preparation of the fruit, which is described above. During the harvesting season, we strongly recommend trying to pickle cucumbers in a saucepan in two or three ways. This way you will choose the most suitable one for your family, and you will always have something to treat your guests.
Cold way
This is a classic pickling option. You will need a large enamel pan. The recipe is for 10 kg of vegetables. Of course, you can take less or more; accordingly, vary the amount of other ingredients yourself.
What you will need:
- 10 kg of cucumbers;
- 7 dill umbrellas;
- 30 currant leaves;
- 1 head of garlic;
- 4-5 horseradish leaves (can be excluded from the recipe if desired);
- water (depending on the volume of the pan);
- 70 g of salt per 1 liter of water.
How to pickle:
- Make sure the pan is clean and dry. Remove foreign odors with baking soda.
- Sort the prepared cucumbers by size.
- Divide the garlic into cloves.
- Coarsely chop the horseradish leaves.
- Mix all the greens, divide into 3 parts.
- Place one part of the greens on the bottom of the pan, and place the largest cucumbers on top.
- Next, cover the vegetables with herbs and garlic.
- The next layer is cucumbers again, but not so large.
- The final layer is the remaining herbs and garlic.
- Considering the size of the pan, dissolve the required amount of salt in cold water. If you are not sure how much will be included, it is better to take more.
- Stir thoroughly until completely dissolved.
- Pour the resulting brine over the vegetables.
- Do not cover the pan with a lid; press the vegetables down with something heavy.
- Cucumbers should be kept in a dark place under pressure for at least 50 hours.
- After the required time, remove the pressure. Cover the pan with sterile gauze. Pay attention to its integrity. It is unacceptable for fibers to float in vegetables.
- Store cucumbers in a cool, dark place without removing them from the pan.
Important! Be careful with spices. Cold pickling often causes vegetables to become moldy. Therefore, do not use oak, cherry or raspberry leaves. Omit the onion rings.
Hot way
This method allows you to salt delicious cucumbers much faster.
Ingredients:
- 3 kg of cucumbers;
- 1.5 tbsp. l. salt per 1 liter of water;
- 5 dill umbrellas;
- cherry and currant leaves to taste;
- 5 cloves of garlic;
- horseradish leaves optional.
Cooking method:
- Prepare the cucumbers, don't forget to cut off the ends on both sides. Pierce fruits that are too large at the ends with a toothpick.
- Leave the leaves whole or chop them. It all depends on your preferences.
- Place some of the greens on the bottom.
- Place the larger cucumbers on top.
- Place the garlic between the fruits.
- Place smaller ones on top of large cucumbers.
- Place the remaining herbs and garlic at the very top.
- Set the water to boil.
- As soon as the water begins to bubble, add salt. Don't forget that 1.5 tbsp. l. are designed for 1 liter of water, not for the entire recipe.
- Mix thoroughly for 3 minutes.
- Pour the boiling marinade over the vegetables in the pan.
- Press down with pressure.
- Leave for 24 hours.
- You can take samples from cucumbers within a day.
Note! Horseradish leaves make vegetables firmer and crispier. If you like soft cucumbers, omit this ingredient from the recipe.
Cucumbers in a pan like barrels
Barrel cucumbers are familiar to many.
Especially those who spent their childhood in the village with their grandparents. In urban conditions, it is also possible to pickle vegetables with the same taste. The number of ingredients here increases significantly, but the taste is worth it. Ingredients:
- 3 kg of vegetables (you can take slightly overripe ones);
- 2 liters of water;
- black peppercorns to taste;
- 2 tbsp. l. mustard powder;
- 1 tsp. mustard seeds;
- 1 head of garlic;
- 6 buds of cloves;
- 150 g salt;
- several cherry and currant leaves;
- 3-4 bay leaves;
- 2-3 leaves of horseradish.
Cooking method:
- Prepare the cucumbers.
- Chop the garlic.
- Place all the herbs, garlic, cloves, bay leaves, mustard seeds and peppercorns on the bottom of the pan.
- Prick large cucumbers with a fork or toothpick.
- Place the fruits tightly in the pan. Start filling the container with large vegetables.
- Boil the water. Dissolve salt in boiling water and bring to a boil again.
- Fill the pan with boiling water.
- Pull the gauze over the top.
- Sprinkle mustard powder over the gauze. Try to do this evenly over the entire area.
- Press down on top with something heavy.
- Place in a cool place out of direct sunlight for two weeks.
Important! For two weeks there is no need to remove the pressure and check what is under the gauze. This way you risk introducing excess air, which will cause spoilage of the product.
Recipe without vinegar
Ingredients:
- 1 kg of cucumbers;
- 1 liter of water;
- 5 currant leaves;
- 1 horseradish leaf;
- 2 cherry leaves;
- 1 sprig of dill;
- peppercorns to taste;
- 1 pod of hot pepper;
- 50 g salt.
Cooking method:
- Chop the greens.
- Finely chop the hot pepper.
- Place cherry, currant and horseradish leaves on the bottom of the pan.
- Then place the chopped pepper.
- Spread the vegetables compactly on top.
- Sprinkle chopped dill on cucumbers.
- Dissolve salt in cold water.
- Pour cold marinade over vegetables.
- Place under pressure.
- You can try it in 3-4 days.
Crispy pickled cucumbers
Ingredients:
- 8 kg of cucumbers;
- horseradish root;
- 3 leaves of horseradish;
- 10 cherry leaves;
- 3 oak leaves;
- 10 dill umbrellas;
- 3-4 heads of garlic;
- 6 tbsp. l. salt per 3 liters of water.
Cooking method:
- Prepare the cucumbers.
- Grate the horseradish root or finely chop it.
- Chop the garlic.
- Place cherry, horseradish and oak leaves on the bottom of the enamel bowl.
- Place the vegetables tightly on top, adding the garlic last.
- Place the dill at the very top.
- Dissolve salt in cold water, taking into account the proportions.
- Pour cold marinade over vegetables.
- Place a weight on top. A heavy jar that can be placed on a cutting board or flat plate will do.
- Fold the gauze several times and cover the pan.
- Place in a dark and cool place for 5 days.
Attention! If you notice mold, bubbles or foam under the gauze, simply remove it carefully. This is not a sign of a spoiled product, but a normal occurrence. This is how the result of fermentation is manifested, without which sourdough is impossible.
Spicy spicy cucumbers
Ingredients:
- 3 kg of cucumbers;
- 2 tbsp. l. salt per 1 liter of water;
- 1 tsp. mustard seeds;
- 1 horseradish root;
- 4 currant leaves;
- 0.5 tsp. ground red pepper;
- 1 dill umbrella.
Cooking method:
- Don't forget to soak the cucumbers, cut off the ends on both sides and pierce the large fruits with a fork.
- Grate the horseradish root on a fine grater or chop it.
- Place currant leaves at the very bottom of the pan.
- Place cucumbers on top.
- Then add the chopped horseradish root.
- Add mustard seeds.
- Add dill umbrellas.
- Dissolve salt and 0.25 tsp in water. ground red pepper.
- Before pouring, the remaining 0.25 tsp. pour pepper into the pan. Try to do this evenly throughout the entire container.
- Pour cold brine over vegetables.
- Place pressure on top.
- Place in a dark and cool place for 50 hours.
Which basins and pans are unsuitable for making jam?
Avoid using narrow, tall pans. You will not be able to prepare jam according to the recipe in them, since the moisture evaporates slowly and incompletely.
Designs with a thin bottom also cannot be used, since the sugar mass can burn, even if you cook on low heat. In addition to the thickness of the bottom, consider its shape - it must be perfectly flat and smooth for uniform heating.
After preparing the jam, the pan must be thoroughly washed.
Secret 7. Jam cannot be overcooked
Overcooked jam loses its unusual aroma, its color and taste change (unfortunately, not for the better).
Jam cannot be overcooked
How do you know when it’s enough to boil? You can determine the readiness of the jam:
- visually - if the jam has become translucent and the foam begins to accumulate in the center of the pan, it is ready;
- using simple manipulation - scoop a little jam into a spoon, wait until it cools down, and drop it onto a cold saucer. If the drop remains round and convex, the jam is ready, but if it spreads, then the cooking process is not completed.
Important:
The finished jam should be allowed to brew.
Video: harm of aluminum to human health
Read further: Recommendations on how to choose high-quality tableware for a picnic
7 best sorbents for cleansing the body: review and application
6 main rules of dental care
Pros and cons of using a carbon water filter
Poisoning with heavy metal salts - symptoms and treatment
Article rating:
( 1 ratings, average: 5.00 out of 5)
Share with friends:
You may also be interested in:
Is it possible to take chloramphenicol for diarrhea? Benefit and harm.
What are the beneficial properties of cherries for women?
Sloe berries: benefits and harm for men and women (jam, wine, moonshine)
Is chewing gum harmful to children's bodies? Are there any benefits?
( 1 rating, average 5 out of 5 )