Ammonia for oil and alkyd enamel
On such a surface there is a durable and dense film that is resistant not only to moisture and water, but also to mechanical stress. Therefore, such walls can be safely washed, but it is not recommended to use soap, soda or washing powders for this.
An excellent remedy for oil and alkyd enamel is an aqueous solution of ammonia, which can be prepared at the rate of 1 tablespoon per 1 liter of warm water.
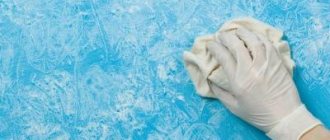
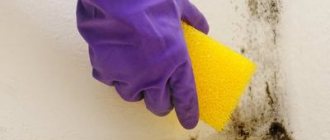
The process of washing walls is simple - you need to soak a sponge in a solution of ammonia and use it to rub the stained area.
If ammonia does not help, then you can try fresh potatoes, the tuber of which needs to be grated on a fine grater, after which the gruel is applied to a sponge and rubbed over the dirty area.
Painting soap
It happens, of course, that water alone is enough. However, in most cases it is necessary to use paint soap.
Painting soap diluted in water will remove not only dust, but also other contaminants. Here, even greasy stains will not be the limit. Therefore, in practice, it is recommended to use this type of soap to wash walls before painting.
Painting soap contains a mixture of two types of soap - potassium and sodium. They are characterized by a dense consistency and beige color.
Painting soap is available at most hardware or hardware stores. It's worth noting that this is not an expensive product. It is sold in various packages - usually from 0.5 kg to 20 kg.
The method of using painting soap is indicated on the packaging. In practice, it all comes down to dissolving soap in a small amount of water. The water should be warm. 0.5 kg of painting soap is dissolved in approximately 12 liters of water. Please check the manufacturer's instructions for details. Painting soap is an inexpensive solution, since prices start at about 80 rubles (the price, of course, depends on the capacity of the package and the manufacturer).
Read: How to choose a brush for painting
Soda for latex paints
Dirt from latex, acrylic and silicone coatings can be removed with almost any non-aggressive detergents. However, the real panacea is baking soda, which in the form of a paste can cope with even severe stains.
To clean more extensive stains, you can use a solution, for the preparation of which you will need:
- 3 l. clean water at room temperature;
- 100 gr. baking soda;
- 50 ml. ammonia.
Important! To protect the skin of your hands, be sure to use rubber gloves!
How to get rid of paint
It is not advisable to try to remove paint from a wall with a small putty knife. It’s better to immediately take a drill with an attachment designed specifically for these purposes and work with this tool. The only thing you can try is to remove not quite high-quality water-based paint with a sponge moistened with water. However, if you have large surfaces to prepare, you can imagine how many walls you will have to wash.
How to wash without streaks?
To prevent stains from remaining on the walls after washing, you must follow simple rules:
- If the product is new, test it on an inconspicuous area of the wall;
- First apply the products to the sponge/brush and only then to the wall;
- Prepare paper towels, napkins and toilet paper for blotting in advance;
- The process of washing walls always starts from the bottom;
- Any leaks that appear are immediately removed;
- Dirty liquid and foam are not reused.
By following the above recommendations, your walls will always be as good as new, and dirt stains will no longer cause headaches. You should also not forget about regular cleaning, because preventing a problem is easier than solving it.
How to remove wallpaper
Never remove old wallpaper, unless, of course, it falls off the wall itself when dry. When the paper is firmly stuck to the plaster, it can sometimes only be removed together with the base itself. Therefore, arm yourself with a bucket of warm water and a brush (not a roller!) and start wetting the wall. And not once or twice, but literally almost every 15 minutes. Believe me, your hard work will be rewarded. At some point, the wallpaper will begin to bubble and come off the wall. All you have to do is help them a little with this.
Removing plaster from a wall
Well, let's move on to the next part of the preparatory work after cleaning the paint, namely removing the plaster from the wall surface.
In this case, the technology of the work performed depends to a large extent on what material the wall surface was finished with. It is worth listing the cleaning methods for the most common finishing materials today.
Whitewash cleaning
You can clean the whitewash from the wall using a spatula . If this “manual” method of cleaning the surface does not suit you, then you can use technology. At the same time, take a vacuum cleaner and, setting the operating mode to “blow”, spray water on the ceiling using a special nozzle. After this, wait a few minutes. Next, you can clean the whitewash from the wall using a scraper.
Removing water-based paint
Old newspapers will help get rid of water-based paint. They must be glued over painted walls. After the glue has completely dried, the newspapers are peeled off with the old paint layer. This way the wall will be cleaned.
Removing limescale and adhesive paint
You can clean the wall from painting with lime and adhesive materials by first wetting the working area with warm water. After this, the layer can be easily washed off using an ordinary washcloth. If the wall was painted in several layers, as a result of which the material is difficult to remove, you should use a solution of 3% hydrochloric acid.
Removing varnish
You can clean the wall from varnish using an appropriate solvent.
Oil paint
If you plan to paint a surface using oil paint, while the old layer of the same material does not have any defects, such as swelling and peeling, then you can start painting over it. However, if the old surface is in poor condition, then you should definitely clean the wall by ironing it through the foil.
Fatty heel
You can get rid of various types of grease stains using a solution of laundry soap or caustic soda.
Ceiling stains
Stains formed on the ceiling due to roof leaks can be eliminated using copper sulfate. In this case, in an enamel container, you need to dissolve one spoon of vitriol in a liter of water. Next, apply the solution over the stains with a brush.
I would like to believe that the tips and recommendations listed will help you clean the walls before painting the surface, thereby carrying out the preparatory work yourself, which will allow the repair not to “eat up” your entire budget.
What tools and equipment will you need to paint walls?
Before starting work, it is important to choose the right equipment. A protective suit will protect us from various types of dirt: a dripping roller, a container of paint, the wall itself - there are a lot of “dangers”, so it’s worth protecting yourself and your clothes from them. In addition, the suit will help us carry out all the necessary actions during painting without any problems. Thanks to this, we will feel comfortable and safe on stairs, moving heavy buckets or covering our feet with sharp elements.
If you want to have clothes that meet the above criteria, you should purchase:
- Gloves – These should not be too thick because they will definitely make it difficult to perform basic movements, especially in the case of precision painting. A good solution would be gloves made of thin fabric, coated on the outside with a layer of latex that improves grip. These days you can buy them in stores for about 60-100 rubles;
- Pants - they should first of all be comfortable. They should also not restrict movement, so you should not choose models that are too loose or too tight. In order to paint walls, it is recommended to choose overalls made of cotton and polyester. They often have many pockets and the ability to adjust the belt. Such overalls for paint today can be bought for 500-800 rubles;
- Shoes - boots should also be comfortable. These can be shoes or work boots made of leather and polyurethane. As a rule, they have a rigid sole and anti-electrostatic properties. The cost of such boots for painting walls is usually 650-1000 rubles;
- Disposable suit - if you plan to paint the walls only once, there is no point in overpaying for the whole set; you can buy a regular one-piece suit for painting walls, which usually comes with an additional hood. Such a suit can be purchased for about 800-1000 rubles at any hardware store;
- Protective suit for chemical painting - this uniform is used for powder painting of walls. Thanks to multi-layer polypropylene, this type of suit protects us from exposure to chemicals. Before purchasing, you should check whether it is air and vapor permeable. These types of overalls are usually not expensive - about 350 rubles;
- Additional clothing - this includes various construction jackets, vests, T-shirts and hats.
Preparing tools
As you might guess, painting walls is not possible without the proper tools. Here's why we should purchase:
- Protective films - we will use them to protect furniture, floors and other decorative elements from paint drops, dust and dirt. Thanks to protective films, we don't have to take everything out of the room. Remember that thick films are the best - they do not stick to your feet and painting tools, and they are quite difficult to tear or puncture;
- Paint trays - thanks to them we will paint the roller evenly;
- Masking tapes are mostly paper and vary in width. Painting tapes will be useful to us for packing contacts, strips, frames and wall fragments that we are not going to paint;
- Spatulas - with the help of spatulas we will apply the so-called “putty” and remove the remaining paint, wallpaper and plaster;
- Paint mixer - it is usually flat and made of wood. Use it to thoroughly mix the paint;
- A ladder is an indispensable tool when painting walls. You can buy an aluminum or metal ladder, although the former is certainly lighter and more practical. It is not recommended to use wooden stairs, especially old ones, when painting walls;
- Screwdriver - we will use it to unscrew unnecessary screws, contacts and sockets;
- Sandpaper - useful for sanding and leveling putty;
- Brushes must be adapted by us to the colors and types of walls used. In the case of water-based paints, you should buy synthetic brushes, natural brushes are good for varnishes and paints that have been prepared using solvents, and brushes containing both natural and synthetic bristles (mixed products), we can use both paints and impregnations, varnishes and stains. Let us note separately a flat brush, which is called universal (for structural and flat surfaces), equipped with an angular brush with a long handle (for hard-to-reach places) and a round one, thanks to which we will paint wooden elements, as well as wood products, doors and windows;
- Rollers - they differ mainly in the length of the bristles. For smooth surfaces, brushes with bristles from 5 to 10 mm are suitable, rollers with medium bristles (11-16 mm) are used for plasters and wallpaper, and long ones (from 18 mm) are suitable for working with rough surfaces. The types of rollers are also important. Latex paints should be painted with stringers, oil sponges, microfiber water rollers and solvent-based wool, acrylic or velor paints.
Removing defects and leveling
As already noted, such preparation of walls for painting is necessary if the surfaces are far from being ideal.
Defect control
Small and relatively rare imperfections (no more than 25% of the entire area) are a reason to carry out restoration only in such areas. For example, it is not too difficult to rid the base of cracks.
- First, the defect is expanded - the “crevice” is enlarged for better adhesion of the base to the putty. At this stage, use a chisel and a hammer, and help yourself with a spatula.
- The widened crack is cleaned of debris and dust with a brush. Then they are treated several times with a deep penetration primer, making sure to go to “healthy” areas.
The prepared hole is filled with putty using a spatula. After the composition has dried on its own, the area is sanded with sandpaper or a sanding mesh. In the same way, areas with chips or dents are restored. Deep “holes” will require several layers: before applying the next one, the previous one must dry on its own.
Alignment of walls
If the walls are uneven, then the surfaces require adjustment. You cannot skip this stage, since almost any decorative coating will not save the situation. An exception may be some types of finishing (for example, liquid wallpaper, decorative plaster); there are no other options for paint. Potential materials for this stage are drywall or gypsum board, as well as plaster and putty.
Drywall or gypsum fiber
If the curvature is slight, then the sheets are glued directly to the walls using the frameless method. The “leveler” is gypsum glue. Serious changes require the construction of a frame made of metal or wood. In this case, the area of the room will be reduced, so this option may not appeal to everyone. In addition, to hang shelves, a TV and other heavy objects on the wall, you need to build wooden inserts into the frame.
Plaster
This type of material gives you the chance to get flawless walls. With this alignment, special “assistants” are used - beacons. They can become “piles” of plaster mixture and a profile. The operation consists of several stages.
- First, the base is primed. After the composition has dried, markings are made on the wall for installing beacons. The recommended distance between them is 600 mm. Then they are placed on the surface.
- Then plaster is applied to the wall using a trowel. After completion of the work, the mixture is leveled using the rule, focusing on the height of the beacons.
- To prevent the formation of cracks, a reinforcing mesh (fiberglass) is glued onto the raw material.
This operation does not involve creating a perfectly flat base, since small flaws will be covered by the following material.
