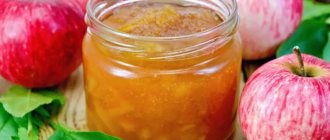
A thrifty housewife does not lose a single fruit during the harvesting season. Each one has its own treasured recipe. Today I propose to combine two favorite fruits in one jar by making apple and pear jam. It’s not a shame to put such a delicacy on the guests’ table, and the family will get maximum pleasure.
The taste of the delicacy is influenced by the type of fruit chosen and the additives that we are already accustomed to putting in desserts. These are cinnamon, nuts, vanillin, cloves, lemon, orange - all of them are friends with pears and apples, bringing unusual aromas to the preparation for the winter.
When cooking, keep in mind that pears are always sweeter, sometimes to the point of cloying, so balance this disadvantage with apples of more sour varieties. The same rule applies to preparing apple and pear compotes from these fruits.
Which varieties are ideal for making jam:
Choose firm varieties of apples: Antonovka, Slavyanka, Kitayka golden. For pears, Lemonka, Autumn Bergamot, Angouleme, or the usual strong wild one are perfect.
Basic rules for making jam
Before cooking, you need to follow some rules and then the jam will turn out great - in taste, color and medicinal properties. These are the rules:
- We carefully select the fruits (we are only interested in ripe pears and apples).
- Wash it thoroughly.
- We peel the skin, remove the stalks and seed pods, and cut out the spoiled areas.
- We cut the slices to the same size.
- We immerse them in salted cold water and leave for an hour (this procedure will prevent the cut fruits from oxidizing and darkening).
- To protect soft varieties of apples from boiling, before cooking the jam, soak the sliced slices in a 2% solution of baking soda for about 5 minutes.
- We strictly observe the proportion of fruit and sugar; if desired, you can add cinnamon, citrus fruits, cloves (whatever you like).
Video recipe
This video shows the entire process of creating pear and apple jam: from preparing the fruit to putting the sweets in a jar. You can see what color and consistency should be achieved for the ideal syrup and complete cooking of the fruit pieces.
Jam is a traditional and beloved sweet by many. This is an opportunity to retain some of the benefits of seasonal fruits and enjoy them in winter. The apple and pear version of jam turns out to be very unusual. The basis of the taste here is apple, but it is the pear pieces that give the unique aroma. This dessert will please everyone: both children and adults with a sweet tooth.
Did you like the jam made using the described method? How long did you simmer it on low heat to get the right color and consistency? If you know how to supplement the recipe described or you have your own options for preparing such sweets, share your thoughts in the comments!
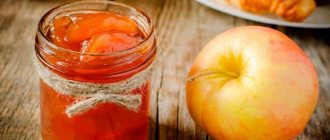
Pears and apples are considered the most delicious and fragrant ingredients for sweet winter preparations. Amber jam made from pear slices attracts gourmets because parts of the fruit can be consumed separately and enjoy the aromatic delicacy.
Apple and pear jam for the winter - step by step photo recipe
Even such similar sweets as French confiture, Ukrainian jam or English jam cannot compete with the taste and beneficial properties of homemade apple and pear jam. There is no analogue to the ancient Russian dish in the world! The proposed recipe for delicious pear and apple jam serves as an excellent confirmation of this.
To ensure the quality and best taste of the finished product, we select only whole and undamaged fruits with dense pulp. Pears will provide the jam with a very delicate texture, while apples will fill the product with a wonderful aroma.
Your rating: ( 1 ratings, average: 4.00 out of 5)
Cooking time: 23 hours 0 minutes
Quantity: 4 servings
How to make jam from apples and pears in slices
Firmer varieties of fruit are ideal for this apple and pear jam recipe. Ideally for apple trees these are Antonovka, Kitayka Zolotaya and Slavyanka. You can even take wild pears, but it is better if they are Autumn Bergamot, Lemon or Angoulême. If there are no such varieties, take those that are!
To make it more convenient to calculate the ratio of one fruit to another, as well as the optimal amount of granulated sugar, prepare:
- 1 kg of apples and pears;
- 1.5 kg granulated sugar.
Let's move on to making delicious jam:
- We prepare the fruits for cooking using the method indicated above, and in this recipe you do not need to remove the peel. Having carefully chopped the apples and pears, put them in a bowl for jam (if you don’t have one, a saucepan will do) and immediately sprinkle with sugar. This procedure will prevent the fruit slices from oxidizing and will speed up the appearance of juice in the basin.
- The first cooking is not brought to a boil, the fruit is hot and the bowl should be removed from the heat.
- The basin is covered with a lid and stood aside for at least 12 hours.
- At the next stage, the contents of the basin are brought to a boil with minimal heat on the stove. To prevent the jam from burning, stir it along the bottom with a special spoon, preferably a wooden one. Boil, stirring, until the granulated sugar is completely dissolved.
- And again set the jam aside, cover it tightly with a lid and let it sit for another 12 hours.
- Bring the jam to a boil again, while continuing to stir. There is one more stand and another boil ahead.
- After the fourth boiling time, the jam can be considered ready. It’s easy to check its readiness: if a drop of syrup, spreading, solidifies on the spoon, then this indicates the readiness of the product.
- Pour the boiling pear and apple jam into sterile jars and roll them up.
- Rolled cans should be turned upside down and wrapped well. It is advisable to store in a cool, dark place.
The jam turned out gorgeous: the slices were whole and transparent, golden in color. There is no shame in putting such a delicacy on the holiday table or using it as a filling for pies. Delicate sweet and sour taste and delicious aroma are the best reward for a patient housewife.
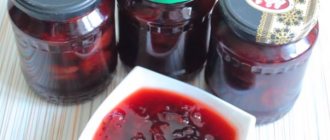
Raspberry jam for the winter without cooking
To enjoy raspberries in winter, you don't have to boil or freeze them. You can make jam without heat treatment in several ways.
Raspberry jam without cooking, so as not to sour
Having prepared raspberry jam according to this recipe, you can be sure that it will last until spring. Just follow the recipe and don't miss anything.
Ingredients:
- raspberries 1 kilogram;
- granulated sugar 1.5 - 1.8 kilograms.
How to cook:
Carefully sort the berries, remove any debris from them, check for bugs and spiders. Throw away the spoiled one.
Place everything in a bowl and use a masher to mash it. Add sugar and mix everything into a homogeneous mass.
Leave for several hours for the sugar to dissolve. Stir occasionally to speed up the process.
After the sugar has dissolved, pour the resulting mass into prepared jars.
In order for the jam to be stored better, you should not add it to the very end of the jar, but leave a little space, about one centimeter, and add sugar there.
Be sure to store the jam in the refrigerator, otherwise it will ferment and spoil.
Raspberry jam without blending
You can use the recipe if you are already tired of the classic taste and want something new.
Ingredients:
- raspberries – 1 kilogram;
- sugar – 2 kilograms;
- lemon – 1 piece.
How to cook:
Select whole ones and turn them into a homogeneous mass using a blender or masher. Peel the lemon from seeds and partitions, then grind it, add sugar. Mix everything well several times. Wait for the sugar to dissolve. Then place in prepared glass jars, which must be sterilized in advance, and seal. Store in the refrigerator.
Important! To make raspberry jam without cooking, you need to use more sugar so that the jam does not ferment.
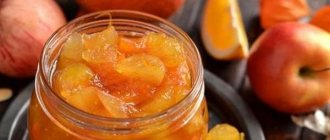
Recipe for clear, amber jam from apples and pears
You can get rich amber-colored jam from pears and apples by following another recipe. We take:
- 2 kg of fruit (1 kg each of apples and pears);
- 2 kg granulated sugar;
- 300 ml water; squeezed lemon juice (150-200 g);
- one clove.
Preparation:
- The first step is to properly cook the sugar syrup. To do this, pour granulated sugar into a special basin (pan), fill it with water and lemon juice and boil it all, stirring, over low heat until the granulated sugar is completely dissolved.
- Set the finished syrup aside and let it cool slightly.
- We prepare apples and pears for cooking in a well-known way.
- Pour the fruits cut into slices into the syrup that has cooled to 50º C. Gently mix the mass and, without boiling, set aside (do not forget to cover the hot mass with a lid).
- The next stage will begin in exactly 24 hours. During this time, it is recommended to gently stir the slices in the syrup several times.
- The day has passed, now it’s time to bring the mixture to a boil and set aside again. This time you will have to wait only 6 hours for the next stage.
- Now it’s time to add another important ingredient - cloves. Bring the jam to a boil over low heat, add one clove bud (this is the seasoning) and boil for about 5 minutes. Set aside for another 6 hours.
- This is the final stage. The almost finished aromatic jam is brought to a boil again and poured into sterile jars while still hot. Roll up, turn over and wrap.
You can transfer apple and pear jam to the cellar after it has completely cooled to room temperature.
Jam with apple slices
Preparing this jam is quite troublesome and takes a long time.
However, the result is worth it - the jam turns out to be very aromatic, with a rich apple flavor and slightly crispy, like fresh, translucent appetizing slices. You will need: 2 kg of apples and 1.4 kg of sugar.
Preparation. Wash the apples thoroughly, cut them in half, remove the cores and seeds and cut into slices. Place them in a deep pan, add sugar, mix well, cover the pan with a lid and leave it for a day. During this time, the apples will be well saturated with sugar and release juice. Place the pan over low heat and cook, stirring occasionally. When the jam boils, cook it for a few more minutes and remove from heat. Cover with a lid and leave for another day. After a day, bring the jam to a boil again and cook for a few minutes, remove from heat, cover and leave for another day. On the third day, repeat the procedure. Place the finished jam in sterilized jars and roll up, or simply cover with lids and store in a cool, dark place.
How to cook apple and pear jam in a slow cooker - step-by-step recipe
Let's talk about the slow cooker! This miracle of technology can make the housewife’s work much easier by presenting many delicious dishes. Pear and apple jam is no exception. Apples and pears in a slow cooker will turn into jam in just a few hours, although to do this you need to put the prepared slices and sugar in the slow cooker, let the fruits release their juice and set the correct mode. For jam, the “stew” mode is suitable.
- So, the chopped pears and apples are already in the slow cooker, stir them for 2 hours and wait for the juice to appear.
- Then turn on the multicooker and set the “quenching” mode. Every 30 minutes for 2 hours we stir our brew.
- If desired, you can add citrus fruits or spices 15 minutes before the end of cooking.
- Roll up the finished jam.
The same quick and tasty jam from pears and apples can be made in a bread maker!
Pear jam with apples and nuts
Add any nuts to the recipe, and the dessert will sparkle with a new taste. Add any, I usually add walnuts.
- Pears and apples in equal proportions - 1 kg each.
- Walnuts – 200 gr.
- Sugar – 1 kg.
- Lemon – ½ part.
- Vanillin – a pinch.
- Wash the fruit, cut it, we won’t peel the skin - we’ll leave the fruit in its natural attire.
- Dry a little, cut into halves, remove the middle part. Divide into equal portions. Prick the pears with a fork or toothpick.
- Place the slices in a cooking container, sprinkling sugar and nuts. Shake the bowl several times to distribute the sweetness among the slices.
- For 5 hours, do other things so that the cuttings have time to release the juice and the sugar is absorbed.
- Let it cook. Over high heat, start heating the contents. When signs of boiling appear, reduce the heat. Cook slowly for a quarter of an hour, turn off the burner. Take a break for 8-12 hours.
- After the specified time, repeat the cooking and again hold the dessert for several hours.
- Do this cooking a couple more times. In the last approach, add vanillin and add lemon juice.
- Afterwards, distribute the hot treats into jars, seal them, and store them in a cool place for long-term storage.