Do-it-yourself repair of women's bags
Unfortunately, when buying a quality leather item, we are not immune from fakes, which begin to develop cracks over time. However, even the strongest leather item also loses its attractive appearance and wears out over time. Nothing lasts forever. But if there is at least some opportunity to extend the life of things, you need to take advantage of it and restore the bag. We are ready to offer you some interesting ideas that will help transform your old bag into a new original accessory.
Important! Do-it-yourself repair of a leatherette bag with minor scuffs can be done using “liquid leather”, sold in shoe stores. The product can mask abrasions. After you use this universal product, be sure to read on our website about how to care for a leather bag.
Fabric handles for bags
Of all the proposed options, I liked the method of sewing fabric handles the most.
For work, I took two pieces of clothesline of the same length as I planned to make new handles.
I also needed a piece of durable fabric. From it I cut a rectangle 5 cm wide and 4 cm longer than the rope blanks.
I folded the fabric in half lengthwise and machine stitched it along the edge.
“We are still friends”: Derevianko commented on the breakup with his wife
A student at the Vietnam Police Academy shared how she takes care of her facial skin.
A Brazilian travels 36 km by bike every day to take his loved one home.
I turned the resulting part inside out so that the seam was on the inside. Having laid out the part so that the seam was located strictly in the middle, I carefully ironed the workpiece.
Having placed the rope inside the belts so that 2 cm of the belt remained free on each edge of the rope, I folded the part in half lengthwise.
Now I needed to secure the workpiece in this position. You could use a needle and thread to make a “needle forward” stitch. But I found it easier to secure everything with safety pins.
Using a sewing machine, I made a nice, even seam along the edge of the handle blank.
Now one handle for the bag is ready. All that remains is to attach it beautifully to the bag.
For fastening, I used old metal rings left on the bag after removing the damaged handles. Having inserted the ends of the fabric blank that were free from the rope, I sewed them up with thread using a blind stitch.
How to fix the handles of a bag with your own hands?
If a part of the bag has worn out over time, you can replace it using available materials. For repair use:
- Waist belts.
- Neckerchief.
- Pieces of fabric or leather.
- Chain.
- Wooden or plastic beads.
- Braid or satin ribbon.
We suggest you use the following ideas for repairing handles.
Idea No. 1. Pen case
You can sew a case from genuine leather so that the accessory lasts as long as possible.
Step-by-step instruction:
- Buy a piece of thin leather (matching the color of the handles or a contrasting shade).
- Open and cut out the blanks. The width of the workpiece should be 2 times larger than desired, plus seam allowances. The length of the cover can be chosen arbitrarily, for example, only for a worn (worn out) area.
- Glue the blanks with thick cotton cloth. Use regular all-purpose glue for this operation.
- Glue the ends of the blanks and turn them inside out.
- Fold the pieces in half and machine stitch them. Use a special leather needle.
- Turn the covers right side out.
- Put covers on your handles.
- Use an awl to make holes on the sides of the handle and sew on the covers.
- Wear your favorite accessory for many years to come.
Idea No. 2. Wrapping the handles with braid, satin ribbon or strips of leather
Handles can be finished to match gloves, shoes or other accessories. The idea itself lies in the ancient method of wrapping parts with satin ribbon (braid) or pieces of leather.
Important! Advantages of the method:
- Not a single knot or connection is visible.
- Excellent structural strength.
- Part flexibility.
- Durability (determined only by the quality of the material used).
- Ease of execution.
To work, you will need a ribbon of a suitable color or lace.
Step-by-step instruction:
- Determine the center of the handle and the length of the restoration.
- Wrap the tape tightly around the handle. To prevent it from moving along the handle, secure it with a few stitches.
- Fasten the thread and cut it.
- Wrap the tape tightly around the top of the handle, hiding the seam. Leave a distance between turns of approximately 3 mm. Make sure that the tape not only fits against the handle, but also does not twist as a result of strong tightening.
- When finished, secure the tape on the inside of the handle with a needle and thick thread.
Important! The handles can be wrapped with strips of leather or strong braid. When wrapping the parts with material, gradually lubricate them with glue.
Idea No. 3. Waist belts
If the handles are thoroughly worn, replace them with waist straps, measuring and cutting them to size. The good idea is that you can adjust the length of the new handles.
If the accessory has one long handle, then use one belt, sewing it with a thick needle and strong thread.
Important! If the material of the bag is very dense, then make punctures for the stitches with an awl. Place the piece on a wooden surface and make holes carefully to avoid injury.
Idea No. 4. Leather handles and chains
For work you will need the following materials:
- Pieces of leather.
- Large chain.
- Scissors.
- Thick needle and strong thread.
- 4 or 2 rings (depending on the number of handles).
Important! Buy a metal chain at a hardware store. Measure the required length in advance and ask the seller to cut a piece of chain for the handle. If there are two handles, then ask to divide the chain into two parts.
Step-by-step instruction:
- Cut the skin into strips of equal width.
- Sew the strips together by hand or by machine.
- Lubricate the strips from the inside with glue.
- Fold the strips in half.
- Wait for the glue to dry and start designing.
- Wrap the strips around one side and then the other side of the chain.
- In the same way, make a second handle from leather and chain.
- Thread the two loose ends of the leather band through the ring.
- Fold and sew the ends of the ribbon.
- Take a wide leather strip and thread it through the ring until it is in the center of the strip.
- Sew a wide strip with a ring to the bag.
Idea No. 5. Silk scarf for pen repair
An interesting designer item can be made from a silk scarf instead of a pen. Here are just a few recommendations on how to repair bag handles with your own hands using this method:
- You can wrap old parts with a scarf, thus hiding scuffs and flaws.
- If the handles are too worn, open them and attach 2 scarves in their place. Tie a corner on an old pen ring. Do the same with the opposite corner, securing it to the ring on the other side. Create the second part in the same way.
- If the handles are not very worn, then wrap them with a scarf in turns at a short distance from each other so that the material of the bag can be seen between them.
Important! To prevent the scarf from slipping, tie knots on the right and left.
And on our portal you will find many interesting ideas for adding practical accessories to your wardrobe. Click on the link and follow the master classes to:
- Sew a fabric bag with your own hands.
- Decorate the bag in an original way.
Idea No. 6. Beads instead of a pen
If you have old wooden or plastic beads that have the same round fragments, then use them to change the appearance of the accessory.
Proceed as follows:
- Take a strip of fabric that matches the color.
- Wrap the fabric around the beads.
- Trim excess fabric, leaving seam allowances.
- Sew the 2 edges of the fabric together.
- Thread the beads inside the finished roll.
- Separate each bead from the next, marking the spaces between them with threads.
- Sew new handles to the bag.
We looked at several ideas on how to repair the handles of a bag, and now we’ll tell you how to update the accessory without spending a lot of time and money.
How to update bag handles with your own hands in a step-by-step master class
This option is the most popular, because it can be used to reconstruct handles of any model, regardless of the shape and style of the bag itself. If the handles of your bag are cracked and peeling from the frost, or they were chewed by a dog, or something else happened to them that thoroughly ruined the appearance of the item, this option is for you.
To work you will need:
- two suede ribbons of suitable length and color matching the color of the bag.
- tools that will help you detach the handles of the bag.
- Glue. It is best to use a transparent quick-drying glue, for example, Moment “Crystal” or “Gel”.
- Scissors, a large stationery clip, a utility knife and an awl - if the handles have holes for the tongue.
It’s also worth taking care of your workspace - covering it with newspapers to make it easier to tidy it up later, because small crumbs and remnants of the top layer of pens are quite difficult to sweep away.
The separated handles must be cleaned of remnants of the original material, otherwise the new material may not stick tightly, or come off along with remnants of leather or leatherette. One end of the handle can be fixed with a large office clip on the edge of the table - this will be much more convenient. You need to paste the handles with new material from one end, overlapping the tape slightly, by about a third, covering the previous turn. Thus, wrap the handles along the entire length, and as they dry completely, attach the handles back.
This method allows you to paste over not only soft fabric materials, but also more rigid and dense materials, for example, a thin strap, as shown in the photo.
If the handle mounts are designed in such a way that you cannot remove them - or you doubt that you can put them back properly, it is better not to experiment.
In this situation, you can get by with silk cord or soutache. The latter is used in the creation of costume jewelry, and in handicraft stores there is a fairly wide range of shades, so it will be easier to choose the right one. If you cover the handles of a bag with cord, then this is not done overlapping, but on the contrary, the turns should go end to end. The lower parts of the fastenings themselves are also covered with cord; it is quite plastic, and it is not difficult to give it the desired shape. Bends and creases.
If the material of the bag is quite hard, but leaves much to be desired in terms of quality, creases may form on the handles in the most visible places - near the handle fastenings and on the fastenings themselves, on pocket flaps, and other places that are subject to wear and tear more than others. In this case, a rather creative option can help out - beading. Of course, this solution cannot be applied to every bag, but there is a chance to revive your favorite item in this way. The color of the beads can be contrasting, or it can be tone-on-tone or to match the decorative stitching, which often differs from the main color of the bag.
Replacement.
Sometimes, when you look at an object, you understand that the patient is more dead than alive. And it’s easier to completely replace the handles than to try to somehow update them. The easiest way to do this is if the handles of the bag are attached to the rings. Then there are several options for replacing handles.
The first, and simplest, is to replace textile or leatherette, or even leather handles with more wear-resistant chains. To prevent them from looking like a foreign object, you can pass a piece of fabric between the links to match the bag - if the style of the item allows it. Technically, this is not difficult to do - the chain links are unbent with pliers and threaded into the fastening ring.
The second option is to use thin women's waist belts. Their edges need to be stitched so that they can be threaded into the ring, and equipped with rivets of the appropriate type and size - for greater compliance.
The third option is to modify the bag with new handles.
Simple repair of your favorite bag
If the handles of the accessory are intact, and the corners are fairly worn, then use leatherette patches. You can cut out not just patches from the material, but entire appliqués, for example, circles or rings. To hide a flaw on a bag, you don't even need a sewing machine.
To extend the life of your favorite bag, use the following materials and tools:
- Leatherette.
- Glue.
- Scissors.
- Needle and thread to match the material.
Use the prepared materials as follows:
- Cut out a stencil from paper. The size of the circle should cover the worn area of the product.
- Prepare 4 parts from the material for the lower corners (circles) and 4 for the upper corners (semicircles). Add 0.5 cm to the hem.
- Make cuts around the entire circumference of the pieces to neatly fold the edges of the patches.
- Fold the edges and sew.
- Glue the patches to the corners of the accessory.
Important! Use transparent universal glue, for example, “Moment Crystal”.
Replace with chain
If the handles of the bag are very cracked, it is better to completely replace them using chains. And then you will receive a new accessory design. You can select chain links that match the color, size and shape in special departments of accessories for clothing and shoe repair.
To replace, you will need pliers to bend the lower links of the chain and thread them into the rings where the old handles were attached. Next, secure the links again with pliers. Additionally, you can weave a leather or fabric strap into the chain to match the bag. It looks original.
Recent Entries
How to clean a frying pan from carbon deposits in 10 minutes Don’t throw away yogurt cups: 3 cool craft ideas for kids Decorating for pennies: 6 ideas for crafts made from plastic spoons
An easy way to update your handbag
This option is perfect for items that have small cracks or abrasions.
For work you will need the following materials:
- Napkins for decoupage.
- Glue for decoupage.
- Varnish.
- Thick soft brush.
The process of updating an accessory is quite simple. Proceed as follows:
- Clean the surface of the bag from dust and dirt. You can use wet wipes for this purpose.
- Cut out the decorative elements necessary to hide defects in the accessory from decoupage napkins.
Important! Roses or other plants will look beautiful. The cut out elements will perform two functions: to decorate the product and hide existing scuffs and cracks.
- Carefully glue the cut out parts onto the surface of the bag using special decoupage glue and a soft brush.
- Leave the accessory for 5 hours so that all decorative elements are completely dry and fixed.
- Apply varnish over the entire surface of the updated accessory. Use a special polish designed for leather or other materials, depending on what the handbag is made of.
- Leave the accessory for 8 hours until the varnish is completely dry.
- Repeat the varnishing procedure.
- Decorate the other side of the bag in the same way.
If none of the methods worked for you, maybe it’s not a breakdown at all, but you just want to update your wardrobe? Then you will definitely find our reviews useful, which you can read right now:
- How to choose a bag for every day?
- The best brands of women's bags.
Helpful Tips:
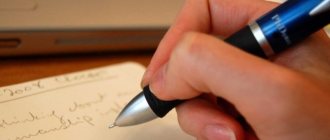
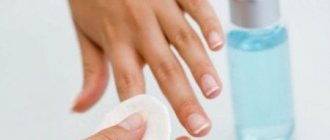
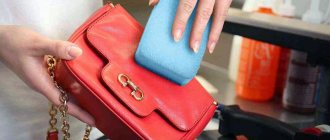
- Before doing anything with an old leather product, it should be thoroughly cleaned of dirt. If necessary, the surface can be wiped with soapy water and a small amount of ammonia. Wipe away any traces of moisture with a towel.
- To renew the leather on your handbag, treat the surface with glycerin. Soak the swab in the product and thoroughly wipe the entire surface. The product will shine and become attractive again. Patent leather can only be wiped with a dry, clean cloth.
- If the fittings on the accessory are worn, replace them with new elements.
- A worn gasket makes the bag inconvenient to use, since very often small things fall into the holes, and getting them out becomes problematic. If you are unable to replace the gasket yourself, then take the product to a sewing workshop.
- To update a white handbag, use leather dye. Buy paint from a specialty store and strictly follow the instructions. Do not try to repaint the product in a radically different color, since paint is intended only to update the material and not to change its appearance.
- You can decorate and update a white fabric handbag with embroidery or painting. Having chosen the design you like, apply it to the fabric using chalk. Embroider the design with threads, beads, buttons, seed beads or pieces of jewelry.
Useful tips for repairing bag handles with your own hands
To make a high-quality repair of the handles of a worn bag at home, you should follow several tips:
- If we are talking about genuine leather. Before work, it must be thoroughly cleaned of dirt and dust. The surface can be wiped with cool soapy water and ammonia. Blot any traces of liquid with a waffle towel and wait until the material is completely dry.
- To update the appearance of a leather product, pre-treat it with glycerin. This will add shine and shine to the model. Lacquered options should be wiped with a soft, dry cloth.
- If an element of the model has become shabby and ugly, replace it with a new element, made with your own hands or purchased in a special store.
- To update the handles of a white or red bag, use leather dye. There are different color options, so you can choose a paint to match the product. The paint is intended only for superficial renewal of the surface, so you should not choose a radically different color. This will only spoil the appearance and the item will become unusable.
- If you don’t want to replace some parts with others, you can always resort to decoration. Make knitted covers, painting on the material or embroidery. And the model will sparkle with new colors. You can add beads, rhinestones or seed beads. Don't be afraid to experiment.
If the bag has lost its appearance or the handles have become worn/cracked due to frequent wear. Don’t rush to throw the item in the trash and buy a new one. You can always replace worn parts or decorate them with available materials. A new version of an item can become even more fashionable than the original appearance. There are many ways to correct the situation, from the simplest to the long and difficult. It all depends on your strengths, desires, finances and imagination.
What to wear with beige boots
Long skirt styles
Video material
The question of how to update your favorite handbag interests every woman. We hope that our ideas will inspire you to the creative process, as a result of which your favorite accessory will delight you with its beauty and creativity for many years to come. And the most important thing is that you were able to change the appearance of the handbag with your own hands. So, there is a reason to praise yourself, beloved!
Everyone knows that products made from genuine leather last quite a long time. The service life of such products is several years, but sometimes you come across real long-livers.
I would like to talk a little about the restoration of handmade leather products that have served their owners for decades. I really hope that they will last for a very long time!
This handbag, which is more than 50 years old, was brought to me in a sad state - the top layer of leather was cracked and rotted, the side parts were unusable, the design was almost erased. Time and garage storage in a plastic bag have left a terrible imprint on it. There was no particular hope of restoring it.
When I see such products, with warmth and love from human hands, I simply cannot pass by. Therefore, I decided to try to do everything possible and try to restore what I could.
I started by simply taking it apart.
It was then that it became clear that all the supporting parts would have to be changed, because they simply fell apart in our hands. Of the original ones, only the front and rear were made.
I took up restoration. The cracked top layer was very rotten, and if you picked it up with a fingernail, it simply fell off. Armed with sandpaper, I very carefully removed the background without touching the design.
To highlight the embossing, I used several colors of artistic ink for the skin. The background was treated with black, and the drawing itself was treated with several shades of brown. Although it was painted brown, apparently from time to time, the brown turned into burgundy, so the handbag changed its original color.
I cut out the replacement parts from undyed leather, 4 mm thick. I painted everything the main color and varnished it.
Next is assembly. The assembly cord is very tight. In order not to damage the holes on the restored parts, it was necessary to cut off a chamfer from the inside and treat it with wax.
After assembly, I slightly tinted the cord and sides to give them an aged look. And this is what happened.
I hope this bag will last for many more years.