The topic of storing things is becoming increasingly relevant. There are even books and articles about the scientific approach to space allocation. In fact, all this is very exciting - once you start, you won’t even notice how everything in your home will be properly organized. That is why we have prepared many different ideas on how to make an organizer with your own hands.
DIY stationery organizer
Under no circumstances should you allow clutter on your desktop. This is very distracting from work and makes it difficult to concentrate. We suggest you get rid of this problem once and for all by making a suitable organizer for yourself.
To create interesting and unusual organizers, it is not at all necessary to have too expensive materials. The photo shows an excellent option for using unnecessary iron cans after processing.
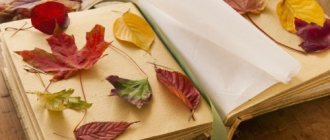
Documents can also be stored in not the simplest folder. Try to make something really beautiful that will make you happy every day.
Another way to create an original office organizer. Just use paper rolls.
Cup organizer
Cups are a must-have item in every apartment. Tea drinking is a special ritual in many families. And most of humanity cannot do without coffee in the morning. But despite such a great need for cups, it is extremely rare that they are given a permanent place. Therefore, an organizer would be an excellent option.
Such an item not only performs a useful function, but also looks great as a decorative element.
Organizer for slippers or towels
To complement the cosmetics organizer, you can sew a simpler version for towels or paper, which will look like in the photo. Sewing it is very simple. To do this, you will need three strips of fabric of different lengths (80 cm, 120 cm and 140 cm) and bias tape.
All you need to do is edge the strips with binding and then sew them together on one side with a straight stitch. The shortest strip should be inside.
The next step is to create the pockets. To do this, divide the longest strip into three parts and draw a line between them. A strip 120 cm long is divided in half and the boundaries are also marked. Markings are also applied to the main canvas, dividing it into three and two parts, respectively.
The lines are laid in order of priority, and then the bottom of the canvas is secured with bias tape. A strip with loops is sewn along the top, and as a result you get a simple and very convenient organizer for towels and indoor shoes.
In conclusion of the article, I would like to note that hand-made wall pockets will not only help save money on the family budget, but will also provide an opportunity to properly organize the space and also decorate the house.
Organizer for cosmetics
Almost every girl has a lot of cosmetics. But how not to get confused in this variety and quickly find the right thing in the morning? If you are familiar with this problem, then an organizer is the ideal solution.
By the way, magnetic boards have become very fashionable in 2021. They are used for literally everything, including cosmetics.
Such a board looks interesting in an unusual shape. For example, in the form of the first letter of your name.
For brushes, you can create another organizer from a transparent container. Thanks to the additional decor in the form of beads, they will have a stable position.
Another budget option is to use chip packaging as a base. Minimal decor will help give it an attractive look. By the way, you can even store painting brushes in such an organizer.
Ribbon Keeper
Any needlewoman accumulates a large number of small things, including meters of bias tape, braid and a wad of all kinds of ribbons. In order to ensure that all these items can always be quickly found, it makes sense to build an organizer for handicrafts with your own hands. How to store ribbons separately from needles, buttons, pins and other small items, we will consider in this part of the article.
To create a box for ribbons, you need a small box, fabric or self-adhesive paper, glue, eyelets, tools for installing them, whatman paper, colored cardboard. A suitable box with a non-removable lid can be purchased at the post office. You need to cut off the excess cardboard from the lid, leaving only the top. If the box is dark, it should be covered with either adhesive paper or white Whatman paper, and a cloth on top. The inside of the organizer is also covered with pieces of fabric. All allowances located on the inside of the lid and box are decorated with colored cardboard. Next, you need to install the eyelets on the lid and sides of the drawer using special tools. Now you can put the spools of tape in the box, and bring the ends out through the holes.
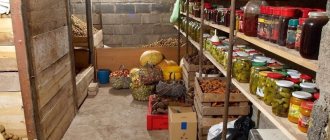
Storing small items
Surely you have often noticed that there are various small objects that do not have their place. This could be anything from threads and ribbons to pencils and pens in the kitchen. It is for such things that you need an organizer in the kitchen.
First, let's start transforming the jars, or rather, cleaning them.
We make a paper stencil of the same shape as the jars will be and transfer it.
Carefully cut out jars of the same size.
To keep the edges from being sharp, be sure to sand them down.
Prepare a board with holes at the same level.
We screw the fasteners so that the organizer is securely held on the wall, as well as the handles.
When everything is ready, you can safely hang the jars and fill them with various little things.
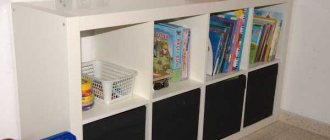
Pockets for children's
To teach your child to keep the children's room clean, you need to have a lot of cabinets, chests of drawers, shelves, and drawers. A convenient option for placing small accessories, pacifiers, bottles, napkins, powders, and diapers can be an organizer in the form of hanging pockets.
Every young mother is interested in learning how to sew pockets for small items with her own hands. A master class on creating a convenient device is described below.
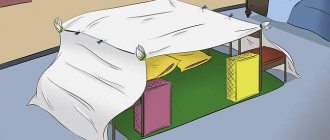
We will need two types of fabric - the main one and for finishing, an elastic band that supports the pockets, and cardboard that strengthens the shape. The organizer can be either vertical or horizontal. Depending on the direction, the product can be hung on the wall, on the end of furniture, or on a child’s bed.
Accessory organizer
Since childhood, every girl has many different hair accessories. To keep them always at hand and look attractive, we recommend making a special organizer.
As for organizing jewelry, we offer you some great ideas in the photo. Maybe among them you will find a suitable option for yourself.
Even if you don't have frames or cardboard at home, you can use a hanger. This organizer looks very original.
For creative and creative people - a stunningly stylish jewelry organizer. Be sure that it will decorate any room.
Glasses are an integral element of every girl’s look. Besides protecting the eyes, they are what make the bow complete. Agree, such accessories definitely need to have a beautiful storage space. A striking example in the photo.
Many girls love scarves, but they still have one drawback - the fabric often wrinkles quickly. To avoid this, we recommend making a simple organizer that allows you to store them in a vertical position.
Organizer “plates” for the closet
photo: blog.spoonflower.com If your closet does not have enough compartments with shelves, you can add them by sewing a similar organizer. It will come in handy in the bathroom, for example, for towels, in the nursery - for toys, and in the hallway - for hats and scarves.
You will need:
Step 1
photo: blog.spoonflower.com Cut out the fabric and cardboard according to the diagram in the picture (the number is the number of parts). 12 pieces 23x23 cm (lining fabric); 2 pieces 23x32 cm (main fabric); 2 parts 20x23 cm (main fabric); 2 pieces 32x69 cm (main fabric). Don't forget to add allowances of 0.5 cm. Photo: blog.spoonflower.com Sew, as shown in the picture, pieces 20x23 cm. Turn out, iron, sew on Velcro.
Step 2
photo: blog.spoonflower.com Mark the middle of this part and sew two lines to the middle of one of the parts of the main fabric 23x32 cm. photo: blog.spoonflower.com Connect this part with one of the lining parts. Sew the parts together as shown in the photo. Insert cardboard between the shelf parts.
Wall Mounted Magazine Organizer
If you like to read not only books, but also newspapers or magazines, then a wall organizer for them is what you need.
To make it you will need:
- textile
- thick rope
- wooden pole
- scissors of any size
- sewing machine with thread
- a decorative element on which you can hang an organizer.
First, we make three pieces of fabric of the same size. We fold each of them in half along the long side. We use a machine to stitch them. The result is a kind of tube-shaped cover.
Turn each one inside out to smooth it out.
Fold one of the covers in half lengthwise.
Lay out the second cover on a flat surface. On top of it we place the workpiece, folded in half. It is important that there is 10 cm of cover left at the bottom.
Turn over and fold the third cover in half. Remember that the seams should not be visible.
We place the third cover on top of the two sewn ones. Pin the top edge of the bottom layer to the top fabric and sew.
Fold the last sleeve in half so that the front edge is 6 cm higher than the back.
We install a wooden pole and wrap a cover around it. Fix with pins and sew.
We tie a thick rope to the pole.
We fix a decorative element to hang the organizer.
Hanging Organizer Ideas with Pockets
An interesting and useful item can be used in all rooms of any apartment.
Bathroom .
A similar thing in the bathroom will be a good solution for placing combs, shower and hair products, foams, creams, gels; Children's room Here, in general, everything can be hung with lovely little things. Near the desktop they will serve to place notepads, scissors, pencils or markers, near the bed and in the play area - to place small toys; Hallway. In the hallway you can compactly place light scarves and hats, fluffy mittens and gloves. Shoe creams and brushes will also be placed here, and the shoes themselves will take up much less space; Bedroom. Next to the bed you can find a place to place glasses, medicines, watches, phones, chargers; Living room. Near the armchair and sofa it is convenient to place an organizer with glasses, a TV remote control, a newspaper with crossword puzzles;
Kitchen. In the kitchen, such storage can be used to store cutlery, spices, and place decorative elements.
There are no creation rules for organizers. They can be made from any fabric, have any color, be of any shape.
Storing ribbons for needlewomen
Every craftswoman is familiar with the situation when different materials get confused and lost. To avoid this, you can make a simple accessory for storing them.