Unusual, bright smartphone cases provide reliable protection for gadgets from damage. The price of a good model is high, so not everyone can buy one. But why pay if you can figure out how to make a phone case yourself?
- Why is it important to make cases with your own hands?
- The most popular colors for cases
- Instructions on how to make your own phone case
- Cardboard case
- Paper case
- From yarn for knitting
- Made from silicone
- From threads and glue
- Felt cover
- From beads
- Hot melt adhesive cover
- From glitter
- Case from an old notebook
- Leather case
- How to make a phone case from rubber bands
- Step-by-step instructions for weaving a case
- Several life hacks
The case you create will become something that you won’t find in any store. It’s enough to stock up on the necessary tools and use your imagination. And then the smartphone will be protected and decorated to your taste.
How to make a phone cover
In order to make a plug, you must be guided by a special diagram of the device. No skills or experience needed. You will need the following parts:
- generator for checking voltage;
- antenna with amplifier;
- exact assembly diagram.
After arranging and fastening all elements, a mandatory check is required. If the equipment does not work, it is recommended to perform adjustments and adjustments.
Based on reviews from experienced craftsmen and beginners, it is clear that making a case for a mobile phone with your own hands is not difficult. Various techniques and styles can be applied. The material can be any product that is safe for health: leather; silicone; textile; polyethylene; scotch. The result is an interesting and unique thing.
How to make a phone case out of a ball?
Balloon case
This type of case is not very popular. Like our very first option, it is used to at least somehow protect your smartphone until the opportunity arises to get your hands on something more acceptable. This happens because the appearance is not the most attractive, but protection comes first!
Balloon phone case - instructions:
- Take a regular balloon and inflate it without tying it
- We place our phone on the ball so that the screen faces up and begin to press slowly, releasing air at the same time
- We do this until the air is completely released and the ball tightly fits the phone body
You can learn more about how to make a phone case from a ball in the video below..
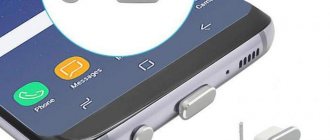
Is it possible to make the rubber boot smaller?
During use, the rubber covers stretch. They can be returned to their original size. To do this, they must be immersed in boiling water. They will become more plastic, and when cooled they should return to their original size.
Some bumpers, made of rubber with a large proportion of plastic, are not as flexible as rubber. But they can also be made smaller at home. If immersing the cover in boiling water does not lead to the expected result, you can try boiling it for 5 minutes - the principle of preparing a polyethylene suction cover. He works. Just don’t put a wet bumper on your phone; the moisture needs to be removed from it.
How to make a book case for a phone?
These phone cases have been quite popular in the past. Nowadays you can find them quite rarely, since most people have switched to bumper-type products. But there are always people who appreciate crafts of this type, or simply do not see the point in following today's trends. And such a case has a big advantage, it has much better protection for the fragile touch screen, and for many careless individuals this is quite a big plus.
How to make a phone case - instructions:
- Take a regular notebook with a hard cover
- Cut out all the sheets
- Take any soft fabric and cut a piece to the size of our notebook
- We glue this piece of fabric onto the notepad, simultaneously checking the quality of the bend of our book
- Cut out a piece of cardboard the size of one wall of our case
- Wrap the resulting sheet of cardboard in fabric
- Add two elastic bands to it to secure the phone
- Glue a makeshift pillow to the edge of the book
You can learn more about how to make a book case for your phone in the video below..
Difficult stains and pollution - emergency control methods
When a soap solution is no longer able to help, but you still need to clean the silicone case, you should use other means. Of course, it will be very problematic to wipe off marks from a felt-tip pen or ink, but it is possible. But the stubborn wine and coffee stains are gone. They can only be lightened slightly, but traces will still remain. Special products are sold for cleaning silicone products. However, they are expensive. Our methods are cheaper and accessible to everyone.
Gentle bleach
A solution with bleach can restore your silicone case to its original appearance and shine. To do this, we use gentle household chemicals that do not contain chlorine. In this case, Vanish, Boss or Swan are ideal. In addition to preparing the solution, bleach can be applied directly to the stains of the cover themselves using a soft sponge or brush. It is necessary to keep the product in the solution for 5-10 minutes, depending on the degree of contamination and the quality of cleaning of the product. At the end of the entire cleaning procedure, rinse the surface of the cover under water and wipe dry.
A solution with bleach can restore your silicone case to its original appearance and shine.
Nail polish remover
Nail polish remover will help remove old stains. The main thing is that it is written on it without acetone. To avoid unpleasant embarrassment, test the effect of the product on an inconspicuous area of the case. If the material does not change its color and structure, then feel free to use it. However, it is best not to use this cleaning method for colored and painted products. Otherwise, it may lead to darkening of the surface, loss of brightness and color.
Alcohol-containing solution for ink and felt-tip pen
If ink has spilled on your case or marks from a felt-tip pen remain, then purchase special alcohol-containing solvents at any office supply store. To use them, soak a cotton pad in the solution and carefully walk it over the inner and outer surfaces of the product, and then apply the sponge to the most contaminated area and hold it exactly as long as indicated in the instructions. After this, rinse the cover and repeat the procedure if necessary. Sometimes such stains can be removed with a regular school eraser or a melamine sponge for cleaning around the house.
If ink has spilled on your case or marks from a felt-tip pen remain, then purchase special alcohol-containing solvents at any office supply store.
Gasoline for refilling lighters
Clean gasoline for refilling lighters, which can often be found in men's car glove compartments, will help you clean your silicone phone case. In addition, other similar compositions with a high octane number, such as kerosene, are also suitable. To clean, soak a cotton pad in this liquid and wipe the contaminated surface of the case with it. And at the end of the process, to get rid of the unpleasant smell of gasoline, treat the product with ammonia or a solution of lemon juice.
Refreshing toothpaste
Regular toothpaste for cleaning teeth is also ideal for cleaning the silicone case. To do this, wet the dirty product, apply toothpaste to the stains, rub the mixture in with your fingers and leave it to soak in for 10 minutes. After this time, arm yourself with a brush and walk it over the surface to completely get rid of the remaining traces of stains. Finally, rinse the cover thoroughly under warm water to avoid streaks.
Baking Soda Cleaning Paste
A very effective cleaning paste with a fine abrasive can be prepared from ordinary baking soda. To do this, take the required amount of soda and water, bring the composition to a paste-like consistency. Then take a soft sponge and apply a little paste to it, spread it over the dirtiest areas and leave to soak for 15 minutes. After this time, thoroughly rub in the composition using the same soft sponge, doing this smoothly, without sharp rubbing. Rinse off excess soda with water and wipe the cover dry.
Citric acid will save you from stains and darkening
A packet of citric acid copes not only with scale and soot, but also with darkening and old stains on the silicone case. To use it, dilute a 30 g bag of citric acid in a glass of boiling water and wait until the crystals are completely dissolved. Next, take a cosmetic disc, soak it in the resulting solution and wipe the dirty surface of your product. If the stains are too stubborn and regular wiping does not help, soak the cover in the solution additionally, then rinse it under water.
Recommendations
The following tips from cleaning experts will help you cope better with the task:
- Before you begin bleaching, the surface must be prepared - remove dust and dirt.
- All work should be carried out wearing rubber gloves to protect your hands.
- It is necessary to consider what kind of plastic will be processed. For some types of products, special products are produced marked “for refrigerators”, “for microwaves”, etc.
- After cleaning is completed, the plastic surface should be wiped dry.
- When treating plastic against yellowing with vinegar essence, alcohol, Dimexide and other substances, you must remember that if the cleaning agent gets on areas with inscriptions, they can also be erased.
- To clean small plastic items, it is convenient to use an old toothbrush.
The most complete and useful information about methods and means of removing yellow spots and yellowness from various surfaces and products is presented in this section.
How to return white color to plastic?
Often, plastic can be restored to its original whiteness using products that can be found in the household. If the yellowness cannot be eliminated the first time, the procedure should be repeated.
Laundry soap
Laundry soap removes yellowness caused by greasy deposits. To restore the original color, you will need to finely grate one block. Then you need to pour 200 milliliters of heated water into the soap. The resulting mixture should be applied evenly to the yellowed areas and left for 30 minutes. After the specified period has expired, the plastic must be rubbed with a brush and the remaining foam must be removed with a rag.
Ethanol
This product combats yellowing of the material caused by exposure to sunlight. Before the procedure, it is recommended to treat a small area of the plastic product with alcohol and check whether this liquid is harmful to the material. After removing stains, it is recommended to rinse the material with clean water.
Washing powder and soda
To remove yellowness you will need to mix:
- 500 milliliters of heated water;
- a tablespoon of soda;
- a tablespoon of powder.
This mixture is applied to problem areas and left for 6 hours and then washed off.
Cosmetics for cars
Automotive plastic cleaners can remove old stains, including yellow stains. It is necessary to treat plastic products with car cosmetics in accordance with the instructions for the product.
Computer wipes
These wipes are impregnated with a mixture that eats away grease and other contaminants. Therefore, these products are used to clean plastic.
Acetone
Acetone is rarely used, and usually as a replacement for other bleaching compounds. This product is not recommended for processing low-quality plastic. To restore yellowed plastic, simply wipe the problem areas with a cotton pad soaked in acetone.
Products with chlorine
Chlorine has an aggressive effect, due to which it eliminates, among other things, old contaminants. Whiteness or another similar product helps remove yellowness from plastic. If necessary, chlorine-containing liquids can be left for a few minutes and then rinsed with water.
Aerosol paint
If the yellowness appears due to microcracks, then the described means cannot eliminate such stains. In such cases, it is recommended to paint over problem areas using spray paint of the appropriate shade.
Tooth powder with chalk
To remove yellow stains, you will need to mix a tablespoon of crushed chalk and the same amount of tooth powder. After this, you need to add water to the composition, achieving the formation of a paste-like mass. The resulting mixture should then be applied to the yellow spots, left for 15 minutes and rinsed off.
Citric acid with chlorine
To bleach plastic, you need to mix both substances in equal proportions. The resulting composition should be applied to problem spots, left for half an hour and rinsed with water.
Special means for recovery
Various store-bought products available in the form of sprays help get rid of yellowness on plastic. You can also use chlorine-soaked wipes for these purposes.
Use of folk remedies
Sometimes there is no opportunity or desire to resort to the help of purchased funds. Traditional recipes include available components that are safe for humans when used correctly. They do not harm plastic surfaces, because they do not contain abrasive particles or aggressive substances.
Laundry soap
The first thing that comes to mind when you need to clean a plastic product is laundry soap. It is effective both when washing white clothes and when cleaning window sills and countertops. However, it will only help if the material has changed color due to dust or grease. How to whiten yellowed plastic:
- grate the soap on a medium grater or finely chop with a knife;
- pour a small amount of warm water to make a soap solution;
- wash the contaminated areas with intense circular movements using a sponge or soft brush;
- leave the plastic soapy for 30-60 minutes;
- Remove soap residue with warm water.
If the structure of the plastic element has become very dark, then this method will not work. It is recommended to repeat the procedure several times a month and try to wipe the surfaces more often with a damp cloth.
Special napkins
In cases of yellowing of a computer mouse, keyboard or monitor, it is better to use special wipes. They are sold in hardware stores or supermarkets. Plastic can be bleached thanks to the composition in which the napkins are impregnated.
Tooth powder with chalk
To achieve a snow-white window sill, a product made from tooth powder for whitening plastic products will help. It is absolutely safe, has no unpleasant odor and does not damage surfaces. It is enough to slightly moisten the contaminated area, apply powder or chalk and rub with a sponge. Residues can be easily removed by wiping the treated area with a clean cloth. We recommend:
How to whiten underwear at home
Soda and washing powder
Baking soda and clothes washing powder can be used either separately or together. For 500 ml of hot water take 1 tbsp. l. components, mix thoroughly until dissolved and apply to dirty areas. Leave the solution for 8-10 hours, then wash off.
Vinegar
When using vinegar, you should use gloves and a face mask, because the smell of the product is not pleasant
In addition, it is important to avoid getting vinegar essence in your eyes, and wash your hands well after work. Yellowness will be a thing of the past if you treat the stains with vinegar using a cotton pad during cleaning; it is not necessary to wash it off. Housewives know how to whiten yellowed plastic; one way is to use vinegar and baking soda together.
Sprinkle soda generously on the stains, soak a sponge with acetic acid (don’t forget rubber gloves!) and rub the stained areas with a little force. Afterwards, rinse off the mixture with cool water; you may need to repeat the procedure.
Housewives know how to whiten yellowed plastic; one way is to use vinegar and baking soda together. Sprinkle soda generously on the stains, soak a sponge with acetic acid (don’t forget rubber gloves!) and rub the stained areas with a little force. Afterwards, rinse off the mixture with cool water; you may need to repeat the procedure.
Citric acid with chlorine
One of the most effective recipes is citric acid and chlorine. It can be used on almost any yellowed surface without fear of ruining the appearance of the product. You should also work with gloves to avoid allergies or chemical burns to the skin of your hands. To clean plastic, mix both components (1 part each) and apply to dirt. Leave the mixture for half an hour, then wash it off and repeat several times if necessary.
Hydrogen peroxide
Every first aid kit should have peroxide, and it will help not only treat wounds, but also bleach plastic. You just need to soak the cotton wool in the solution and clean off the dirt. Sometimes they don’t work the first time, so you’ll have to regularly clean them with hydrogen peroxide. Yellowed elements can be filled with the product and left for several hours, because peroxide is not capable of spoiling the material.
Alcohol
Alcohol-containing products (or pure alcohol) allow you to achieve ideal cleanliness and remove any degree of contamination.
Acetone
Another aggressive substance that can help. It is advisable to use it only in extreme cases, when gentle methods have not helped. Inhaling acetone vapor or allowing it to come into contact with your skin is dangerous. You need to carefully apply the plastic bleach solution to a rag and rub the yellow stains. Instead of acetone, many people choose nail polish remover, as it does not damage materials.
How to decorate covers
The video shows several options on how you can decorate the cover of your smartphone:
Dried flowers
Dry inflorescences, leaves and stems can be used as decorations when decorating a product. You will need acrylic varnish (transparent or matte, pearlescent), dried flowers, and glue. Any dry elements can be glued to the surface of the case or body and fixed with varnish. After hardening, you get a very attractive effect.
Pictures, drawings
What designs can you choose for your phone:
There are several options to decorate the product with pictures:
- using glue, varnish and ready-made pictures (cut out or purchased);
- using acrylic paints, brushes and varnish;
- using decoupage.
You can make your own drawings on a piece of paper or cardboard and then cut them out. Also, when choosing illustrations and decorations, the Internet, magazines and newspapers will help. They can cover the entire surface or a specific part. This could be a specific topic: romance (hearts, beautiful phrases and words); wedding; jokes and more.
An easy way to decorate a case:
- cut a paper base of any color to insert into a transparent finished case;
- cut out interesting pictures or words and glue them to the base with glue;
- insert the base into the product.
Stages in the photo:
There are different ways to erase a drawing from your phone. The types of cleaning products depend on the durability of the stains. Commonly used: alcohol; rubber eraser; Toothbrush; dishwashing liquid; toothpaste; rag and soap solution; soda; crust of black bread.
Decoupage
Using beautiful thin napkins, you can stylishly decorate the case or body of your gadget. You should cut out the picture and slightly wet it. Then place it against the surface and smooth it thoroughly. Leave for a few minutes to dry completely. Cover the top with clear acrylic varnish and let dry for 1-2 hours.
Washi tape
This ribbon can be found in different colors in stationery or creative stores. To create the design you will need: ribbon of three colors; ready-made cover (optional). Based on the drawing, it is recommended to make small pieces of material and attach them to the phone. The edges can be coated with transparent glue or varnish (so that they do not come off during use).
Acrylic paints
How to decorate your phone with acrylic paints:
- Prepare: tape; acrylic paints of different colors; ready-made case (you can do without it); brush and acrylic varnish.
- It is recommended to stick strips of narrow adhesive tape on the phone body or a finished case, depending on the pattern (striped in the photo).
- The exposed surface should be painted with 1 color.
- Then repeat the steps with color 2.
- Repeat the steps several times until the surface is completely covered with paint.
- The result should be secured with transparent varnish.
- Allow the product to dry for 1-2 hours.
However, you can paint the case using a variety of patterns, including those you come up with yourself.
Confetti
For this purpose, small bags are made inside the finished cell phone case. For this you need materials: glue; a transparent piece of silicone, confetti (plain or colored).
You should secure the bag from the inside of the case and fill it with small particles. Secure the top edge. Wait until the glue dries. By turning the product over, the particles will move from side to side.
Paper with patterns
The phone case or case can be decorated with scrapbooking paper. It is possible to cover both the entire surface and a separate part with it. You can attach it using: Moment glue, tape, washi tape.
Detailed instructions for making your own cases
With our instructions, you can make your own phone case using paper, glue, beads, fabric and more. Each product will be original, because you will create it from the materials and in the way your imagination allows. For each text instruction, we also provide a similar method in the video review. You will clearly see that creating a designer accessory is not as difficult as it seems, and the simplest tools and materials will be enough for the job.
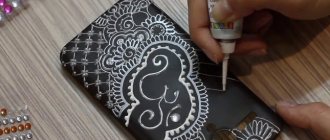
Hot glue case
The first instruction will be one of the easiest ways to create protection and decoration for your smartphone. This method allows you to use silicone glue and minimal effort to create a unique accessory that will have a high degree of protection. In the video you can clearly study one of the creation methods, and in the instructions we will try to list all the main points and subtleties. Please note that in the video instructions two types of varnish are used - colored and transparent with glitter, which will significantly increase the aesthetics of the device.
This method is also called phone decoration. Remember that such decoration or creating an original silicone case should only be done after all precautions have been taken. In particular, during operation, not a single drop of glue should get on the display, which could damage the touchscreen.
Don't be afraid to experiment, just prepare all the tools in advance and follow the instructions. We divide the work into the following stages:
- We prepare tools and materials. You will need a glue gun that heats up the glue pins. Be sure to purchase parchment paper - it will protect your device and also facilitate the process of creating an accessory. As auxiliary items, it would be useful to take matches, varnish or acrylic paint, as well as tape and a marker.
- Getting the phone ready for use. Preparation consists of wrapping it with parchment paper on all sides. All sides of the phone should be wrapped as tightly as possible, especially the back where the glue will be applied. You can secure the paper with tape.
- Draw the base of the picture with a marker. The outlines of the picture can be drawn with a marker, creating a specific image or an abstract picture. It is important to take into account only one factor - each line of the pattern will increase rigidity, which will require taking into account the absence of voids in large quantities.
- Apply glue. We apply glue along the contour of the phone, taking into account that it will not only be a decoration, but should also hold the entire structure on the gadget. Each pin used in the gun will be enough to apply an outline or make a three-dimensional design. You will need at least two sticks of glue to create a sufficiently thick cover that will act as a safety bumper.
- Wait until the glue hardens and cut off the excess parts. As a rule, such parts will be clumps of glue at the attachment points on the display side. Remember also to leave holes for the camera and speaker; openings for which will need to be cut if they are not prepared in advance.
- Remove excess hairs and cobwebs. Using light heating with matches (you can use a lighter), easily remove the glue cobwebs and any hairs that have arisen. The cover should be the same thickness on all sides and without any excessively protruding parts (you can also cut it with a knife).
- Apply varnish or paint. This step will not only be a way to decorate and increase the aesthetics of our product, but will also give it greater rigidity. It is better to use nail polish that will be more rigid when cured. You should cover the outside and inside, but do not put on the cover until it dries.
You can cover the entire phone in one layer without bothering with creating designs. However, this method will not be very relevant in terms of material consumption, and will not always bring the desired result due to problems with accurate and even application of glue. You can also use transparent varnish for coating, if you did not leave dark traces of soot on the glue while singeing the web and threads.
From paper
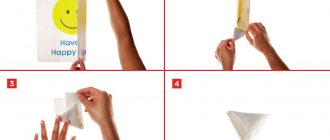
I would like to point out right away that you can make cases for a mobile phone from paper using several methods. This option is considered a budget option and allows you to protect your device on unexpected trips or trips, for example, when visiting the beach. By completely packing the phone and leaving free access to it according to the instructions in the video, you will protect the device from dust, sand or other negative conditions.
You can use a simpler method by simply wrapping your smartphone, to do this you will need to follow these steps:
- The apparatus is placed on a horizontally laid sheet (folded in half).
- The phone is wrapped to the end of the sheet, completely hidden in the paper. The upper edges are folded equally on both sides by about a centimeter.
- We tuck the sides in small sections.
- Fold up the bottom.
- We bend the corners at the bottom and fix all the folded parts with glue.
To get a beautiful paper case, you don’t have to use origami methods. In this video you can clearly see that decorating your device is a simple and quick task. Simply cut out the decor by placing a sheet of paper under the silicone accessory. You can draw it yourself or use ready-made images, cut out sheets from magazines or print out a print.
Made from rubber bands
This method requires choosing several colors of elastic bands, as well as using a loom and a hook for weaving. In the video instructions, you can learn the weaving method using only one hook, and we will tell you in detail how to use a machine for weaving and make a cover from a set of 500 elastic bands.
Let's start working with the second pin, putting rubber bands on it and transferring them to the third pin in the bottom row (crosswise). Next we perform the following steps:
- We put on the elastic bands crosswise from the bottom pin to the third row at the top.
- Similarly, put on the rubber bands from the third pin, transferring them to the fourth row inside. As a result, there will be three crosses.
- In the center we pass two pins, braiding four more crosses in the same way. As a result, in addition to the crosses, two pins at the edges should be free.
- On the next row we put on elastic bands on the top row and the bottom on the opposite side. Similarly, we put it on all the pins in the previous row.
- Turning the machine horizontally, without crossing from the bottom, we transfer the elastic band to the top. We also secure the remaining elastic bands of the top row, including using two pins in the middle.
- After performing the same steps for the second side, you need to remove the elastic bands (two pieces) from each pin at the bottom with a hook. We skip the middle pins again, leaving two elastic bands on each pin.
- We perform the next row in a different color (we perform the actions for the second row on the third). We remove two loops around the circle of the machine, and then put on elastic bands of a different color instead. After this, remove the lower loops.
- Alternating the colors of the elastic bands, we perform the steps for the next two rows. For each row you need to put on and take off the loops.
- Next, we make a hole for the screen. To do this, you will need to turn the machine vertically, remove the lower elastic bands from the third pin, and then transfer them to the fourth row. The last loop should be on the seventh pin.
- Remove the loops from the middle pins (all five). There are only three occupied seats left on the sides. We also knit the next rows, performing the procedure in a circle. There are 5 pins left on one side.
- Having removed the lower elastic bands, we leave two loops each. We knit another 11 rows in the same way, not forgetting to change the color order when choosing elastic bands. We also knit a row in a circle, filling each pin.
- Leaving the previously unused five pins, remove the elastic band from the remaining lower ones. We skip the working pins (two), remove the lower loops from the third, throwing them over the adjacent one. We continue the procedure until the last two pegs are completely freed. We also knit the next row.
- Turning the machine vertically, remove the loop from the 2nd peg of the right row, throwing it onto the next one. The last loop will be thrown onto the 4th peg.
- Remove the lower loops on the 3rd and 2nd peg.
- Leaving the central two pegs, we put the loops in a circle and also remove the lower ones.
- Next row - we put elastic bands on all the pegs and remove the loops without touching the pins that contain 2 elastic bands.
- The upper and lower loops on the first peg change places, then the upper loop needs to be thrown onto the next peg, connecting the structure.
- On the next pegs, remove the lower loops and transfer them to the next pegs in the row. After this we knit a regular row.
- To close the accessory we have obtained, we will need to make a row of crosses, similar to the first weaving procedure. The next row will use opposite pegs for the cross stitches.
- Remove the loops from the bottom, leaving the rubber bands from the figure eights on the pegs. As a result, there should be three rubber bands on the bottom pin. Similarly, we transfer the lower loops to the next pins and knit another row.
- Additionally, taking the elastic band, fix it with a knot on the right side and remove the cover. We push the protruding rubber bands inside, hide the knot and put the resulting case on the phone.
From a balloon
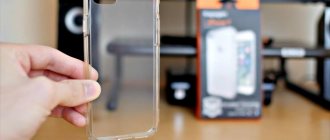
This method will be the simplest method to create a unique, bright and cheap accessory that is impervious to moisture and can be installed on your phone in 10 seconds. All you need, as you can see in the video, is a balloon and the desire to protect your gadget.
To create protection, you will need to inflate a balloon of the color you choose. The case will tightly cover the sides of the phone and the back, leaving access to the touch display and without interfering with its operation. Place the inflated balloon on a flat surface, holding it by the nipple. Next, pressing the phone, pressing it into the ball, gradually release the air.
As a result, the ball envelops the device, fitting tightly and preventing moisture from reaching the contact holes. Of course, it is not recommended to swim with such an accessory, but as a simple method to protect your device in a few seconds, a custom-made case is an ideal option.
Case book
Since we are only considering options for making cases from the simplest objects and materials using available tools, the book case will be based on one of them. For this base, we chose an old notebook with a bright design, and it only takes 10 minutes to make. In the video you can clearly study the process of creating a case with soft upholstery from napkins and fastening in the form of rubber bands.
To create an accessory that will allow you not only to provide protection, but also to use your smartphone to watch video comfortably, prepare the following tools and materials:
- Scissors. You will need them to cut out a napkin for your phone.
- Paper knife. It will help you get rid of notepad sheets.
- Bright paper. Let's decorate the outside of the accessory.
- Glue. You can use any type of glue that will hold securely.
- Two rubber bands. We choose elastic bands that are not too wide, but sufficient to hold the device during operation.
First of all, measure the dimensions of your phone and select a notepad in which the smartphone will completely fit. If the edges of the notepad protrude a little, it’s okay, you can trim them or leave them like that, completely covering the gadget. Next, follow these steps:
- Take a notepad and cut out its inner part - paper sheets.
- Lay out the resulting cardboard, cutting out a napkin along the contour.
- Apply the napkin, checking the quality of the bend.
- Cut another sheet of cardboard to fit one side of the notebook.
- Stick a napkin on the cardboard, and also fix the elastic bands along the edges (pre-measure them by leaning the device and checking the tension).
- Glue the cardboard with rubber bands to one side of the notepad, without gluing, a strip about a centimeter wide.
From cardboard
To make a cardboard case you only need a few simple tools and materials. In the video instructions you can see how to do the job using regular cardboard and securing not only the accessory itself, but also gluing the gadget into it using double-sided tape. The main thing is not to forget that you need to leave holes for the keys, charging and camera. We also remember that such covers are a temporary measure, even if they are decorated.
Using a similar cardboard template, you can cut out and glue our product with glue. This video instruction clearly shows the method of a more massive and functional accessory. That is, you can use it for reading or watching videos, and the case itself will not fall apart during use at the most unexpected moment.
The main thing to remember when creating such protections is that you must first draw your gadget on a sheet of cardboard, taking into account all the holes and function keys. Also, do not forget about the low strength of the material and remove the phone case if it no longer provides the required level of protection.
For users who perceive information better in text format, we offer the following instructions:
- Taking a sheet of cardboard, use a marker or pencil to mark a contour on one side and at a distance of half a centimeter (depending on the thickness of the device) another template.
- Cut out the resulting template, leaving a jumper and bending it by lightly pressing a pen or pencil into each line.
- The case will need to be secured to the device using double-sided tape. To secure the book itself, you can use an elastic band or two along the edges (similarly, you can secure your phone on cardboard with rubber bands by cutting grooves for it in the case).
From felt
To make such a case, you only need half an hour and a small set of tools. The main advantage of such products will be the ability to decorate the accessory using a variety of methods and using available materials. The video shows a master class on one of the options for doing the job.
We suggest using the following materials for this type of case, which does not become part of the phone, unlike cardboard:
- A piece of felt (choose bright colors, even small pieces can be used for decoration).
- Scissors, ruler, pencil and needle and thread.
- Glue gun with silicone pins.
The first step is to create blanks for our product by tracing the outline of the phone and cutting the felt at a distance of a centimeter from each edge (excluding the top, which needs to be cut exactly according to the gadget). Next we perform the following steps:
- Using an outer seam, we sew two pieces of fabric together, leaving the upper part open.
- We use small pieces of felt as decoration, creating an applique using the hot glue method.
- We wait for the glue to harden and use the cover.
From fabric
One method of creating fabric covers is to glue fabric onto cardboard. That is, we create a cover from fabric and cardboard at the same time. In this case, it is recommended to use a soft cloth that is not too thick.
It is not necessary to use felt as in the previous method - any dense fabric with a high degree of rigidity is suitable for such covers. Use your imagination and try to carefully stitch the blanks to get not only a reliable and safe, but also a durable case.
Leather
This case does not have holes for the camera, but it is easy to make without additional tools or materials. In the instructions on the video you can find a visual aid on working with leather, as well as the method of making such accessories.
Using leather blanks and small pieces of material, you can not only create a protective material that is comfortable to use, but also an aesthetic product. The main thing is to take into account the need for high-quality firmware, especially if it is done inside the case. Even a small knot of nylon thread can damage the touchscreen or the body of the gadget. The procedure for creating a leather case exactly repeats working with felt (with the exception of products with internal stitching).
From threads
There are two methods for making such covers - using only a glue gun and threads (yarn), or you will additionally need a transparent cover onto which the threads will be attached. The first method can be studied in the video; it is quite simple, but it will require speed and care so that the glue does not have time to harden before applying the yarn.
At its core, this method of creating protection and decoration will replicate covers made from hot glue. The difference will be the application of threads or yarn to glue, as well as the absence of the need to take into account accuracy and a specific pattern when creating a cover.
Simply apply glue to the paper in which the gadget is wrapped, and then glue yarn cut into small pieces onto it. To cut, use a ruler; after winding it, you need to cut one side of the spiral.
From beads
Of course, the highest quality will be a case in which the beads are attached with separate threads, and the entire structure is connected. This is the method of knitting a cover with beads (with a buffer in the form of threads) shown in the video. However, we offer another method, which is described below.
For a simpler method, you can take a ready-made knitted, silicone or even cardboard cover and glue beads on it. Let us emphasize right away that to completely cover even a small case you will need a large number of beads. You can stick it with regular hot silicone, which we will squeeze out of the gun:
- Prepare beads, a case, cardboard and a toothpick.
- Apply a drop of glue to the cardboard and use a toothpick to take a small drop to glue each individual bead.
- Using tweezers and glue, glue each bead one at a time.
You can apply a small amount of glue directly to the case, smooth it out and lay out the beads. However, this method can lead to poor quality gluing of individual beads.
From rivets
This method is simple, fast and effective in terms of aesthetics. It will require several dozen rivets, which are secured using a regular glue gun. Carefully take the rivet with tweezers or pliers, apply glue to it and secure it to the case. Using a similar method, you can decorate the case with any other available decorative option, for example, an iron logo from old denim pants.
Made from sparkles
This method can be implemented in two ways - using paints or nail polish, as shown in the video, or using hairspray. In the first case, you will need to create a base on a transparent cover, painting it with paint or varnish. While the paint has not hardened, scatter glitter over the surface (you can lay out a specific pattern or abstraction).
The second method will require less time and effort:
- Spray polish over part of the cover.
- Sprinkle the case with glitter.
- Carry out a similar procedure in several more rows.
From beads
A fashion accessory with a truly original design can be created using an old beaded necklace. Even a pendant that can take the centerpiece of the decor will come in handy. The process will be completely identical to gluing beads, but will require a larger amount of glue and pre-calculated actions. Lay out the beads on the cardboard case template the way you will place them on it, and only then glue them directly onto the accessory.
Knitted cover
In the video you can study detailed instructions on how to knit an original cover in just a few hours. This method is more suitable for those who already know how to knit, and also understand reading and using patterns and clippings. Remember that knitting is a labor-intensive process that cannot be rushed and will require a lot of effort.
Silicone Case
It is not necessary to buy a silicone case; you can make it yourself using tools and materials that are available in a regular store. The video contains detailed instructions for making such a case, and we will also describe each action in text form.
The first step will be to prepare all materials and tools. Prepare rubber gloves, a small amount of regular starch, a knife, sandpaper, a spatula and construction silicone. These are all the tools and materials you will need to create the case.
Prepare a template of your phone in advance or wrap it in film or paper to avoid damaging the display or clogging the functional connectors. But also keep in mind that you must follow all safety measures, in particular, cutting off excess from yourself.
- Pour a small amount of starch onto the table and make a dough mixed with silicone. Kneading should be done with gloves, mixing until it becomes plasticine or a thick paste.
- Roll out the resulting pancake to a thin layer that will accommodate our device. Next, you need to wrap the phone in the resulting dough and check that the edges meet on the sides (also check the corners and mold them like dumplings, removing the excess by pressing).
- After hardening, you need to remove the phone from the resulting case and cut all the functional holes.
- The last step is polishing. Clean the cover and make it the same thickness in all places. Also, carefully remove the excess with a knife. Apply a small amount of starch-free silicone to the surface, smoothing with a brush.
This case can be decorated with appliqué, paint or glitter, creating a product comparable to the products of the world's leading brands.
Case with dried flowers
Using acetone, an old silicone bumper, dried leaves and flowers, as well as epoxy resin, scissors and glitter, you can create a unique case with dried flowers. The video describes one of the methods of such decoration using pansies, and we will tell you in detailed instructions how to create such decoration using other types of dried flowers.
The first step is to develop a design. You need to figure out exactly how you will lay out the flowers and leaves to get the most aesthetically pleasing picture. Next, we proceed directly to gluing using a glue gun:
- Glue each leaf separately, applying several small drops, not large ones.
- We complement the decor with sparkles to create a halo around the flowers.
- We wait for the glue to harden and fill the resulting composition with epoxy resin (the resin will need to be mixed with water in a certain proportion).
- Having leveled the mixture, we wait for it to harden and we can use the cover.
To ensure that the resin does not fall to the edges, and you do not have to remove it after hardening, you can remove the excess immediately using a cotton swab and acetone. It is best to level it with a wooden stick.
Cleaning methods: wash or bleach the rubber accessory
First of all, it all depends on what kind of case it is: transparent, with pictures or just. Depending on the type, you need to choose the right method
It is equally important to take into account how long the stain has been on the accessory and how it was placed.
Why is it important to clean your case:
- to extend its service life;
- taking care of appearance;
- prevent the phone from being affected.
The most famous methods:
- soap solution - add liquid soap to water, stir, and you're done: you can scrub the stain. This method works best if the contamination is recent and has not yet dried;
- dishwashing detergent - you need to work with it carefully, as it is more caustic than just soap. But it also cleans stains better (for example, Fairy);
- baking soda - it is best used for whitening. A little soda is applied to the toothbrush and the case is rubbed with it. Then the remaining product is washed off under clean water.
Mobile phone cases, especially rubber ones, are not always amenable to this method of cleaning. Therefore, you can use some other means:
Toothpaste and powder. We must remember that it is better to use a whitening paste, otherwise you will have to clean the accessory for more than one day. Hydrogen peroxide - it doesn’t cost much, but due to its properties it easily removes stains. Problems can only arise if they are already ingrained. You can also replace soap and dishwashing liquid. Window cleaner is a good alternative for this.
But it is important to remember that it is caustic, so you should not use too much when washing; dilute a small concentration. Regular alcohol can also be an alternative. But in his case, you still have to spend a lot of time and effort to remove the stain. Alternatively, nail polish remover
But if you have some kind depicted, then you should take one without acetone. With its presence there is a risk that it will damage the surface. Paint stains can be cleaned well with a solvent; the main thing is to make sure that there is only a small amount of the product and it only touches the surface where the stain is located. Otherwise, the cover itself may be damaged. You can clean the rubber surface using a regular eraser. But mostly this will work if the surface is . Because it is unknown how well the accessory is painted, this method may damage other colors. This will also help remove excess scratches. People who are not afraid to take risks with their cover can try cleaning it in the washing machine. But it must be placed in a special washing bag, otherwise it may be damaged on the drum during the process. If you don’t trust chemicals, there is a folk method - lemon. It is suitable for both cleaning and whitening. You need to cut a lemon and apply it to the problem area for 10-15 minutes. Then rinse with water. If you don’t have lemon, feel free to use lemon juice; you can apply it to your toothbrush.
A silicone case or cover is a common accessory for a phone, smartphone or iPhone, which is distinguished by its aesthetics, ease of use, wide range, availability and low price. It will help protect your phone and, if necessary, give it the desired color or design.
However, such a case is not practical, since silicone is a soft and delicate material that absorbs dirt well. Subsequently, the resulting stains are quite difficult to wash off. In addition, light and white products often turn yellow. Let's look at how to clean a silicone case from dirt and yellowness.
How to decorate a silicone phone case with your own hands
Decorating the “clothes” of your smartphone from such modern material will not be difficult. The main thing would be desire and imagination. Here are some interesting ideas.
1. Decorate the accessory using colored Japanese washi tape. This is one of the most common methods, as it does not require large expenses and has a large number of options. For example, tape can be applied diagonally along the entire body or in horizontal lines. Moreover, you can even cut out the figures and “assemble” them into an original ornament or design on the case.
2. Use confetti. If you don’t know how to decorate a phone case with your own hands, then you should take advantage of the fact that silicone cases for mobile phones are usually transparent. Just pour sparkly small multi-colored confetti into the case and cover it with paper on top so that it doesn’t fly out. Voila! The holiday case is ready!
3. Decorate with nail polish. If you use several colors at the same time, you will get a quite beautiful and interesting case. Those with artistic talent are especially lucky, as they can draw an abstract design to create a case design that is one of a kind.
Leather book case
From the same leather you can make another model of phone case with your own hands. For this craft, in addition to strings of glue and leather, you will need a piece of thin plastic, material for finishing the inside of the phone and an old silicone case:
- · Measure the height, width and thickness of the phone;
- · Draw a pattern on paper. Circle the phone twice, and between the halves draw a line equal to the thickness of the phone. Add 2 mm on each side to the resulting figure;
- · Round the edges of the resulting rectangle;
- · Attach the template to a piece of leather, trace and cut out;
- · Trace half of the pattern onto soft fabric, cut out;
- · Trace half of the pattern on plastic and cut it out;
- · Glue the old cover on the right side to the leather blank using hot glue;
- · Glue plastic to the skin on the left, then fabric;
- · Use a thread to sew around the edges of the cover with a decorative stitch;
- · Insert your phone into the case.
If desired, you can glue a flap to the book cover that will hold the cover.
Try one of these techniques to make your phone case unique. Once you've mastered the basic techniques, use your imagination and create something truly amazing.
Simple option
This variation of decor is rightfully considered the simplest.
To perform it you will need the following set of tools and materials:
- Phone case made of transparent silicone.
- Acrylic paints in two colors (to choose from).
- Brushes.
- Painting tape.
- Cotton buds.
To begin, glue a strip of masking tape to the inner surface of the accessory in the desired location to divide it into two zones.
Next, paint the inside surface of the phone case with acrylic paints, painting the parts between the strip of tape in different colors. Use a cotton swab to remove excess paint from the edges of the product.
Let the accessory dry completely, and then apply two more layers of each paint in the same way from the inside. When the last layer has dried, remove a strip of masking tape - and the simplest, but very stylish design is ready.
How to make a leather phone case?
Leather case
Leather products are generally considered to be something of a premium class. And similar models exist, but they are quite difficult to get. After all, it’s easier to find some kind of silicone phone case, which can be bought in every specialized store, but when it comes to leather models, everything is a little more complicated. They are more expensive, and finding a well-made item is much more difficult; it’s a whole adventure. Therefore, there is an opinion that such a thing is much easier to do.
Leather phone case - instructions:
- We measure the size of our smartphone. Add 1 centimeter in height and 2 in width to the workpiece
- We make two such blanks from leather
- We are rounding the corners of our future case
- We take a similar template, but from cardboard, and make small holes every 0.5 centimeters
- Place your two leather blanks facing each other with the inside out, and attach them to the cardboard template.
- Make holes already on the skin, following your template, that is, on the bottom and sides
- Sew leather blanks, fasten the thread several times to be secure.
- You can decorate this product using decorative thread eglets
You can learn more about how to make a leather phone case from the video below..