Ironing boards don't have to stand alone in a corner or hidden in a closet. They can be successfully integrated into the interior, while saving valuable space. Making cool and very comfortable ironing boards is easier than it seems. We offer 25 ideas with drawings for inspiration:
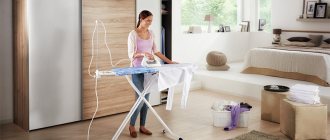
It is impossible to walk around in wrinkled clothes - everyone needs an ironing board. On the one hand, a standard floor device is functional, because it is convenient to iron, but on the other hand, it is irrational: every time you need to lift it, move it apart, walk around it, fold it, and hide it. It takes up a lot of space and is a lot of hassle. Where to iron, how to unload the living space? There is a solution - purchase or make a built-in ironing board.
Types of built-in ironing devices
There are plenty of options for ergonomic, practical ironing devices that relieve space and fit seamlessly into the interior.
Folding
There are several types of folding ironing boards, including the following:
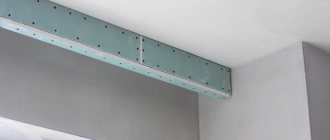
- Classic wall-mounted version of the ironing board. The tabletop-lid (solid wood, laminated chipboard or moisture-repellent plywood) is attached to a frame-frame with a simple folding mechanism, and it is attached to the wall (at two or four points). When folded, the board is positioned vertically; when working, it is positioned horizontally on the floor. There are two possible methods of fixation: without a supporting leg or for (reinforcement) on a stand resting on the floor.
When installing the classic wall-mounted version of a built-in ironing board, the frame to which the lid is attached remains open. Metallized frame pipes will fit perfectly into a loft or industrial style, emphasizing its deliberate simplicity; disharmony with others is possible.
If the ironing device is hidden in a box with a sliding decorated panel or a hinged door, imbalance can be avoided.
- Ironing board with wall mirror. A two-in-one variation: on the outside there is an elegant reflective surface of any shape or size, on the inside there is an interior device for ironing clothes. The mirror sheet can be hinged - sliding to the side, or hinged - a traditional single-leaf structure using canopies, a box and a movable sheet. An additional advantage of combining two functionalities is unloading the scarce space of a small apartment and its visual expansion. A built-in ironing board with a mirror can be integrated into any interior style by framing the reflective surface with a suitable finishing or decorative material (baguette, molding) - natural wood, wild or ornamental stone, stucco, plastic.
Retractable
A folding version of the ironing board, placed inside a furniture box (in a cabinet, chest of drawers). It is fixed on the guides by the widened part of the base, the tabletop “breaks” in the middle, folding in half - the narrowed part is laid on the wide one - face to face. The dimensions of the retractable ironing board are proportional to the size of the drawer, stability depends on the quality of the guides.
Built-in
Maximum space saving. The optimal variation for small apartments. It is usually made to order when purchasing a wardrobe or installed with your own hands in both a wardrobe and a kitchen cabinet (a labor-intensive but functionally rewarding process of filing partitions, installing a fastening system and fixing structures).
In a large ironing wardrobe, it is more advisable to install not a static board, but a rotating or folding board with a built-in socket. In the classic variation of the cabinet with swinging doors - with a folding device and a light weight structure.
Operating principle of a folding ironing board
The principle of operation is quite simple. I think everything will be clear in the photo.
This is how, with the help of simple steps, with a minimum of materials and tools used, we got such a convenient folding ironing board.
This concludes my article!
Thank you all for your attention!
There is an ironing board in every apartment. This is an item that a modern housewife simply cannot do without. And everything would be fine if not for one “but”: usually the irons are quite large. Today we will tell you where to hide the ironing board so that it is always convenient to use and does not spoil the interior.
DIY built-in ironing board
Several built-in variations are possible in the cabinet:
- retractable - a complex design for homemade craftsmen with specialized telescopic mechanisms;
- hidden - in a niche behind shelves or a mirror - requires stable carpentry skills;
- folding - with a simple and reliable fastening and fixing mechanism.
The folding option is easy to implement. The structure consists of:
- ironing surface (you can use a modernized base of a folding floor board);
- folding device;
- frames;
- support attached to the rear wall of the cabinet.
For a DIY installation, it is better to use the practical installation of a static board to the middle shelf (at lumbar level) using door awnings, piano hinges or butterfly hinges (ideally hidden hinges). The upper shelves above the ironing tabletop are filed down so that it can be placed freely when folded behind a closed cabinet door.
The support must be attached to the wall with the same hinges that were used for the table top, and hooks must be installed under it on the bottom (back) side of the board. During operation, the lower support is folded back and secured with hooks to the board lowered onto it.
This version of a hand-made ironing device is stable and maneuverable.
Rules for choosing functional ironing boards
When preparing to purchase or accept the ordered and installed drawers and built-in ironing boards on the wall, check:
- folding mechanism - smooth lowering, no noise, there should be no doubt about the quality and durability of the material;
- reliability of fastening of the support to a box, shelf or wall and stability of the structure - swaying, dangling in a horizontal position will unbalance the fastener, leading to injury during ironing and breakage;
- weight of the structure - the wall thickness should not hold, but calmly hold the total mass of the ironing board, linen and iron;
- warranty promises and obligations of the manufacturer and installer: no guarantees - refusal to use.
Ironing board on the door
For expressive personalities who can slam the door in the heat of the moment, this option is clearly not suitable. But if you have a calm character and like to decorate your interior, you may be interested in the placement of the board on the door. You can attach it using the same principle as on the wall, using hooks.
Just for reliability, so that the ironer does not rattle every time it opens and closes, mount a few additional nails into the surface of the door and bend them. If necessary, you can use them to fix the ironing board, and it will be firmly secured.
Some popular models from top-rated manufacturers
Among the available options for built-in boards, there are those that you can follow when making devices for ironing clothes/clothes yourself, or buy and use for their intended purpose - they will last a long time and faithfully. I am glad that they were produced mainly in Russia and the CIS - TriYA, IRON SLIM, Shelf-On, “Lubimy Dom”:
- wall-mounted ironing board “Mermaid” with a chrome-plated pipe frame and an automatic lock - installed quickly and easily, taking up only 8 cm from the wall;
- built-in “Rocket” board with variable installation methods (inside and outside the cabinet), mounting on the right or left rack, with a varied set of ironing surfaces and, what is especially valuable, its maximum permissible load is 70 kg;
- wide built-in ironing board attached to the wall with reinforced brackets with a mirror cabinet from IRON SLIM;
- compact ironing board Astra-mini Eco, built into a cabinet with hinged doors, with a plastic lock included - child protection.
Reviews
Our daughter is a needlewoman. She sews toys and clothes for them. Parts and workpieces need to be ironed. There is a stationary board of a folding type, but it is inconvenient to lay it out all the time, and the children do not want to litter it. We installed a “Mermaid” wall board in her room - it’s compact and easy to handle in children’s hands. When unfolded, it leaves a good gap - it’s convenient to iron both small pattern pieces and our (adult) things. Everyone is happy.
Egorov Dmitry When ordering the wardrobe, we immediately provided an ironing board with a rotating function. They installed everything quickly, neatly, without unnecessary play - everything is clear and thought out: the tabletop is at the right level - your hands don’t get tired and your lower back doesn’t ache from unnecessary bending, doesn’t sag or wobble during ironing. We've been using it for four months now - absolutely no complaints. Both my wife and I are happy: she’s comfortable, and I’m comfortable.
My husband gave me a gift - he ordered an ironing board with a mirror cabinet from IRON SLIM. This is just lovely! The house is always in order. And it gave in to me instantly - no difficulties either during opening or assembling. I managed it right away. Now I want to give my daughter-in-law the same birthday present.
join the discussion
Share with your friends
Every housewife should have that minimum set of auxiliary things that she cannot do without. In addition to household appliances and equipment, an ironing board will be a fairly important item. Not all apartments have the necessary dimensions to contain and use it, which is why wall-mounted models are becoming increasingly popular. The ability to choose the right board, attach it and use it will make it possible to save space and make the work area as comfortable as possible.
Step-by-step description of making an ironing board
1
.
First we determine the optimal board size. The approximate length of the tabletop is 120–130 cm, and its width is 30–40 cm. Based on these parameters, we measure out a piece of furniture board. If possible, choose a shield with rounded corners; if not, round it. This way the upholstery will not be damaged while using the board. 2
.
We will prepare a pair of beams with dimensions of 3.5x4x30 centimeters, and three beams - 3.5x4x110 cm. Their sizes may vary, depending on the space in the room and the height of the users. 3
.
To cut out all the parts, we use an electric jigsaw, and to process the edges, we use a milling machine. 4
.
We take one long beam and measure 52 cm from one end, and 58 cm from the other. We mark the places and drill a through hole in them using a drill and a drill bit with a diameter of 8 mm. We carry out a similar procedure with the remaining long bars. 5
.
We make a sample on two long beams using a cork drill. This way the bolt heads will be immersed in the material and will not stand out on the surface. 6
.
We connect three beams with bolts, marking M10. Rotate the middle element 180 degrees. 7
.
We retreat 3 cm from the edge of each short beam and make holes with a diameter of 8 mm in these areas. A sample is made on one side. 8
.
On the other edges of the short beams we drill similar holes, but step back 2 cm. We make samples on one side. 9
.
After this, we connect the short and long beams with bolts. 10
.
We fix the support, made of long and short beams, on the tabletop - we retreat from its edge about 16–18 cm. 11
.
At the other end of the tabletop, using a milling machine, we make a small recess - one leg will fit into it when the board is unfolded. If this area is further removed from the edge, the tabletop will be higher when unfolded. 12
.
We cut out the upholstery panel, taking into account the size of the tabletop. The optimal solution in this case is 150x50 cm. 13
.
We trace the tabletop onto the lining material, cut out the fabric and place it on the surface. 14
. turn the tabletop over and place it on the upholstery fabric - place it inside out. We wrap the edges of the material and fix it on the board using a stapler.
Device
Ironing boards that are attached to the wall are most often hidden in a closet in order to hide a necessary household item nearby and rationally distribute the space of the room. A wall-mounted ironing board will be convenient for those who do not have a storage room or a special room for household needs in their apartment. Thus, it is possible to place all the necessary things in one place: an iron, a water spray bottle, accessories for cleaning the iron, an additional armrest for the board and much more. A wall-mounted model usually lacks such advantages and can be placed in any corner of the apartment, even if it is not entirely convenient for the owners.
If the ironing board is hidden in a closet, it is often made foldable, which means the device becomes much more complicated. The following main elements can be identified:
- support;
- folding mechanism;
- ironing surface.
The support is the part that is attached directly to the surface of the wall or cabinet. It is important to secure the base well so that it can easily support both things when ironing and the weight of the board itself when folded. The next important detail is the fastenings, which must be made only from high-quality and durable materials so that the product lasts as long as possible.
The last part, namely the ironing surface, can be wooden or metal, depending on the need and wishes.
The dimensions of the board can be very diverse, from miniature, where small wardrobe items will be placed, to a full one and a half meter surface, on which you can easily iron an evening dress or raincoat. The fasteners will be different for each case: a more powerful design requires strong and reliable systems, a smaller one makes it possible to use dowels and screws of suitable length, which are screwed into the back wall of the cabinet, if it is strong enough, or into the wall.
Pull-out board
Finding such a variation in stores is problematic, but you can order it at any furniture shop or make it yourself. Most often, this design is placed in a cabinet or chest of drawers. It is assumed that the wider part of the base will be fixed to the guide elements, while the tabletop is folded in half. Such a board traditionally has dimensional characteristics limited by dimensions. But such an element does not take up much space compared to similar devices.
Advice! When choosing a built-in ironing board, pay attention to the functionality of rotating the structure.
It is important to know!
If you decide to make such a structure with your own hands, you should take into account the direct dependence of the stability of this item on the quality of the guide elements.
Varieties
There are many options for wall-mounted ironing boards, so it is important to know about all the different varieties available before making your final choice.
There are these options:
- folding;
- built-in;
- folding and folding;
- suspended and mounted.
The folding type is the most popular due to the maximum strength of the product, as well as stability, which allows you to safely leave the iron on the surface without fear of it falling. This option can last for many years, delighting the owner, being easy to use and reliable. Among the design features of this option are the following:
- The tabletop is fastened to a metal frame with a folding mechanism, which, in turn, is attached to the wall;
- a folding structure, which is placed on the wall, can have different dimensions;
- it is difficult to find a board attached in this way indoors, because a suitable location is chosen for it;
- To improve the system, a cabinet-type structure is built around the board, or it is purchased initially, taking into account the required dimensions.
A folding ironing board can be hidden behind a mirror, which will solve several problems at once: a convenient place for the board, expanding the space due to the mirror, the opportunity to look at yourself in full height, thanks to the appropriate dimensions of the ironing surface.
Built-in ironing boards can be represented by the following options:
- a cabinet with a mirror where the board is placed;
- hinged wardrobe or wardrobe;
- a pencil case or hanging cabinet with shelves that can be placed in any room.
A very convenient option is to integrate the ironing surface into a drawer or a separate shelf. In this case, a lifting mechanism is additionally installed, which lifts the board higher during operation and lowers it to the level of the shelf, which allows you to hide it, making it completely invisible. There are also built-in designs that can be rotated to iron any items with maximum comfort.
A folding ironing board is a structure whose surface consists not of one piece of wood or metal, but of several. Often there are only two. This option makes it possible to reduce the area of the board, which makes it easier to place it in any closet, shelf or cabinet. The ironing process does not suffer in any way, only the procedure for setting up the board and its cleaning becomes more complicated, due to the additional action of arranging the parts, fixing them and reverse actions.
A suspended wall structure is not always framed by a cabinet or similar furniture; in some cases, the board is simply attached to the wall. This is convenient if the room is intended for cleaning and other similar activities. Due to its simplicity, the ironer can be easily brought into working position and also quickly removed. In this case, it is important to purchase reliable fastening mechanisms and screw the board well to the wall.
A wall-hung structure is not much different from a wall-hung structure; the only difference is that the ironing surface in this case is autonomous; it is hung on mounts that are already in the wall or any other surface. You can store parts of a single whole either in one place or in different ones, this does not affect the functionality in any way.
The choice of option will be determined by the room in which you want to install the ironing board, the dimensions of the room, in addition, it is important how often the housewife will use the surface and what size items she usually irons. Taking all these factors into account can help you choose the most suitable option.
To make the right choice, it is important to know not only the types of devices, but also the popular models of boards that currently exist on the market.
Among the most relevant are the following.
- Iron Slim is a transformer because it is built into a cabinet that is hidden behind a mirror; A special feature of the model is the socket, which is already built into the cabinet, and for an impressive appearance, the entire structure is made in a metallic shade.
- Shelf on Iron Box Eco - this option is in many ways similar to the previous one, as it is built into a closet, but the distinctive feature will be two shelves that are added inside to make it possible to place clothes or necessary small items.
- Asko Hi 115 T - is represented by a completely different modification, which is installed in a cabinet drawer, which can significantly save space in the room; in addition, the entire board with the mechanism is made of steel, which allows you to evenly distribute the load, which significantly extends the service life of the equipment.
There are a lot of options for wall-mounted, built-in and folding models, so before buying, it’s worth comparing the main characteristics, and it’s best to see the product in person, try folding and unfolding it. Not all brands produce such a line; some still give preference to the classics, those models that are installed anywhere in the room and are autonomous; Among these we can highlight the well-known and popular company Ikea.
Covering the main part of the ironing board
An ironing board built into a wall, or any other, is not complete unless the paneling is done. Otherwise, how to ensure comfort while ironing clothes?
To carry out this operation you will need:
- a bath towel;
- furniture stapler;
- staplers;
- hammer;
- scissors.
Important! Remember that upholstery only happens after you have inserted the hinges into the board.
In this case we will proceed like this:
- We cover the surface of the board with a bath towel, then fasten the corners with a stapler.
- You must be sure to stretch the fabric sufficiently so that no wrinkles form at the very base of the board.
- You can finish off staples that are difficult to hammer in with a hammer or try repeating this action with a stapler. The next layer is the facing material - any fabric that suits your taste, but it must be resistant to fairly high temperatures.
- Using a stapler and hammer, carry out the fastening procedure as you did with the first layer.
- Use scissors to trim off any excess hanging fabric.
An ironing board is a necessity for both a large family and one person. But often the problem lies in the lack of space to store this important part. You constantly have to hide it and then pull it out, which takes time, effort, and energy. Modern companies have come up with a way to modernize this product and have created compact designs that involve integrating an ironing board into. As a result, ironing has become a simple and enjoyable process!
What to focus on when choosing?
To make the right choice of a wall-mounted ironing board, you should pay attention to some things that will help you evaluate the quality of the product, its performance and ease of use. These include the following characteristics.
- Checking the quality of the folding mechanism. This detail is fundamental, so you should pay special attention to it. If this mechanism gives the impression of not being of the highest quality, it is light and can be deformed with force, then this is absolutely not something worth buying. The quality of the metal and assembly of the folding system must be at its best, only this guarantees the longevity of working with the board.
- Checking the quality of the support. A very important point is to fasten the board support to the wall, cabinet or shelf, which guarantees that the ironer remains securely inside both in the folded and in the working position. If the support is weak or of poor quality, the board may simply fall out of the niche in which it is located.
- The weight of the ironing board. If there is too much weight, it will be difficult for any support to withstand the load and sooner or later the fastenings will fail. In addition to this factor, it is worth paying attention to the thickness of the wall to which the ironer is attached. The optimal weight of the structure and the required wall thickness will make it possible to securely fix the board and use it without any risk.
- Checking the accessories that come with the board and cabinet. In addition to the box where the ironing board is located, there may be a number of additions that can significantly affect the cost of the product: inside there may be several shelves for linen or necessary things, a socket, and a board height adjuster. Instead of a regular cabinet door, a mirror, etc. can be installed.
- It is worth paying special attention to the stability of the board in the working position. This is important for those who have small children or pets who may accidentally snag the ironing iron, causing the iron to fall and cause unpleasant consequences. In addition, the housewife herself may accidentally get burned if she has an unstable ironing surface.
Having gone through all the above criteria, you can quite easily choose a high-quality product that will last a long time and reliably. In order for a wall structure to be appropriate in a particular room, it is worth selecting it in accordance with its dimensions. For a small room you need a compact model, which will contain only the essentials, but for a spacious room there is the opportunity to purchase what will be most convenient for the housewife.
In a drawer
Another very interesting option for storing the ironing board is in a drawer.
Moreover, it can be either traditional horizontal or vertical. This is very convenient if you have a small board and a chest of drawers or a cabinet of sufficient depth. Today there are also special built-in ironing boards that come with furniture. Pay attention to these options if you are going to update your furniture.
How to attach?
To place an ironing board on the wall with your own hands, you need to know certain rules by which this work is carried out. It’s worth starting by deciding what type of board you’ll be dealing with. If the board is located in a retractable drawer, then it can be secured thanks to the supporting structure, which should already be available. It is important that the height of the retractable shelf does not exceed one meter, otherwise it will significantly complicate the ironing process.
The thickness of the board on which the device is mounted must be 16 mm, and the mounting itself occurs using screws.
If you want to hang the ironing board by placing it on the wall or in a closet, the process will be different. In this case, you will need a holder and bracket, materials that may vary, but most often it is a symbiosis of steel and plastic. It is this tandem that allows you to create a reliable fastening system that will allow you to quickly remove the board and bring it into working position, while the reliability of the product will be at the highest level.
Each of the above options is convenient for small apartments where there is not a lot of space for household items. With the help of shelves and drawers, it is possible not only to hide the ironer, but also to make it convenient to use, equipping it with a rotation mechanism in any direction. In the absence of support from below, it is much more convenient to iron sweaters and other things that cannot be unbuttoned. Wall-mounted and built-in structures have many advantages and only one drawback, which is the high cost of the product.
Tips for choosing boards in the video below.
How to make a retractable board on the wall with your own hands
Making a folding board with your own hands is quite simple. To complete the work, you need to correctly draw up drawings, as well as prepare the required tools and materials.
For work you will need the following items:
- plywood sheet;
- long wooden stick;
- wooden blocks;
- fasteners;
- a simple pencil;
- metal ruler;
- sandpaper;
- piano loop;
- a piece of fabric;
- staples;
- hammer;
- scissors;
- furniture stapler;
- Sander;
- electric jigsaw.
To hide a board in a niche or cabinet, you need to correctly perform several simple operations. You can even use an old board as the base of the product. At the same time, it must be durable and without any damage.
Sequencing:
- Draw a drawing of the future product, on which all the necessary dimensions are indicated.
- Using a simple pencil, the outlines of the future structure are drawn onto a sheet of plywood. The shape and dimensions are chosen independently, taking into account the dimensions of the cabinet or niche in the wall.
- Using an electric jigsaw, cut out the base.
- The edges of the workpiece are processed using a grinding machine or sandpaper. It is important that they are smooth and even.
- To make a fixing leg, take a wooden stick.
- It is cut to the required length and sanded.
- The finished part is attached to the bottom of the base using a piano loop.
- From the bars, the width of which should be approximately 70 mm and the thickness - 40 mm, 2 identical parts are cut out.
- They are attached to the base where the board is attached to the niche.
- A piece of cloth is placed on the board.
- It is stretched and attached to the base using a furniture stapler.
- Several additional staples are hammered into the corners with a hammer. This is necessary to ensure that the fabric is securely fastened and does not create problems during ironing.
- The facing material is attached to the edges of the base. It can be a special tape or any fabric that will not lose its appearance when in contact with a hot iron.
- The product is installed in a niche using hinged fasteners.
A built-in ironing board is a great solution for a small apartment. Such a device should be purchased ready-made or made independently. You can install it in a dressing room, bedroom or any other room.