Share on social media networks:
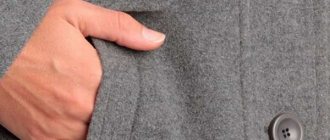
With the onset of rain and bad weather, all people need suitable clothing and shoes. In the autumn and spring, almost everyone takes out rubber boots from the distant shelves, which can protect against moisture. However, you want to be not only dry, but also warm, so you have to buy shoes with liners or make them yourself. Those who do not have such shoe insulation often wonder how to sew liners into rubber boots? In order to understand this issue, you need to find out about the purposes of using such products and the materials for sewing.
How to sew liners into rubber boots?
Share on social media networks:
With the onset of rain and bad weather, all people need suitable clothing and shoes. In the autumn and spring, almost everyone takes out rubber boots from the distant shelves, which can protect against moisture. However, you want to be not only dry, but also warm, so you have to buy shoes with liners or make them yourself. Those who do not have such shoe insulation often wonder how to sew liners into rubber boots? In order to understand this issue, you need to find out about the purposes of using such products and the materials for sewing.
Boots for children
How to sew boots for a child from fabric? You can make home slippers for your baby using the same methods, the main thing is to correctly outline the pattern. But the assembly principle and manufacturing technique are similar.
Important! This product is not suitable for constant wear, but serves as a prop and accessory.
Materials for work
To create soldier boots you need to prepare:
- Leatherette. If you can’t find a suitable material, you can use a thick tarpaulin.
- Dense base for the sole.
- Glue.
Important! The peculiarity of these boots is that they are worn over the child’s shoes, i.e. like a stocking.
Sewing technique:
- The base of the boot is made in the form of a pipe, which must be installed vertically directly on the boot. Make several cuts in the front of the material, which will simplify the formation of the boot, since the upper part will lie more evenly.
Important! The width of this part should allow the foot to pass freely in the shoe.
- Place the second piece of fabric on the toe of your child's shoe. Position this piece so that the cuts are hidden. Trim the excess fabric along an arc.
- Secure the parts with pins and sew them on a machine.
- Now let's move on to the sole of our boot.
- We make a template based on the shape of the shoe, transfer it to the fabric, and cut out four such parts from dense material.
- Place one element of the future sole on the sole of the shoe itself, make several cuts in the fabric up to the foot line. Using a needle and thread, pull the edges towards the center. There shouldn't be anything sticking out on the sides.
- Then generously coat it with glue and place the next element on top of the sole. Press tightly and leave to dry.
- When the product is completely dry, remove the resulting boot from the child’s shoes. Treat the inner edges of the sole with glue, secure and leave to dry.
Important! To make it easier to secure the elements, turn the boot inside out. A zigzag seam at the junction of the parts will only add reliability to the product.
- And at the end we design the boot top, namely its upper edge. We carefully bend it and make a beautiful stitch on the machine.
DIY boots for the young soldier are ready! The material of the product is quite durable for gentle washing and gentle wear.
Important! Using this technique, you can make other models, for example, stylish cowboy boots.
You don’t have to stop at such decorative items, but sew children’s boots from fur with your own hands - patterns can be found on the Internet or you can safely use the above master classes. The main thing is to choose the right size and buy high-quality, beautiful material.
Nowadays it has become very fashionable to wear not only slippers, but also house boots at home. They sew not only women's slippers, but also men's ones. In order to understand how to sew boots correctly, you need to read our tips and instructions.
While working on house boots we will need:
- fleece or velor of a suitable color;
- a piece of leather fabric;
- threads matching the color of the fabric;
- pins;
- padding polyester;
- scissors;
- pattern paper;
- needle;
- sewing machine;
- figured rulers for sewing.
The work is divided into three stages:
- pattern making;
- preparation of parts;
- product collection.
What are shoe boots used for?
Before you start sewing stockings into boots, you need to understand what they are needed for and why they sell shoes on the market without them?
- Protects the inside of the shoe from moisture.
- Create additional conditions of comfort (warmth, convenience).
- Do not restrict movement.
- Practical to use.
Important! They are often sold individually, since as a set their value is minimal, and the seller receives practically nothing from the sale. The cost of such boots is influenced by the material from which they are made, so it happens that instead of one pair of boots with liners, you can buy two pairs, but without any additions.
What to wear with stocking boots
It is customary to wear bright boots with outerwear in muted tones and the same color scheme. And choose accessories to match the boots. The shoes will look great with a skirt of any length, from mini to midi. However, when choosing a length below the knee, you should choose a skirt that is wide or has a longitudinal slit. Doll or fluffy skirts are very stylish. But they are appropriate for parties or nightclubs: they are too extravagant.
Short warm shorts are at the height of fashion. They look great with stocking boots (see photo). But it’s better not to choose “tone-on-tone models”: they blend in and resemble regular trousers. Stocking boots are ideal with coats, down jackets, and fur coats. True, a sheepskin coat and high boots look ambivalent. Designers consider high boots-stockings the most feminine and sexy shoes. That’s why they play up the models in such a way as not to evoke the slightest hint of vulgarity.
For cold weather, models are offered that tightly fit the leg and are hidden under the hem of midi-length clothing. This length is in harmony with classic colors. And light brown suede boots are especially in demand. Patent leather is considered irrelevant and tasteless this season. Soft suede and matte leather are in the lead.
Stocking boots for full legs are not a problem. They slim, and do not emphasize fullness. The length of the boot lengthens the legs, stretching the silhouette. The models are also convenient because they stretch, adjusting to any size. To make imperfections invisible, you should choose shoes without small parts and accessories. Fringed appliqués are not permitted. They make the leg heavier and increase its bulk. You should not wear stocking boots with miniskirts. Plain leggings are preferable. A high stiletto heel elongates the silhouette and corrects the figure. But it is recommended to select a hairpin that is not too thin.
What are shoe inserts made from?
For the production of shoe stockings, both natural raw materials (sheepskin, wool) and artificial ones (synthetic material) are used. The quality of the product directly depends on the material. For example, wool has excellent heat retention properties and maximum wear resistance. But with synthetics, the opposite is true - the cheaper the raw materials, the worse the quality of the future product.
Important! Synthetic stockings do not allow air to pass through and do not absorb moisture well. From this we can conclude that they need constant care. And people working as foresters and in road repair services are primarily concerned with work rather than cleaning shoes. Therefore, it is recommended to buy and sew insulation from high-quality, natural materials.
We sew insulated felt boots for boots
In order to sew boot liners with your own hands, you will need the following materials and tools:
- Synthetic padding.
- Cuffs from an old jacket.
- Fleece.
- Shoe insoles.
- Needle and thread.
- Sewing machine.
- Scissors.
- We make a pattern based on the size and shape of the boot.
- We transfer the patterns to fleece, then padding polyester material.
- Cut out the insole along the contour.
- Cut off the elastic from the sleeve of the jacket.
- We sew together the elements of future felt boots.
- We connect the front parts of fleece and padding polyester and sew them together.
- We turn the future product inside out.
- We sew the insole to the resulting felt boot with a strong seam.
- We put the stockings into the boots.
As it turns out, making simple, comfortable felt boots for a child’s boots is not that difficult. But now you can run through puddles and not worry about getting a cold.
Second option: fitted boots
You can sew home boots with your own hands in this manner. This model is distinguished by a more fitted shoe silhouette. Note that the assembly of elements and sewing do not differ from the previous version. The difference lies only in the pattern of the product, namely in the boot:
- Its length increases by approximately 50 cm, and the top expands.
- Half of the boot at the top is approximately 23 cm.
Again, it should be noted that these parameters are arbitrary and you can change them at your discretion.
On the boot we form an assembly of four elastic bands - they are sewn parallel and at an equal distance from each other. There should be a gap of 4 cm from the elastic to the edge of the boot.
Important! The insulation for the toe part of this model should be very thin. We recommend choosing fleece or velor as a suitable material for shoes.
Additional recommendations
Fabric inserts, like many other products, cannot last forever. However, with proper use and familiarization with a few tips, you can still manage to extend their service life. Let's look at the recommendations in more detail:
- On finished products, sew additional pieces of fabric to the heels, since the heel is the most vulnerable spot on socks, felt boots, and stockings.
- Sew the pattern pieces using a zigzag seam - it is the most reliable.
- Wash them with regular laundry soap without adding acidic compounds.
- After washing, dry under natural conditions (preferably outside).
Important! If your product is made from natural raw materials, it is recommended to wash it by hand or in a washing machine programmed for “gentle washing”.
Felt boots for rubber boots
Spring has finally arrived! And she brought with her the long-awaited gentle sun, the first green grass and... huge impassable puddles. The ideal shoes for such spring walks are rubber boots . But, in addition, so that children's feet do not get wet, they must also be warm. For this purpose, many children's models have felt boots for rubber boots . They can be fleece and wool, sheepskin and faux fur. But what to do if your favorite and beautiful rubber boots are without such warm felt boots? Wait until it gets warmer so you can run fearlessly through puddles? The answer is simple - you can sew these boots for rubber boots yourself . Our craftswoman Maria will be happy to conduct a master class on sewing such a necessary item.
For felt boots you will need: 1. An old padding padding from a jacket + knitted cuffs for lapels from it. 2. Fleece 3. Insoles 4. Matching threads, sewing machine, scissors, needle.
So, let's get started: 1. I made the pattern directly from the boot.
There were these boots
This is what they have become!
I would like to add that rubber boots remain in demand for children in any off-season - be it spring or autumn. And fashionable shoes for fall winter 2011 still include boots that are comfortable for children’s feet. After all, as long as there are puddles, the kids’ interest in them will not wane - so, dear mothers, allow them to stomp and jump in the puddles, without fear of getting their feet wet.
How to seal PVC or EVA rubber boots at home
August 6, 2016November 19, 2017
If your favorite hunting or fishing boots are damaged, do not rush to throw them away.
They can still be repaired using available tools and detailed instructions for action.
What to prepare to seal waders or fishing boots
For boots made of EVA material, you need to prepare a repair kit, which consists of two patches and glue.
You will also need:
- sandpaper;
- degreaser;
- protective gloves (you can use ordinary non-sterile ones from a pharmacy);
- napkins for removing excess glue along the edges of the patch;
- piece of fabric;
- two plastic bags.
The patch can be cut from any durable, water-resistant material. Special glue should be used; in extreme cases, the universal “Moment” will do.
For PVC boots you will need a repair kit consisting of two patches and glue.
We repair PVC boots
You will also find it useful:
- “fine” sandpaper;
- surface degreasing agent;
- protective gloves;
- napkins for removing excess glue along the edges of the patch;
- hair dryer (mounted or regular).
Any glue that is created specifically for PVC materials will do. For quick shoe repairs while hiking, fishing and hunting, special repair kits are sold.
For example, KU-3105, consisting of glue and a transparent patch film. An hour after application, the glue dries completely. The cost of such a set is about 100 rubles.
Seal the hole in the boot step by step
Before you get started, here are some tips and tricks:
- do all work with glue only with gloves;
- carefully read the instructions on the glue tube;
- do not arbitrarily change the time intervals specified in the instructions;
- Do not use materials for which the selected adhesive is not suitable as a patch.
How to seal boots made of EVA material
Step by step repairing boots from EVA
- Thoroughly clean and degrease the damaged area of the boot.
Using sandpaper to roughen the surface where the glue will be applied, also sand the patches. This condition must be observed, since the glue does not adhere to glossy surfaces! - Reach your hand into the boot and push out the torn part of the boot. Apply glue to the sides of the torn part. From the outside, carefully push this part inward, joining the edges.
- Apply glue to the patch and apply it to the damaged area from the outside.
- Apply the patch in the same way on the inside and press it in place. To do this, place a piece of fabric wrapped in a bag in the boot.
- Place a weight on top of the boot placed in the bag.
A day after repair, the boots can be used.
VIDEO INSTRUCTION
How to seal PVC boots
- Thoroughly clean and degrease the damaged area of the boot. Use sandpaper to roughen the surface on which the glue will be applied.
- Apply a thin layer of glue to the damaged area and patch. It should dry, so stop working for 15 minutes.
- Apply a second layer of glue to the previously treated surfaces. Leave for half an hour.
- Using a hairdryer, carefully heat the glue and connect the torn parts of the boot fabric. Then, immediately apply patches to the outside and inside.
- Using your fingers, gently but firmly, squeeze the gluing area for 1-2 minutes or roll it. Boots can be put on after the period of time indicated on the tube of glue.
- If there is not a cut on the boot, but a hole, place a piece of paper under the surface to be glued so that the tops do not stick together.
VIDEO DESCRIPTION
Is it possible to repair a rubber boot if the sole is torn?
Depends on the nature of the damage. If a crack appears, there are several repair options.
- Buy elastic glue and fill the space in the crack with it. After it is completely dry, use sandpaper to clean the repaired part of the sole. How long will it last? One or two exits.
- For this method you will need a small piece of nylon the size of a crack in the sole and a soldering iron. The nylon is inserted into the crack and carefully heated with a soldering iron. Then it pushes into the crack in the sole. How long will it last? For two or three exits.
If the damage is more serious, there is no need to waste time repairing the boots. It will be easier and more reliable to buy a new pair!
Source: https://kakkley.ru/kak-zakleit-rezinovye-sapogi/
What to sew from and how to decorate boots?
House shoes are made from different materials: fleece, velor, faux fur, knitwear, felt, corduroy and drape. The fabric for sewing can be old jeans, sheepskin coats and sweaters. Depending on what material you choose, the product will turn out to be shape-holding or soft.
Self-sewn boots can be complemented with various elements: applique, embroidery, lace, bows. Boots with the image of an animal's face look great: a bunny, dog or kitten. In addition to embroidery, the resemblance to the animal will be conveyed by separately cut ears, a tail and antennae. For lovers of glamor, the ideal finish is rhinestones or sequins. If you plan to give shoes as a gift, then, using your imagination, you can make something with meaning, that is, take into account the interests of the recipient. For example, decorate it in a football style, with biker elements, in the form of Minions - whatever you like! Such a gift can be made for the New Year, for a birthday or for another occasion, and it will be doubly pleasant.
Textile boots-stockings. Stocking boots: a combination of spectacular appearance, comfort and chic
Stocking boots have become an indicator of femininity and elegance, emphasizing the style of the owner. The soft material of the boot tightly envelops the legs, visually hiding plump ankles, giving the fashionista a feeling of comfort. Designers offer products for the spring-winter period, not forgetting to please with a winter option with a fur lining. You will like the boots because of their versatility and the ability to combine them with most things from your everyday wardrobe. The cost of branded shoes from popular brands seems overpriced, but subsequent use will dispel doubts about a good purchase.
features and advantages of the model
stocking boots will help you make your dream come true and get long legs. The slim fit fits snugly around the ankles and reaches mid-thigh. such products are sometimes called tights boots due to their resemblance to this wardrobe item. note a number of advantages and features of fashionable shoes:
- Thanks to the elastic material, the product is worn like stockings. Lacing is present as a decorative element, although the fastener is considered optional.
- Stocking boots follow the contours of your legs, allowing you to demonstrate the beauty of your ankles.
- Comfortable wear. They do not tighten your legs, allowing you to lead an active city life.
- Suitable for owners of any figure. With the help of over the knee boots, it is possible to reduce the fullness of the legs of curvy girls, but fashionistas with thin ankles can also achieve a complete fit of the boot.
- Leg protection for maximum length during weather changes. Even in winter they don’t give up on dresses and skirts, because the long boot with fur will protect them from wind or frost.
- Variety of models. Designers are developing options for discreet and bright colors, with a minimum or abundance of decor.
- Universal application. Models for the demi-season and winter periods are presented. Unlike standard shoes, girls remain the center of attention in these boots. Openwork lace products are now on sale, complementing the look in the summer.
How to make a pattern?
To make the result pleasing, you should create a pattern for the boots. For convenience, it is recommended to use a plastic material such as polyethylene. If you don't have one, paper will do. The pattern of boots made of fabric is constructed in different ways:
- Using an old comfortable pair of shoes. Applying polyethylene and focusing on the seams, you need to trace the parts along the contour. Check that the parts match each other in length and adjust.
- You can create a pattern by applying it to your leg. The foot is outlined and an increase of 2-3 cm is made, depending on the material from which the boots are made. The width of the leg is measured in several places on the upper toe box to take into account the height of the instep.
How to sew fleece boots with your own hands
House shoes are increasingly gaining popularity. It’s so nice to dive into warm, cozy fleece boots after a hard day. They will come in handy on cool evenings at the dacha or during battery outages.
You can easily sew home shoes with your own hands; these can be boots (ugg boots), slippers, slippers.
To make ugg boots, the following warm material is useful:
- Fleece, velsoft, fur, felt.
- Insulation: synthetic winterizer, alpolux, batting.
- Sole: leather, suede, leather substitute, anti-slip fabric with rubber pimples.
- The threads are strong.
- Edging tape.
If desired, ugg boots can be decorated with ears, bows or in an ethnic style.
Stages of pattern construction
The pattern is ready-made, as in the photo below.
If the leg is not standard, for example, a wide foot, a high arch, a protruding bone, then the patterns can be built independently, according to individual measurements.
To construct the sole, you can outline the foot, the insole, or a finished slipper that fits the size.
Attention: if the foot or insole was outlined, then add an additional 1 cm around the circumference. There is no need to increase the sole around the slipper - it is already large.
- Draw a center line and make a cut along it almost to the very top.
- Separate the halves at a distance equal to the lifting height. For this measurement, you need to measure the width of the foot at the base - the green line, plus 3 cm for freedom of fit.
- Mark the distance from the tip of the thumb to the instep - the blue line. This will be the length of the toe of the boot. Usually it is 12 - 14 cm.
- Draw a smooth arc - pink color. The toe is ready.
- Boot top. It is necessary to measure the circumference of the shin in the place where the boot ends, and the circumference of the ankle. Add 3 - 4 cm to these measurements for a loose fit. When using stretch fabric, such as fleece, and without insulation, a small increase of 2–3 cm can be made. If you want to sew the product looser, then add 4–5 cm.
- Mark the lifting point on the pattern. Draw the heel with a convex arc. Its height is usually 5 cm.
- Draw a semicircle where the toe and boot meet.
Cutting out the parts
The details should be cut out taking into account allowances of 1 cm. For convenience, they can be drawn directly on the pattern.
The sole insulation is cut without allowances. Or it is subsequently cut off close to the seam.
Product assembly
The main fabric of this model is fleece with a brown pattern, the lining is the same, only gray. Insulation – thin padding polyester. The sole is anti-slip “foot” fabric.
- Connect the toe and shaft, then sew the back seam.
- The lining piece is assembled in the same way, but leave a hole in the back seam for turning out, 8 - 10 cm long.
- Place one part inside another – face to face.
- Stitch along the top edge.
Sole assembly
Fold the layers of the sole in the following order: fleece, insulation, leather or anti-slip fabric. Stitch them together.
There are two ways to connect the sole to the main product: with seams outward or seams inward.
Processing with seams inside
The advantage of this treatment is a very neat appearance. Nothing is visible from the outside.
Negative aspects: due to the fact that thick seams are located on the inside, there is a decrease in space in the shoes and their size decreases. They can interfere with the foot when walking if the boot is not large enough.
The parts are connected as follows:
- Attach the sole to the lining piece.
- Connect to the outer part in the sequence as in the photo.
- Sew along the outline and turn through the hole left.
- Sew the hole by hand using blind stitches.
- Turn the product right side out and straighten it.
Important: the thickness of the sole layer is quite significant, so it is advisable to stitch this area manually or using an industrial sewing machine. A household machine may not be able to handle it.
Processing with seams facing out
The advantage of this treatment is that the foot in the boot is very comfortable, the thickness of the seams does not interfere with it.
- The assembly sequence in stages is shown in the photo.
- Finish the outer edge with edging tape.
How to sew children's boots from fleece yourself
Fleece shoes will come in very handy for kids. This is a soft, delicate and warm material.
The patterns are built according to the same principle as for an adult. But since children’s legs in most cases have a standard shape, you can take a ready-made pattern of a suitable size.
Sewing homemade fleece boots for kids is a pleasure. They are made in various bright colors, in the form of animals with faces and ears.
For very tiny ones, ugg boots are sewn with the seams facing out. For the sole, it is advisable to use anti-slip fabric or suede. Because they provide stability and prevent slipping.
The video will clearly show another way to create a pattern and sew house shoes.
What do you need for work?
After constructing a drawing of future boots from fabric, you can prepare the necessary materials for sewing. Depending on the model you will need:
- The main fabric is the top of the boots: fleece, fur, velor, etc.
- The sole is made of leather, leatherette, thick raincoat fabric. This can be the main fabric, as long as it is not too slippery. Specialized stores sell soles for handmade shoes, but they make the product heavier.
- Insulation, such as padding polyester or silicone, will not only protect your feet from the cold, but will also keep the shape of the boot. An important point is not to forget to make an additional allowance for the thickness of the material.
- Lining fabric is needed as an additional layer, and also allows you to hide all the seams inside the product. The lining pieces are cut from the main fabric or, if the top is too thick, from a thinner material. If the boots are made from sheepskin, then no lining is needed.
- You will need a needle, nylon threads for hand stitching and a sewing machine, if the density of the fabric allows it to be sewn.
Sewing boots.
1. How to sew house slippers and boots. Fold two symmetrical pieces face to face, aligning their edges, then pin them across the seam (Fig. 1). Sew a seam width of 1 cm (Fig. 2).
2. We repeat operation No. 1 with other freebie parts. To turn the boots inside out, on the two freebies, which should be inside the two boots, we leave an unstitched distance in the middle of about 10 cm, not forgetting to put bartacks at the ends of the lines, they are shown in green in the picture. In total you should have 4 stitched top parts (Fig. 3).
3. Sew in the insole (Fig. 4). We take one sewn part and pin one insole in a circle, aligning the sections of the sewn freebie and the insole (Fig. 5). We sew in a circle, since we pinned the seam with a seam width of 1 cm (Fig. 6).
4. We repeat operation No. 3 with other freebie parts. In total you should have 4 stitched top parts (Fig. 7).
5. Take one piece sewn with an unsewn 10cm hole and the second fully sewn (Fig. 8). We turn any one part inside out and put it in one boot, which is turned inside out, and align the upper sections of the boot. In this case, you should succeed. that you put two boots face to face (Fig. 9). We chop in a circle (Fig. 10). We sew a seam width of 1 cm (Fig. 11).
6. We repeat operation No. 5 with two other freebie parts. After sewing two parts at a time, you should end up with only 2 sewn boots (Fig. 12).
7. We turn two boots on the face through the unsewn holes in the freebies (Fig. 13).
8. We sew up the unsewn holes in 2 boots with a seam width of 1-2 mm, while tucking the seam allowances inward (Fig. 14)
9. We put the boot that was made in operation No. 8 inside and thus get one boot. We do the same with the second boot (Fig. 15).
10. To slightly fasten the two boots so that they do not fall out, we fold the seam exactly with the seam and sew along the face directly into the seam so that the stitching is not visible. At a distance of 5-6 cm from the top of the boot. We do this on one side of the boot and on the other side, I showed this in the picture with a red solid line. We do exactly the same with the other boot (Fig. 16)
11. Putting the seam of the connection of the top of the freebie on the edge, we fasten the boot with another finishing stitch with a seam width of 0.5 - 1 cm from the top of the freebie, stitching in a circle. We do the same on the second boot (Fig. 17). This is how we get warm house slippers and boots.
12. That's it! Our boots are ready! Now you know how to sew slippers and homemade boots with your own hands.
House boots. MK from Alena Maslova.
It's time to warm up and today I'll show you a simple way to build house slippers and boots
. I had been using natural sheepskin on a knitted base for a long time; such knitwear is used for sewing blankets and children's products; I found a piece for two pairs of slippers. Having searched the Internet for patterns, I found a large number of them, but none for my size, and I’m too lazy to remake them, and the result will not always be as expected. That’s why I made everything very simple; this pattern can be made to fit any size, even a child’s.
These are the boots we will make by hand.
And so the leg, remember how in the movie “Office Romance”, such a simple leg. I didn’t want the boots to be clingy, so I put on a knitted footprint and wrapped a scarf around my shin, otherwise I would have to insert a zipper or change the pattern, which I don’t like; long-time visitors to my site remember my simple recipes.
With tape, as in the case of making a mannequin, wrapping the foot and lower leg in several layers, it is important to remember that the foot must be placed with an “iron”, or rather, check the angle of the foot as if standing.
The blank is ready, you can start making the pattern.
Let's draw construction lines along the bend of the foot to the line of the sole, along the heel in its most concave part, as well as along the middle of the upper part of the foot to the top cut of the boot. Cut off the upper part from the future sole, cut the boot along the marked lines of the heel and the bend of the foot.
To lay out the part, cut it in the middle, trace it, mark the connection points with the sole and the upper part. Align uneven sections. On this part, you must mark the inside and outside so that when assembling with the sole, you do not sew the left boot to the right sole.
Let's make a boot with a seam at the back, to do this, lay the top part, folding together the previously cut ones on the inside, circle. For accuracy, I folded it lengthwise in the middle and aligned the lengths of the concave parts with each other and shortened the boot to the desired height. Do the same with the heel part, here make a small incision 1.5-2 cm from the bottom in the middle of the heel (no photo). Align the sole part so that it is pleasant to look at, mark the connection points (I recommend doing this for all parts of the boots) and cut it out. At all stages, compare the sections of the pattern so that the distance of the heel fits exactly in length into the arc of the back part of the boot, and the sock clearly coincides with the line of the arc of the boot and heel.
The pattern is ready. These boots can be sewn from fleece or an old sweater, with a tail, nose, ears and eyes attached.
Cut the boots according to this pattern with seam allowances of no more than 5 mm; these boots took about 40 cm by 80 cm of fabric. Cut the sole so that it does not wear out too much from the remnants of the leather; even a thicker piece of jeans or a boot from an old boot will do. By combining the dots, slightly seating the toe and heel parts, we connect the parts of the upper with the sole. I did not sew a dart on the heel, because the fabric is soft; if you are sewing boots like this from jeans, I recommend sewing a dart.
For greater warmth and density of the structure, insoles were cut out from felt inside.
These are such cozy house slippers and boots
in the end it should work out.
There are no words for how warm they are. While I was sewing, I remembered the remnants of a sheepskin coat I had once shortened and decided to sew myself boots with a zipper, but more on that in the following articles.
Warm slippers and boots for your feet, my dear needlewomen!
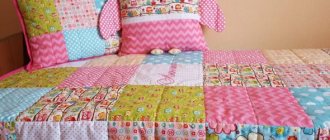
Most often, we are used to buying shoes, even indoor ones. However, many craftswomen fell in love with making these wardrobe items themselves. Especially when a child appears, and you want to do something unique, interesting, and safe for him. You will be surprised, but boots are comfortable and warm shoes for indoors in winter. But, of course, not their street look, but a cozy and homey option. These boots look like the now trendy UGG boots, and by the way, they are very comfortable to wear, and the thick leather sole will turn them into practical slippers. Next, we will focus on how to sew homemade slippers-boots with your own hands - it will not be difficult for you to make patterns with product sizes based on step-by-step instructions.
Ugg boots for baby
Making home boots is easy. To do this, you only need a little skill in working with a needle. The only condition is to strictly follow the instructions on how to sew boots from fabric. The pattern is offered for sizes 24-27. If necessary, it can be adjusted to any leg, but it is worth considering that when changing the size, the pattern changes more in length than in width.
For UGG you will need:
- Artificial sheepskin 20 cm with a width of 140 cm: all 2 pcs.
- Square piece of artificial leather with a side of 20 cm: sole 2 pcs.
- Optional decor.
Preparing parts
Let's start making parts:
- Cut out the parts for the sole:
- 2 leather parts;
- 2 fleece parts;
- 2 parts made of padding polyester.
- For the toe-heel part you need to cut out:
- 4 fleece parts;
- 2 parts made of padding polyester.
It is necessary to cut double elements that are not cut in the front part.
We cut out double tops of the required size from fabric. You need to cut 2 of them. The cut should be on the heel side.
How to sew boots from fabric - step-by-step instructions
- Print the pattern and cut out the desired size, marking the reference points.
- Transfer the pattern onto the fabric, not forgetting to allow allowances of about 3 cm. Since the drawing is made on the front side of the fabric, use a disappearing marker or subsequently cut off the pattern lines. When cutting leather with a fur back, you need to use a sharp blade so as not to damage the pile with scissors.
If the boots are made by hand, then all seams can be made external by overcasting them with finishing stitches.
We sew fur boots for a child with our own hands - My fur coat
For winter walks, your baby needs winter shoes. Socks and booties will be out of season, and factory boots are too stiff and cannot be pulled over sliders. The solution could be sheepskin fur boots, which you can sew yourself using these patterns.
Tool you will need:
- scissors;
- sheepskin or any other fur that can be replaced with fleece or drape;
- pencil;
- needles;
- threads;
- pins.
Cutting sheepskin boots
On the Internet I found this pattern for sheepskin fur boots. It turned out to be very successful! Print on A4 sheet 2 times (the details in the drawing overlap) and cut out the parts.
Sheepskin can be replaced with any fur you have, and fleece can be replaced with raincoat fabric or coat fabric - your choice.
Each material needs about 2 sheets of A4 or a little more to be sure. This is for 2 boots.
Progress:
- Fold the top fabric right sides together;
- Pin the details of the boots with pins;
- Trace with a pencil and cut out with a 0.5 cm seam allowance;
- Only now chop off the paper patterns, and pin the cut out parts again with one pin (this is more reliable)
- Determine the direction of the fur pile;
- Lay out the parts of the boot on the wrong side of the fur;
- Next you need to pin, trace with a pencil and cut out with allowances of no more than 0.3 cm.
- Cut the fur without folding it in one layer; The direction of the pile is up the part.
- Be sure to check that all parts are included before cutting. Don't forget to make marks to help you align the pieces as you sew.
You should end up with 2 pieces of outer fabric and 2 pieces of fur. In the photo they are stacked.
Cut out sheepskin like fur - in one layer, 3 pieces for each boot, tongue and sole.
We sew boots according to patterns ourselves
Fabric parts can be sewn on a sewing machine. But everything is so simple and quick that I sewed these fur boots with hand stitches on the sofa in 2 movies. I sewed with my own hands, not on a machine.
- Fold the side piece in half with the right sides facing in, baste and sew the short side with a backstitch.
- Attach the sole, align marks 1 and 2 on the parts, and pin these places together with pins.
- Next, evenly distribute the sole in the stitched part and pin along the entire length of the sole.
- Insert the sole with short straight stitches “forward needle”, remove the pins.
- Now sew the sole tightly with a back stitch.
- Remove the basting thread.
Immediately sew the second boot in the same way - it’s easier to sew paired parts at the same time . Also sew fur parts - you need to pin and baste.
Only a permanent seam - loop (I like it better) or edge. The stitches should be very tight. Just like fur, sew sheepskin boots.
Do not turn the prepared shoes made from the upper fabric inside out, but turn the fur shoes inside out.
Place the fur boot inside the fleece one, compare the cuts and pin together the boot (between marks 3 through the top cut of the boot). The right sides of both parts should be on the inside, on the outside - the wrong side of the fabric and the knitted base of the fur.
Baste both pieces, removing the pins, and sew them tightly with a buttonhole stitch. Now turn the shoes right side out, straighten them and admire the result.
Place the tongue pieces right sides together, compare the cuts and pin together. Using your hands, sweep and sew the tabs between marks 3 - side and top cuts (they are rectangular).
Do not sew the rounded part of the tongue; turn the part right side out through it and straighten the corners. The job is already nearing completion!
- Turn the shoes fur side out, compare and baste with short stitches the upper fabric and the toe fur of the boot.
- You also need to baste the upper fabric and the fur from the rounded part of the tongue. If you do this, you won't have to update and compare the 4 slices by sewing in the tab.
- Insert the tongue into the toe of the boot, pin again between marks 3 and align mark 4 of the tongue with the middle seam of the sock.
- These 3 pins will be enough to thread the tongue. Then remove the pins, and sew the tongue tightly with a “loop” stitch in dense columns.
- Make a strong bartack at the beginning and end of the stitch. Now turn the sewn boot inside out - it’s almost ready!
The second sheepskin fur boot is ready - use the same principle to sew the tongue, only with the fur on the inside and the skin on the outside. In sheepskin, all the seams are on the front side , so do them very carefully, or even better, choose the shoe thread to match the color of the sheepskin.
We cannot provide a photo - there is no sheepskin. But for your baby, you want it to be not only warm and soft, but also good and comfortable. I bought ready-made embroidered strawberries and sewed them onto the toes of fur boots. Ties - two pieces of ribbon 15-17 cm each.
If you have time, you can embroider something yourself.
We did all this with our own hands and this is what we came up with:
[Total: 4 Average: 3.5/5]