How to make homemade kefir from milk? What kind of food is this? You will find answers to these and other questions in the article. There is no need to tell anyone about the benefits of kefir. For many ailments, doctors advise drinking this delicious and valuable drink.
However, the healthiest thing is not factory-made kefir, but homemade one, made using a starter culture from live lacto- and bifidobacteria. It populates the intestines with specific strains of microorganisms and effectively fights fermentation and putrefactive processes in the gastrointestinal tract. We will find out below how to make homemade kefir from milk.
Fresh kefir
Many people wonder how to make homemade kefir from milk. Do we trust the manufacturers of fermented milk products 100%? Unfortunately, today it is very difficult to purchase real kefir, since manufacturers of this product try to sell only its imitation, adding many components to it that improve the taste and increase shelf life.
Kefir also must be fresh, because children can only be given a drink that has been stored for no more than three days. It is fresh kefir that perfectly stimulates intestinal motility, digestion, cleanses the gastrointestinal tract, restores harmony, getting rid of extra pounds.
It is known that kefir often hits store shelves when it is already 2-3 days old from its production date. In this situation, those people who care about their health and the health of their children begin to figure out how to make homemade kefir from milk.
What should kefir be like?
The most beneficial for our digestive system and the body as a whole is fresh kefir, which is not yet 3 days old from the date of production. It is this product that stimulates intestinal motility, helps cleanse the body, helps get rid of extra pounds and restore a slim figure.
However, finding such a product on store shelves is quite problematic, because... everything that is “fresh and correct” is sorted out by buyers quite quickly.
In this case, the only way to get a fresh, tasty and real product on your table is to prepare it yourself at home. Preparing a homemade fermented milk drink is not so difficult; the most important thing is to purchase high-quality milk and still get the right kefir to use as a starter.
If you haven’t been able to find a good product, don’t be upset, because the second option for preparing a delicious homemade drink is to use a special starter.
It is important to remember that with any method of preparing this fermented milk drink at home, the milk used for these purposes must be subjected to heat treatment.
So, it is enough to bring pasteurized store-bought milk to a temperature of 40 degrees, but whole homemade milk must be boiled. Baked or skim milk can also be used.
At the same time, you need to understand that the lower the fat content of the milk, the more liquid and “light” the final product will be.
Many people confuse the product that is obtained when milk and kefir are sour. In fact, these are slightly different things.
When milk sours naturally, this process occurs due to the activity of lactic acid bacteria. The result is a product called curdled milk. If the milk has turned sour, no matter how hard you try to make kefir, it will no longer work.
Leaven
What is kefir starter? For the production of cottage cheese, kefir, and yogurt, it is better to use liquid Lactobacterin as a starter, since the taste of the final product will be milder and its creation will be faster.
When using Bifidumbacterin, kefir may become sour (pronounced taste of Bifidumbacterin), especially if you ferment skim milk. To prevent this effect from occurring, constantly check the readiness of the food.
Cooking process
How to make homemade kefir from milk? Follow these steps:
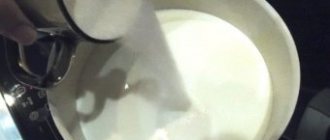
- Boil milk (of any fat content). Cool to 37°C. If bacteria are exposed to high temperatures, they may die.
- Add bacteria to the milk at the rate of: per 1 liter of milk – 10 ml of starter. Stir.
- Cover the fermentation container with a lid and leave at 37°C for maturation (an excellent temperature for bacterial growth). At home, you can place kefir near the battery. It is very good to use a thermos or yogurt maker. It will not be possible to simply ferment such food at home temperature, since the bacteria will grow more slowly, and in a cool room they will generally go into suspended animation and the milk will not ferment.
- Place the ripened kefir in the refrigerator to cool.
How to make homemade kefir:
Classic recipe for homemade kefir.
- In order to get 1 liter of finished kefir you will need 900 ml of milk and 100 ml of fresh natural kefir, which you will use as a starter.
- You can take either homemade whole milk or store-bought milk that has been pasteurized.
- It will be enough to warm pasteurized milk to 40°C, but it is better to bring homemade milk to a boil, and then cool it to a warm state.
- It is better to boil milk in an aluminum container, it will not burn there.
- The first time, purchased kefir is used as a starter, and subsequent times, a home-made drink.
Making kefir at home is very easy:
So, you have warm milk.
- Add the starter and, if desired, 1 tbsp. sugar to enhance the fermentation process and enrich the taste of kefir.
- Then stir the milk thoroughly so that the starter is evenly distributed throughout it, and
- cover the container with the future kefir with a thick cotton cloth - light should not penetrate there.
- The kefir preparation should be left in a warm place for a day, and then placed in the refrigerator for several hours.
- Before use, stir the kefir with a wooden spoon.
Homemade kefir
It is best to drink it within one day, then it will bring maximum benefits to your body.
Don't forget to leave 100 ml of the product for the next portion of kefir.
How to make kefir for losing weight:
If you want, use skim milk to prepare it. The preparation method is the same, however, kefir for weight loss is best consumed on the second day after preparation.
For those who are not concerned about losing weight or, on the contrary, want to gain a little weight, it is recommended to prepare homemade kefir from full-fat whole milk with the addition of 1 tbsp. sour cream, preferably also rustic.
You can not only prepare kefir at home, but also fermented baked milk:
If you like fermented baked milk, prepare kefir from baked milk, which you can buy or you can also make yourself.
- Take 1 liter of fresh steamed milk and bring it to a boil in an aluminum pan.
- Pour the boiled milk hot into clay pots and simmer in the oven for 4 hours at low temperature - about 50°C.
- Add 2 tbsp to baked milk that has cooled to about 30°C. sourdough so as not to break the milk crust.
- Leave the drink in a warm place for 12-24 hours (until it thickens), and then put it in the refrigerator for another day.
All I can do on the pages is to state that anyone who has tried to make kefir at home at least once will never buy it in a store again. Learning how to make kefir at home does not take long and is not expensive. But how much benefit you will bring to your health and the health of your loved ones. In addition, this will help avoid problems for many years!
Do you know how the story of the “Prisoner of the Caucasus” and kefir are connected? No, then it’s time to watch this video, which also debunks many myths associated with kefir.
Now you will learn how to easily make kefir at home, which will be healthier and tastier than store-bought kefir.
Sourdough at home temperature
Do you want to ferment kefir at home temperature? Add kefir grains to it, which is quite easy to purchase. The process of preparing bifidokefirs with fungus is as follows:
- Boil milk (of any fat content). Cool to 38°C.
- Add bacteria at the rate of: per 1 liter of milk – 10 ml of starter. Stir.
- When the milk has cooled to 22 °C, add kefir grains to it - 20 ml per 1 liter of milk. Stir again.
- Cover the fermentation container with a lid and leave at home temperature until ripening (8-12 hours).
- Place the ripened kefir in the refrigerator to cool.
As a result, your table will always have fresh, extremely healthy food, enriched with live bacteria, which help heal and prevent many intestinal ailments and improve metabolism.
Homemade goat milk kefir
The primary fermentation of kefir is the main stage. Fresh goat's milk is used as a base for kefir; it is not advisable to boil it, otherwise many useful elements may simply lose their properties or even disappear completely when boiled.
- You need to take two liters of milk and heat it to forty degrees, the milk should be warm.
- Next, take one glass of yogurt and put it in a two-liter jar, and then pour the yogurt with warm milk.
- The entire resulting mixture is thoroughly shaken.
- Then the jar should be wrapped in a warm towel and can be left in this form for eight hours. The main thing is to observe the time, otherwise the kefir will turn out too sour.
- After the specified time, homemade kefir should be put in the refrigerator for another two hours.
It is not recommended to drink it at the preparation stage, because bacteria only multiply and you can get indigestion, so you should be patient and drink only the finished product. The ready-made kefir needs to be stirred and you can drink it - such a dairy product will be a little thick and moderately sour. And if you like to drink it with sugar, then why not, it won’t do any harm.
For secondary preparation of kefir, you do not need to use store-bought yoghurts; primary prepared kefir is used as a starter.
- One glass of kefir is poured into a two-liter jar and fresh and warm milk is added on top to about one liter and mixed thoroughly.
- Next, one liter of the remaining fresh milk is heated to forty degrees, and poured into a jar, everything is mixed again.
- The jar must be wrapped in a warm towel and placed in a warm place for eight hours. At this time, the process of fermentation and preparation of kefir occurs.
After the specified time has passed, the kefir must be placed in the refrigerator for another three hours. After a certain amount of time (eleven hours in total), kefir is ready for use.
What is the difference between Bifidumbacterin and Lactobacterin?
The main difference between Bifidumbacterin and Lactobacterin is that the former is dominated by bifidobacteria, and the latter by lactobacilli. Both live in a healthy intestine and are vital to humans.
The normal proportion of bifidobacteria to lactobacilli is 100 to 1. Therefore, much more often doctors prescribe Bifidumbacterin to the sick, because more bifidobacteria are required for normal human life.
An imbalance in the proportion of some bacteria to others is called dysbiosis. There is no specific answer to the question of which is better - Lactobacterin or Bifidumbacterin. These are drugs of one type (probiotics), which are used for the treatment and prevention of dysbiosis, depending on the needs of the patient and on an equal basis with each other.
Sourdough with “Bifidumbacterin”
This kefir starter is used to create a homemade drink with an impressive content of beneficial bifidobacteria.
Compound:
- 500 g milk;
- 1 bottle of “Bifidumbacterin”.
“Bifidumbacterin” is the most accessible source of bifidobacteria. It can be bought at any pharmacy. This drug has no contraindications and is recommended even for newborns. Making kefir starter:
- Warm the milk slightly; its temperature should not exceed 40 °C.
- Pour a little milk into the bottle with “Bifidumbacterin” and make sure it dissolves.
- Mix the solution with the rest of the milk, seal tightly and leave in a dark room at home temperature for a day. If the room temperature is more than 23 °C, then the starter will ripen earlier.
Store the finished starter for homemade kefir in the refrigerator for no more than 7 days, as the bacteria die after this time.
Some whey may separate from the starter, so stir it well before using.
Homemade kefir benefits and harms
Home » Benefits and harms » Homemade kefir benefits and harms
- /
Kefir is a popular fermented milk product obtained by fermenting milk.
It can be purchased at any store, but homemade kefir is much tastier and healthier than store-bought, if only because you know exactly how and what it was made from.
To make homemade kefir, just put the required amount of milk in a warm place for a day or two. To speed up the process, you can use sugar and a starter, such as store-bought kefir.
The benefits of homemade kefir
Kefir normalizes the functioning of the gastrointestinal tract, kidneys and is an immunomodulating drink and antidepressant.
Kefir contains lactic acid and acetic acid bacteria, potassium, sodium, calcium, copper, magnesium, iron, enzymes, phosphorus, antibacterial substances, free amino acids and organic acids. Kefir contains vitamins of groups A, C, B1, B2, D, PP.
It is no coincidence that kefir is used as a means for weight loss - 100 grams of this drink contains only 4.7 g of carbohydrates. It normalizes metabolic processes in the body and promotes its cleansing. The calcium content in kefir is higher than in milk.
Harm and contraindications
In order for kefir to bring maximum benefits, it is necessary to consume a fresh product, since it contains a small amount of ethyl alcohol, which can cause poisoning when taking an expired product.
Daily consumption of kefir will benefit only in moderate amounts and a balanced diet, since excessive consumption of kefir alone can lead to a weakened immune system and a decrease in metabolic processes. Kefir is not recommended for those who often experience stomach upsets due to its laxative effect.
It is also not recommended to drink this drink for people with stomach diseases with high acidity.
Homemade kefir: benefits and method of preparation
Kefir is good for everyone, always. Firstly, it contains a symbiosis of many microorganisms - lactic acid bacteria and fungi, which help maintain the intestinal microflora in ideal condition. Secondly, kefir is a wonderful source of such important minerals as phosphorus, potassium and calcium, and their absorption from the product is very high. These minerals are necessary for muscles, bones, and the cardiovascular system. Thirdly, kefir is a good source of protein: one glass contains about 10% of the daily requirement.
Kefir also contains vitamins - mainly group B, including biotin and choline - the same ones that lower blood cholesterol levels. And kefir fasting days are the most favorite among those losing weight.
In production, kefir is made like this: milk is mixed with a special starter and the hero of our article is obtained. But! You will find all the beneficial properties only in fresh kefir.
As soon as it “stops”, its acidity will begin to increase, which is destructive for beneficial bacteria, which means that all the beneficial properties of the comrade will come to naught. This will also affect the taste, which will become sharper and sour.
All that remains is to pour the drink onto the pancakes.
So when buying kefir, always look at its expiration date. Although there are no guarantees here: if, for example, the rules for transporting the product are not followed, kefir will arrive at the store already sour. Therefore, I advise you to make homemade kefir.
It’s very simple, and such a drink will have much more benefits. All you need is to buy a starter at the pharmacy - a powder made from dried bacteria.
With its help, at home, first make sourdough, and then kefir from it.
Kefir starter recipe
What do you need:
- 0.5 l 0.5% pasteurized milk
- 1 bottle of pharmaceutical starter culture with bacteria
- What to do:
- Pour milk into a sterilized half-liter jar and heat it in the microwave to steam temperature (40 °C).
- Then add bacteria to the jar, mix, close the lid and wrap the container in a “fur coat”.
- Leave it to ferment for 15-20 hours at room temperature. The starter is ready.
Keep it in the refrigerator, do not open the lid unless necessary. If you can’t find a pharmacy starter, as a last resort, natural milk yogurt or fresh store-bought kefir may be suitable.
Homemade kefir recipe
What do you need:
- 1 l 0.5% milk
- 2 tbsp. sourdough
- What to do:
- Pour milk into a liter jar and heat it in the microwave until steamed (40 °C).
- Add 2 tbsp. starter, mix, close the jar with a lid and wrap it in a “fur coat”.
- Let the kefir brew for 4-5 hours at room temperature. And then store it in the refrigerator.
I advise you to drink 1-2 glasses of homemade kefir per day, adding 1-2 tsp. Siberian fiber or rye, wheat, oat bran. The latter are just a breeding ground for beneficial bacteria in the drink.
Kefir for kids
Did your gastroenterologist recommend giving your child kefir made from homemade cow's or goat's milk? Finding such provisions is almost impossible. No need to be upset! We will tell you how to make this amazing drink. So, you need to have “Bifidumbacterin” in a bottle (the same probiotic from the pharmacy), milk and a thermos. Boil and cool natural milk before cooking.
Sourdough recipe:
- Heat milk (0.5 l) to 40 ° C (check the temperature with your lips or wrist, the milk should be warm, but not scalding).
- Fill the bottle with “Bifidumbacterin” with milk, stir well.
- Now pour the milk into a thermos and pour a bottle of diluted bacteria into it. Cover, shake and leave for 12 hours.
- Next, pour the milk into a bowl and put it in the refrigerator. The starter can be stored for a week (not in the refrigerator door, but near its back wall).
Kefir recipe:
- Heat milk (0.5 l) to 40 °C, pour into a thermos. Add 1 tsp to it. sourdough
- Close the thermos and stir the contents. In 6-8 hours the kefir will be ready.
This kefir turns out thick, and the kids eat it with a spoon. If you want to get drinking kefir, then put 0.5 tsp in a thermos. sourdough This kefir can be made with both goat and cow milk, as we discussed above.
How to make kefir at home
The first method was used by our grandmothers
To the boiled milk distributed in jars (cooled to 40 degrees), add 2-3 tbsp of starter. l. Mix the resulting mass thoroughly, cover with a blanket, and check after 12 hours.
The readiness will be indicated by thickness, snow-white color and uniform consistency. If it is not ripe, leave it for some more time. Then we transfer the future drink to the cold for another 3 hours. Voila - you're done!
Cooking like Yulia Vysotskaya
Heat the milk, add 1 tbsp to it. spoon of sugar, 2 tbsp. - sour cream, stir well. Cover with a thick towel, or preferably several layers, and put away for 7 hours. For better preservation, the container can be wrapped in several layers of towels.
And now look, we put the drink not in the heat, but in the cold, where it will remain for about 5-7 hours. For a more pronounced taste, sprinkle a little vanilla or cinnamon. All that remains is to mix thoroughly, and we can try the resulting drink.
Option from the 90s, we use kefir grains
Take a sieve, place a fungus there (approximately 6 cm in size), rinse well, leave for a while to drain. We transfer the fungus into a jar, fill it with lukewarm milk, and put a cloth on the neck so that no light can penetrate. This will be optimal for development.
Check it after 19 hours (it should be thick). The mushroom will look like a white clump. Carefully strain everything through a strainer.
It will be better if you drink the drink on the first day, otherwise it will lose its properties (if stored for more than a couple of days).
Kefir at home without starter
For this ripening option, we use the crust of black bread. We take out a container, pour the milk, where we will leave it to ferment. Place black bread there and leave the container with all the contents for 10 hours.
After this, carefully take out the bread and stir. The drink is ready, you can try it.
Using a multicooker
Pour the milk into the pan, along with the dry starter (0.5 sachet), stir until smooth. On the multicooker, select “Multicook” and set the temperature to 35 degrees. The heating mode is not needed, we turn it off. Cook for 6 hours, pour into a glass container, and leave to cool.
Probiotic cost
We have already said that you can buy Bifidumbacterin at the pharmacy. The price of this drug is low. You will pay only 96 rubles for 10 bottles, each of which contains 5 doses.
What is Bifidumbacterin powder? It is a crystalline or porous mass of whitish-gray or beige color. In fact, it is a freeze-dried microbial mass of living bifidobacteria.
Classic recipe
Consider the classic recipe for making kefir. We take:
- 60 ml kefir;
- 500 ml high fat milk.
Here you can optionally replace kefir with sourdough, which must be used in accordance with the recommendations on the pack.
Manufacturing process:
- Pour the milk into a saucepan and place on the stove. Wait until the first bubbles appear, remove from heat and cool slightly.
- Pour kefir (or sourdough starter, if you are using it) into warm milk. Mix until smooth. Cover the neck of the jar with gauze folded in several layers.
- Place the dishes in a warm, dark room. Time 8-10 hours. After carefully stir the mixture, wait another 10 hours.
- After the specified time, try the food. If it is thick and uneven, you can start eating homemade kefir.
Homemade cow's milk kefir
There is another interesting recipe for making kefir, for the preparation of which you need cow's milk, which is not particularly fatty, and one bag of store-bought kefir for starter culture.
The algorithm for making kefir is as follows:
- You need to take two liters of milk, it’s up to you to decide whether it will be store-bought or homemade, the most important thing is that its fat content should be no more than two and a half percent.
- The milk must be heated to forty degrees (if the milk is homemade, then it must be boiled and then cooled to forty degrees).
- Next, the milk is poured into the prepared container, where the starter is already located and all the ingredients must be mixed well, but only with a wooden spoon.
- The jar needs to be wrapped very well again and placed in a warm place for eight hours, during which time the kefir can sour.
The last step in preparing kefir is to send it to a cold place so that the kefir finally sets and is ready for use.
With sour cream sourdough
Take:
- 150 g high-fat sour cream;
- 1 liter of milk.
Follow these steps:
- Pour the milk mixture into a fireproof pan, place it on the stove and boil. Then turn off the heat and cool the mixture.
- Add sour cream, stir, pour the liquid into a glass jar. Be sure to cover it with several layers of gauze.
- After 10 hours, you can taste delicious kefir. It is suitable for babies who are already 8 months old.
How to make a starter for baby kefir
It is advisable (which is quite logical) to make a starter for children’s kefir from purchased children’s kefir. Choose the one that your child likes and use it as a base.
Ingredients:
- baby kefir – 2 tablespoons;
- milk – 200 ml.
Preparation time: 1 day.
Calorie content: 62 kcal.
Preparation progress:
- Boil the milk, strain, mix with kefir and leave for 24 hours;
- After the specified time, you can make the drink yourself using the resulting starter: combine boiled and cooled milk (200 ml) and the preparation (100 l);
- After 10 hours everything is ready for use.
With bifidobacteria and sour cream
You will need:
- 30 g high-fat sour cream;
- 0.4 l milk;
- bottle of probiotic "Bifidumbacterin".
Prepare this kefir like this:
- Boil 0.15 liters of milk for 15 minutes. Cool slightly, add sour cream with Bifidumbacterin powder. Set aside for 3.5 hours.
- Then combine the remaining milk with 30 ml of the infused starter. Stir and set aside for 12 hours.
The finished drink can be drunk.
Kefir for weight loss
Kefir with spices will help you stay slim. Try making it! This drink is not only good for your figure, but also extremely tasty. Without changing your diet much, you can get rid of 3-5 kg in a month. You will need:
- 200 ml kefir;
- 1 tsp. ground cinnamon;
- 1.5 tsp. ginger;
- ground hot pepper (to taste).
Follow these steps:
- Add cinnamon to kefir.
- Grate fresh ginger root on a very fine grater.
- Add a pinch of ground red hot pepper.
- Mix everything well.
This spiced kefir can be drunk either after meals or 20 minutes before meals. There is only one rule - prepare this drink before drinking. Bon appetit!
