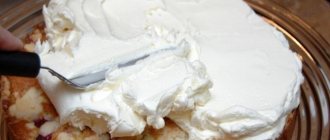
Making a cake with your own hands is not an easy task, especially if you are planning to serve not the usual “Napoleon” to the festive table, but something more refined and originally decorated. Homemade cakes are as popular today as they were many years ago, despite the abundance of confectionery products on store shelves. In addition, you can add any ingredients, experiment, combine recipes, or make original decorations with your own hands, which will make the cake truly unique.
It is necessary to approach the preparation of cakes thoroughly; the most important thing in the preparation process is to choose a good master class step by step. It will help you learn the recipe step by step, avoid making mistakes during the manufacturing process, select the right confectionery equipment and make a high-quality cake. And a master class on a red velvet cake recipe is no exception.
Baking biscuits
I explained and showed in detail how to do this here.
The article provides a list of ingredients for 2 biscuits 12 cm in diameter and 4 cm in height. We will cut each biscuit in half lengthwise, and therefore we will get 4 wonderful cakes.
Please note that the cakes are colored with a natural dye - red fermented rice from the CakeUp store, so they are not bright red, as would be the case if a synthetic dye was used. But still, it seems to me that they are not just chocolate, but with a clearly visible red tint. Please also note that the brightness of the shade depends greatly on the lighting.
Cream
Cream Ice Cream has a pleasant soufflé consistency and moderately sweet taste. With its dense texture, it contains very little fat and is lower in calories than most other fillers.
Since the cream is based on a plant product, it can be made lean or vegan if you adjust the list of other components.
What's included
- 240 g soft tofu cheese;
- 0.25 tbsp. unsalted butter (or melted coconut, for a vegan version);
- 2.5 tbsp. powdered sugar;
- 0.75 tsp. vanilla extract;
- Cow's or plant milk, if necessary;
- salt, optional.
Step-by-step cooking process
- Using a mixer with whisk attachments, beat the tofu with butter until fluffy.
- Then you need to add powdered sugar, without turning off the mixer, and mix slowly.
- Next, increase the speed of the mixer and continue beating until fluffy.
- If the mass turns out to be very thick, you need to pour milk into it (1 tablespoon at a time) and mix with a mixer until the consistency becomes desired. If the cream turns out too sweet, you can add a pinch of salt and stir.
- Cake with cream Ice cream should be stored in the refrigerator until serving.
Berry layer
In general, traditionally “Red Velvet” is made without any frills with filling: sponge cake and cream cheese.
That’s right, historically the cake is American, and there, as we know, they don’t stand on ceremony when it comes to filling cakes. But we are not like that! For us, serve it soft, juicy, rich, but not greasy, fresh, sweet, but with a slight sourness, and on top of that, it’s certainly elegant - and all this, mind you, within the framework of one cake. Therefore, we often add layers of berries to Red Velvet, and strawberries and raspberries are the most popular. Fair! So we'll make the raspberry one. Take 170 g of seedless raspberry puree and 100 g of just raspberries. Place in a small saucepan.
Separately, weigh 8 g of NH pectin and 75 g of sugar in a dry bowl.
Separately, soak 7.5 g of gelatin with a strength of 180 bloom in ice water.
Heat the puree and berries to about 45C and “rain” with constant stirring, pour in sugar and pectin, which have also been well mixed with each other.
Boil over medium heat for three minutes.
Remove from heat and add squeezed gelatin.
Let's mix. Let it cool a little. To speed up this process, you can pour the future filling into another container.
Once it cools down a bit, you can pour it into molds!
If, like me, you have molds without a bottom, it is better to prepare them in advance.
I have two rings, each 10 cm in diameter. I covered them tightly with cling film, forming a bottom, and put them in the freezer for half an hour. When I fill them with my berry filling, the cold walls will hold it inside.
You can freeze the filling or just let it set for a few hours.
And just before assembling the cake, we’ll do...
Red velvet cake in a slow cooker
Time required: 2 hours. Yield: 10 servings. Kitchen utensils and appliances: sieve, 3 bowls, fork, spatula, knife, mixer, multicooker. Calorie content: 376 kcal per 100 g.
Ingredients
| Egg | 3 pcs. |
| Sugar | 1.5 stack. |
| Kefir | 300 ml |
| Vanilla sugar | 2 tsp. |
| Cocoa powder | 1.5 tbsp. l. |
| Baking powder | 2 tsp. |
| Premium wheat flour | 2.5 stacks |
| Red dye | 1.5 tsp. |
| Vegetable oil | 300 ml |
| Salt | ¼ tsp. |
| Soda | 0.5 tsp. |
| Powdered sugar | 4 tbsp. l. |
| Soft curd cheese | 500 g |
| Butter | 190 g |
Cooking steps
Preparing a biscuit
- Add 0.5 tsp to 300 ml of kefir at room temperature. soda and stir well.
- In a convenient container, mix 1.5 cups. sugar and 3 eggs, beat everything with a mixer until the volume doubles.
- Pour kefir and soda into a deep bowl, add a mixture of eggs with sugar and 300 ml of vegetable oil and mix everything thoroughly.
- Add 1.5 tsp. dye and mix well until the desired color is obtained.
- Sift 2.5 cups into the resulting mass. flour and 1.5 tbsp. l. cocoa powder.
- Add 1/4 tsp. salt and 2 tsp. vanilla sugar and baking powder and carefully mix all the dry ingredients into the dough.
- Grease the multicooker bowl with a piece (10 g) of butter and pour in the prepared dough.
- Close the lid of the multicooker and set the “Baking” mode and the timer to 70 minutes.
In the meantime, let's get to the cream
- Beat 4 tbsp. l. powdered sugar and 180 g butter with a mixer.
- Add 500 g of curd cheese and beat again with a mixer until smooth.
- Place the cream in the refrigerator until needed.
Assembling the cake
- As soon as the cake is ready, take it out and let it cool.
- Cut it into 3 parts.
- Place 1 of the cakes on a plate and grease it with the prepared cream.
- We do the same with the remaining cakes.
- Spread the cake with the remaining cream on top and sides. Place it in the refrigerator for 15-30 minutes. Decorate the finished cake and you are ready to serve!
Video recipe
Watch a short video recipe that details how easy it is to make a red velvet cake. In addition, you will see an original way of cutting cakes.
…cream!
This is a regular cream cheese made with cream. I took 400 g of cream cheese (curd cream cheese), 150 g of 33% cream and 70 g of powdered sugar. Everything except the powder is cold. I whipped everything up very well. Oh, and be sure to add vanilla extract or vanilla sugar, ground into powder. Now they also sell a certain “Vanilin-intensive”, well, very aromatic and concentrated, of course, it’s not that it’s haute cuisine to use vanillin) But, to be honest, I use it with pleasure, and I add it to cheesecakes, pancakes, and even here - in cakes)
Beat until combined and fluffy, but do not over-mix!
This is the cream. It is not heavy, quite tender and fluffy. If you are worried, you can reduce the amount of cream, the cake will be stronger.
Before assembling the cake, it is better to weigh the cream in order to distribute it more evenly between the cake layers.
With mascarpone
Mascarpone-infused cake cream is also quite popular because the creamy cheese makes it easy to achieve a souffle-like consistency.
Preparation next.
What's included
- 4 tbsp. soft mascarpone;
- 0.75 tbsp. powdered sugar;
- 1/8 tsp. orange extract;
- fresh zest from 1 medium orange, chopped.
Step-by-step cooking process
- In a deep container you need to combine all the ingredients and start beating at low speed using a mixer equipped with whisk attachments.
- Next, you need to switch the speed of the device to medium and continue whipping until a thick and fluffy consistency is achieved, for 3-5 minutes.
Assembly
Let's take our cakes. They do not need impregnation, and the cream is wet and will give up some of its liquid to the cakes.
We assemble immediately on the substrate. Let's disinfect it. Apply some cream on it. Place the cake. Apply some of the cream to the cake.
Let's level it out.
We make a side of cream and put a layer of berries inside.
And now it will be quick and monotonous!) Cover with cream, level, put the sponge cake, apply cream, level, put the sponge cake, apply cream, level, make a side of cream, place a second berry layer inside, cover with cream, level, put the cake. All! Ugh!
It turns out like this!
Now I would wrap this thing in thick acetate film, fasten the ends of the film with office clips and put on the ring. Close. And in this form, stabilize in the refrigerator.
But I didn’t have any film, so I wrapped the cake in baking parchment) I didn’t put the ring on, it didn’t fit: parchment is not a film, it’s difficult for them to wrap the cake tightly and without flaws. (But it's better to wear it!)
In this form, the cake should stabilize in the cold for ideally 7-8 hours.
Sour cream
Red velvet cake cream prepared with the addition of sour cream is less sweet and more “creamy.”
Using melted white chocolate instead of sugar allows you to get a more delicate consistency and a non-standard taste.
What's included
- 100 g white chocolate, cut into pieces;
- 100 g low-fat cream cheese, softened;
- 2 tbsp. l. unsalted butter, softened;
- 50 g sour cream;
- 0.25 tsp almond extract.
Step-by-step cooking process
- Place the chopped white chocolate in a glass bowl and microwave in short bursts at 15 second intervals, stirring after each heating, until melted, then allow to cool to room temperature.
- In a food processor, blend the cream cheese, butter and sour cream until smooth, scraping down the sides of the bowl.
- Next you need to add the melted chocolate and beat until completely mixed.
- After this, you need to pour in the almond extract and mix quickly.
Several secrets of velvety
If you are making the cream with cream cheese, take it out of the refrigerator just before whipping - this will make the cream much fluffier. It is best to use mascarpone cheese as its velvety texture is perfect for this dessert. But do not beat the cheese and cream for too long, otherwise the cream will separate. Butter and eggs should be at room temperature, but it is better to cool the cream.
After the cakes are baked, trim their edges - this way, when assembled, the cake will look more neat and impressive. The scraps can be shredded and sprinkled over the top cake after frosting.
American confectioners recommend keeping the baked cakes in the refrigerator and only then covering them with cream and icing. The fact is that cream and glaze spread on warm cakes, and the sponge cake becomes soggy and loses its airiness. These unpleasant moments can be avoided by pre-cooling the cake before assembling.
Classic chocolate with sour cream
This cream is suitable for any sponge cake, including red velvet. It is based on cream cheese and butter, as well as sour cream.
What's included
- 1.5 tbsp. powdered sugar;
- 3 tbsp. l. unsweetened cocoa powder;
- a pinch of salt;
- 5 tbsp. l. unsalted butter, softened;
- 120 g cream cheese;
- 210 g dark chocolate, melted;
- 0.6 tbsp. sour cream.
Step-by-step cooking process
- Sift the powdered sugar, cocoa powder and salt into a clean bowl and set aside.
- Place butter and cream cheese in a separate container and beat with a mixer fitted with paddle attachments at medium speed until fluffy.
- Next, you need to reduce the mixer speed to low and gradually add the mixture of powdered ingredients until completely dissolved.
- Then pour in the melted chocolate and sour cream, continuously whisking until you get a homogeneous cream.
Prepare the mastic and decorate the cake
The final stage of preparing a cake in our MK way is creating decorations from mastic and final assembly of the product. Today there are plenty of master classes on making mastic decorations on the Internet, so here you can experiment. We offer a fairly simple tutorial so that you can decorate your mastic cake with hearts. By the way, such a product will become an original table decoration for Valentine’s Day or as a gift to a loved one.
So, our master class will tell you step by step how to make mastic:
- Mix powdered milk with finely ground powdered sugar in a separate dry container. It is best to take a dish or flat bowl.
- Squirt condensed milk straight from the can and at the same time stir the mixture with a tablespoon.
- Place the resulting mixture on a table sprinkled with powdered sugar and knead with your hands like dough until the bridge stops sticking to your hands. If necessary, add powdered sugar or add a little condensed milk so that the consistency of the mastic is just right for this MK.
- Now divide the mastic into two parts, leave one part unpainted (it will be cream-colored due to the inclusion of condensed milk, this can be seen from the MK), paint part with the same red dye that was used for the dough. Drip it onto the mastic a little at a time so that the shade does not turn out too intense. Instead of artificial colors, you can add syrup, for example cherry or strawberry; in this case, you cannot achieve a bright shade.
When the mastic is ready according to the recipe, start creating figures as in our master class:
- Roll out a layer of white mastic.
- Walk over it with a special rolling pin in relief, do it in only one direction, pressing the mastic rolling pin tightly.
- Now cut out several blanks in the shape of a heart, then level them with your fingers or a special stack so that there are no nicks.
- Roll out the layer of red mastic in the same way, as in MK, cut out slightly smaller hearts from it in an amount corresponding to the number of white hearts.
- Then apply a special adhesive compound to the back of the red hearts with a brush, place the smaller hearts on top of the larger ones and press down lightly with your hands.
- Then, according to MK, you can make small white flowers and glue them to the middle of the top heart.
- In addition, this decor can be decorated with golden beads (edible). They will also be glued using gel.
Now it's time to assemble the cake. How to do this step by step according to MK, read below:
- Also smooth the top and sides of the cake with cream. Use a wide knife.
- Make a border of crumbs on the surface of the cake, as shown in the master class.
- Apply a special corner to the side surface, smeared with cream, to give a beautiful relief.
- Place pre-prepared mastic hearts vertically on the surface of the cake, as in the master class or at your own discretion.
As you can see, creating such a cake with your own hands is not at all difficult. No special skills in working with mastic are required here, the dough and cream are completely ordinary, but the result is a real masterpiece of culinary skill, which, moreover, you created with your own hands.
I decided to bake “Red Velvet” for the New Year: I tried it several times in a cafe and really love it for its rich taste and unusual appearance. Endishef's recipe attracted me with its simplicity and spectacular results, so I took it as a basis. Especially for this event, I went to Ikea to buy a springform baking dish with a diameter of 22 cm (everywhere they sell only large ones, 26 cm each) and to Udelnaya to buy red food coloring.
Before writing the list of ingredients, I’ll clarify a very important point: the Endichefa website shows a tall cake made from small shortcakes with a diameter of 14 cm (16 cm shape and trim), like this:
The composition in the recipe is indicated precisely taking this size into account; the plate below stipulates that for a larger mold you need to increase the amount of ingredients by 2 or even 3 times.
Expecting to get about 3 cakes of 2.5 cm each and having a mold 22 cm in diameter, I boldly doubled the amount of ingredients according to the sign. This is error 1
, but I'll come back to this later.
Flour 680 g - sugar 600 g - cocoa 2 tbsp. - salt 1/2 tsp. - soda 2 tsp. - baking powder 4 tsp. - 6 eggs - vegetable oil 600 g - cream 300 g - sour cream 260 g - coloring 4 tsp.
According to the recipe, without much dancing with a tambourine, I sequentially poured/poured all the ingredients into the pan and beat thoroughly with a blender. Error 2:
not thorough enough. I beat for a long time, but the volume of the dough was very large (almost 3 kg at the end), my blender is not suitable for such loads, so the color of the cakes at the end turned out to be uneven (although the dough in the pan seemed quite uniformly red). Following Endychef's advice, before cooking, I weighed the empty pan, then the pan with the dough, calculated the weight of the dough, divided it into three and began baking the cakes, measuring out a third at each batch. I greased the mold with butter and sprinkled it with flour, and put baking paper on the bottom of the mold: I recommend reading it on the same site, it helped me a lot during the play.
Error 3:
The baking time was strikingly different from that indicated on the website (20 minutes). My oven is not very hot, but I preheated it properly to the desired temperature, and yet, after 20 minutes it only set a little, and was completely liquid inside. After another 20 minutes, the toothpick still came out wet. As a result, baking the first cake until I was finally convinced that it was baked properly took 1 hour and 10 minutes. By the second cake, the oven had apparently completely started to heat up, and it took an hour, on the third - about 55 minutes. But still, I overexposed the cakes in the oven, and closer to the edges they were more brown than red (and the visual result in this cake is component is no less important than taste).
The cakes turned out impressive, even taking into account the fact that I was going to cut off the top. I was counting on 2.5 cm of thickness, as stated in the recipe, and it turned out to be quite 4-5. That is, you could get by with two or even one (if you don’t show off).
After cooling on the wire rack, I trimmed the cakes (the trimmings also went into use later).
I made buttercream. It took me: - curd cheese ~1 kg - butter 350 g - powdered sugar 300 g Again, I took the author’s recipe calculations as a basis and tripled the original amount of ingredients, because I baked a cake 22 cm in diameter and planned to cover it completely with cream.
Error 4
:
the cream came out right next to each other.
I made a fairly generous layer between the cakes and I had a little cream left for dessert, which I made from the scraps of the cakes, but in proportion to the amount of dough and cream, I would take 2/3 of the dough for the same amount of cream, so as not to save. I really liked the taste of the cream! The combination of salty cream cheese and sweet powdered sugar in a creamy base is very, very delicious. One minus - on the second day of standing in the refrigerator (and it is impossible to eat such a cake in 1 day), the cream began to “crack” - is there any way to combat this? Is the problem with the products or the application technique? I assembled the cake again according to EndiChef’s instructions: I dripped a little cream onto the plate so that the bottom cake would not slip (this is brilliant!), and began squeezing the cream from the pastry syringe onto the top of the cake. Second cake layer and second layer.
I had an old-school syringe, I took it from my mother, I remember it as much as I remember myself. I need to buy myself something more modern. I simply smeared the top layer of cream with a knife, like artistically; it wouldn’t have turned out perfectly even anyway. And here we return to error 1:
The cake turned out just HUGE. I suppose that if I had at least roughly estimated the total weight of the ingredients and Googled “3 kg cake,” I would not have been so surprised. At our wedding we had a 7 kilogram cake for 70-80 guests, but here it was 3 kg for a modest group of 5 adults and 1 child. After the New Year, we practically ate only it for three days.
In addition to the cake, I still had cake scraps and some cream, which I put in glasses for dessert.
I decorated the main cake with fresh raspberries and sprinkled it with powdered sugar - I was afraid I wouldn’t be able to handle the cream roses, and there wouldn’t be enough cream.
I’ll show you the cut, but I’m not very proud of it: you can see all the flaws in the cooking process - uneven color due to poorly mixed dough and brown dough around the edges, but it should be evenly red! But it’s okay, I still have an almost full tube of dye, we still have “Red Velvet” more than once, I’ll work on the technique. Well, either I’ll buy pastry rings and trim the cakes on all sides, but that’s cheating.
The taste was excellent, everyone really liked it. I was afraid that with so much vegetable oil in the composition it would seem too greasy and that the oil would taste. I can say that in hot and warm cakes you can really feel it a little, but after a night in the refrigerator the taste completely disappeared, leaving only fluffy moist cakes. In general, it definitely makes sense to try again, given your mistakes.
Once again I will put them at the end of the post for greater clarity: 1. Pay attention to the amount of ingredients. If we take Endishef's recipe as a basis, then 1.5 portions of dough for a large cake or even one for a regular one is more than enough for me; you can simply bake one cake and cut it into two parts. 2. Beat the dough very thoroughly! If there is a lot of it, then divide it into two parts and beat separately, and then together again. But if you take into account point 1, there shouldn’t be much of a problem. 3. Take into account the features of the oven when baking cakes, check them more often with a toothpick. As soon as it comes out dry, don’t play it safe and take it out immediately. 4. Make cream with a reserve (that is, for 2 portions of dough, take not 3 portions of cream, as in the recipe, but 4, for 1 - 2, for 1.5 - 2).
Well, of course, I will be grateful for the advice from my senior comrades!)
“Red velvet”, having been invented in America, spread all over the world: it was repeatedly transformed, improved and acquired new ingredients to improve the taste. There are several recipes for red velvet cake: the original one is among them.
