Why pumpkin is a symbol of Halloween
The original Halloween celebration was held to celebrate the end of the harvest. And, of course, the entire rich autumn harvest was the main character of the holiday. But in ancient times, night watchmen walked around with lanterns. The Irish have a legend about Stingy Jack, who is doomed to walk the earth with his lantern until Judgment Day.
His lantern was a turnip, since medieval Europe was not familiar with the pumpkin.
According to legend, during his lifetime Jack was extremely stingy, shrewd, but not very honest. One day he invited the devil to have a drink together, but he didn’t want to pay for the drink. Then Jack invited the evil one to turn into a coin for payment, and then put this coin in his pocket with a cross, which did not allow the devil to get back out.
After his death, Jack was not accepted into heaven because of his not too honest life, and the devil, remembering the deception, denied Jack a place in hell. And the poor fellow went back to earth. And so that he had something to light his way, they handed him a coal, which he inserted into a turnip. This is how the Jack-O-Lantern appeared.
Settlers from Europe who poured into America found many new plants there, which they used for their already existing traditions. Jack replaced the turnip with a jack-o-lantern. In addition to always growing in abundance, pumpkins fit right in with the harvest theme and fall colors.
This is how the tradition of the Irish holiday and one of its characters gained worldwide popularity.
Did you know? In the United States, Halloween celebrations are accompanied by many wonderful events and unusual records. In 2013, Stephen Clark set the Jack-O-Lantern carving record in 16.47 seconds.
What is a Halloween pumpkin called?
The most popular name for a Halloween pumpkin is Jack-o'-lantern. The traditional Jack-O-Lantern is a carved pumpkin face with a candle inside. You can make it yourself from natural vegetables or purchase it in a store. The decoration can be further decorated.
Among the ideas on how to decorate Jack:
- coloring;
- use of applications;
- decoration with tinsel;
- pumpkin makeup and other methods.
Jack-lanterns are used for porch decoration and indoor decoration.
How to make a pumpkin for Halloween
Decoration is done in stages. First, they think about how to beautifully make a pumpkin lamp, select materials and tools. If you are not a professional artist or carver, choose a simpler design. Of course, the most evil ones are faces with teeth, but cutting them out is more difficult than an even smiley mouth.
It is also necessary to take into account the features of this work:
- how to properly clean the fruit;
- how to dry;
- how to peel the peel;
- how to cut it to cut out teeth and ears;
- how to prevent rotting so that the craft does not deteriorate longer.
In the Jack-O-Lantern, the top of the vegetable is trimmed to form the lid and the inside is removed. The image, usually frightening or comical, is cut out by removing the skin and pulp. To create a lantern effect, a light source is placed inside.
Tools and materials for work
To make a pumpkin head you will need:
- sharp knife;
- spoon;
- pumpkin;
- paper;
- marker.
Step-by-step instructions for making a Jack Lantern
Even before you make a pumpkin lantern with your own hands, you need to take into account that raw fruits become unusable within a week. And if you want to preserve the created masterpiece for a longer time, you need to know how to prepare the fruit and how to dry it. For regular drying, it will take at least 1.5 months, and if you need the workpiece quickly, use the oven.
Drying instructions:
- Place the knife at a 45° angle at the top of the fruit.
- Cut the lid so that you can easily remove the insides by hand. Now you have in your hands a stalk with part of the pulp.
- Remove seeds and soft parts from the vegetable. Use a spoon, it is better suited for this operation.
- Dry the fruit from the inside with paper for 5 hours; Replace it as moisture is absorbed. As soon as the paper stops absorbing moisture, move on to the next step.
- Place the vegetable in the oven at +60°C for 8 hours. Don't forget to turn it periodically, or turn on the airflow.
When the fruit is ready, cool it, and you can start cutting out the image.
Important! Applying a thin layer of petroleum jelly to the inside, edges and sections of the image creates a barrier to bacteria and also adds shine to the piece. For a painted fruit, Vaseline will “work” as a sealant, which will allow the craft to last 1 week longer.
Jack-O-Lantern Cutting Instructions:
- Use a marker to draw a mouth, eyes, ears.
- Using a sharp knife, carefully remove the crust and some of the pulp in the designated areas.
- Place a candle in a candlestick or other light source inside and cover with a lid.
Pumpkin coloring
If you don't like the traditional orange color, dye your pumpkin in other colors. You don’t need to think long about how to do this - in this case, do the same as when drawing pictures. First, the background is drawn, and then the main image is applied on top of it. For painting you will need acrylic paints.
Step-by-step instructions for painting:
- Choose a fruit with a smooth surface.
- Rinse the surface and dry thoroughly.
- Draw a sketch of the image.
- Assess the possibility of its application visually.
- Draw an outline with a marker.
- Color with paints.
To help the paint adhere better, cover the pumpkin with sealant. Start painting over the dried layer.
Making your own Jack-O-Lantern from paper
Carving the classic "Jack O" Lantern requires some skill, patience and time. You also need to know which fruit is suitable for making a holiday symbol. If you want to decorate your classroom, home, or make an original gift for your family, pay attention to paper crafts. Here are some easy options.
Three-dimensional pumpkin-lantern
The basis of this craft is the origami technique. You can involve children in making crafts who can already fold paper neatly.
Materials and tools:
- green and orange colored paper;
- scotch;
- scissors;
- a simple pencil;
- stapler
Operating procedure:
A sheet of A4 format is folded in half and the fold is ironed. Carefully cut, then join with tape, placing the short sides end to end. You should end up with one long strip.
The left and right sides are folded to the gluing site. Next, make more bends to the corresponding edges. Turn over and fold each side toward the center again. It should look like a kind of “accordion”. Fold the workpiece along the gluing line, and then crosswise. Iron all sides well. The result is a “little book”.
On a green sheet, draw a pumpkin tail and a rectangular strip up to 15 cm long. Unfold the orange blank in the center, and fix the tail on the middle part of one of the sides. Fold the “book” and secure it with a stapler with a 1 cm indentation at the bottom and top.
Fold in half again and round the edges. Carefully unfold and connect the outer leaves with tape or glue. A long strip is attached next to the tail, having first twisted the free end.
Tip To ensure that the pumpkin holds its shape well, it is better to use watercolor paper. It has a higher density compared to regular colored paper.
Striped pumpkin
This craft option can be entrusted to children over 7 years old. Of course, they must do all the work under adult supervision, but overall the assembly process is very simple. In just a few hours you can make a real field of improvised pumpkins.
Tools:
- orange and green paper;
- pencil;
- ruler;
- scissors;
- glue.
Operating procedure:
8 strips with parameters of 2x10 cm are cut out of orange paper. And also a circle with a radius of 3 cm (the same is made from green) paper. Draw a 3x10 cm strip on green paper. Fold it in half. From the bottom edge on the left, 3 cm are retreated upward and a strip is cut from it, which is divided in half. Notches are made in the uncut part. The edges of the green circle are trimmed with a wave.
Using scissors, carefully round off all the orange stripes. Glue one end to the orange circle according to the pattern: one against the other, crosswise, diagonally. In the same order, fix the free ends to the green round blank.
The green strip is screwed onto the pencil from the side where there is no “grass”, the edge is smeared with glue and pressed firmly. Then they take it off. The notches are carefully straightened, lubricated with glue and fixed on the green mug. The remaining rectangular blanks are twisted and inserted into the middle of the ponytail.
Design option
What else can you make from pumpkin?
Besides the Jack-O-Lantern, pumpkin has many uses.
Among the most popular:
- consumption;
- production of decorative vases and accessories for the room;
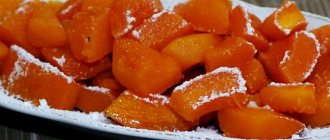
- making original dishes for serving porridges and casseroles;
- creating a decorative pot for an indoor flower;
- pumpkin face mask.
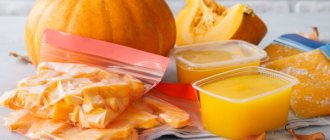
Every part of the fruit can be used. Pulp - for soups, casseroles, purees, cereals, pies, cakes, cocktails and even beer. The seeds are considered a strong anthelmintic in folk medicine.
It will not be possible to eat the fruits of decorative varieties due to their low taste. But making vases, boxes, stands from them is quite possible. Finished products can be varnished, applied with a design, or other means of decoration can be used.
A decorative pumpkin pot will not last longer than 2 weeks. But when it deteriorates, it becomes an excellent fertilizer in the garden.
A pumpkin mask will make your skin more delicate, restore its even color, and enrich it with vitamins A, C and E. There are so many varieties of masks that you will definitely choose something for your skin type.
Did you know? In 2021, the city of Richmond (USA) built a continuous line of 3,975 Jack-o-lanterns created by residents to celebrate Halloween. The line length was 1046 m
.
What you will need
First, find a nice looking pumpkin that isn't too damaged.
For cutting you will need a strong knife. If the pattern is complex, take several pieces of different sizes. You can use a large spoon to scrape out the insides of the pumpkin.
A felt-tip pen or pen is useful for drawing. You may also need a drawing template. Here are some classic and non-standard options:
To download them, follow the links:
Many more different options can be found and downloaded here and here. If you decide to use a template, you will need scissors, tape or pushpins, and a needle.
Also prepare one or more candles, as well as a lighter or matches. Instead of real candles, you can use electric ones if you wish.
How to Preserve a Pumpkin for Halloween
Of course, unless you dried the pumpkin until it was very hard to use in decorative crafts, it will inevitably rot. The answer to the question of how long pumpkin can be stored depends on how it is processed.
Fruit that shows signs of rotting will spoil faster than others (within a week), so when choosing a fruit, make sure that it does not have soft or damaged areas.
Recommendations for increasing the shelf life of pumpkin:
- Clean the inner surface as much as possible.
- Wipe the inside of the fruit with a solution of bleach and water (1 teaspoon per ¼ liter of water). This will kill any existing bacteria.
- Dry the fruit before cutting.
- Wipe the surface with the above solution after work.
- You can also soak it in a bowl of bleach solution for 24 hours to make the pumpkin unsuitable for microorganisms to grow.
- Store the Jack-O-Lantern in the refrigerator, or in the basement in a plastic bag.
Now you know how to prepare for the popular holiday. Use a pumpkin in any of the following ways - bringing any of them to life is not at all difficult. And also invent your own ways of using these wonderful fruits.
Table decorations
If you want to make a holiday symbol without using a pumpkin, try creating the main holiday attribute from polymer clay.
Cute, funny, cunning or dangerous faces will be a wonderful souvenir for friends:
- Form the gray material into a perfect ball.
- Use a toothpick to make characteristic grooves.
- Mark the outline of the cap on top, and insert a wooden tail in the center.
- Gouge out your eyes, nose, mouth.
- Bake for a few minutes in an oven preheated to 100°C.
- Paint the workpiece with dark orange acrylic.
- Highlight the inside of the face in yellow.
- Wear gloves when working with polymer clay. If you sculpt without them, be sure to wash your hands. Particles that remain on the fingers and then enter the body can cause poisoning. After baking in the oven, place a large container of water inside and heat to maximum temperature. Repeat 2-3 times and ventilate the oven well.