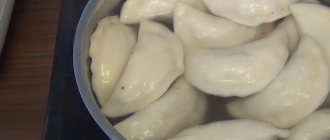
The national Georgian dish khinkali, beloved by many, can be prepared with your own hands at home. But if you don’t have enough time or don’t want to spoil the product, without having the skills to prepare dough and minced meat, you can buy frozen ones and simply boil them. This way you can get a hearty dish in about 10 minutes - a great dinner that will please the whole family.
How long to cook frozen khinkali in a saucepan?
This dish first appeared in Georgia. According to legend, this was the dish that was fed to wounded soldiers. The main task of the cooks was to contain proteins, fats, and carbohydrates in the dish, but at the same time provide an antiseptic effect. Thus, the minced meat was mixed with spices, garlic, green onions, broth and filled into thin pieces of dough. Thanks to this, a rich dish with an unusual taste and broth flowed out.
How long to cook frozen khinkali in a pan:
- To prevent the products from sticking together, the main condition is cooking in a large saucepan.
- Do not save water; it is necessary that the khinkali float freely in the liquid and do not stick together.
- If they stick together, this can lead to rupture of the walls, which will lead to the leakage of broth. As a result, the taste will deteriorate.
- 15 minutes is enough for the products to cook.
Semi-finished products
Useful tips
- If khinkali is prepared not by steaming, but by boiling, you need to use a lot of water so that they do not stick together. When a large quantity of semi-finished product is boiled, it is recommended to immerse it in water a few at a time (no more than ten at a time), and there is no need to change the water. The more freely the khinkali float in the pan, the lower the risk of sticking to each other. You can save the broth for soup.
- Experienced cooks advise that before immersing the first khinkali in boiling water, make a “whirlpool” in the pan with a spoon - this way it will not immediately fall to the bottom, but will swirl, and the dough will set in the process thanks to the hot water. You can immediately put the second khinkali in there.
- During the boiling process, semi-finished products need to be mixed, but it is very important to do this as carefully as possible. A wooden spoon is best suited for this task. If you accidentally damage the dough while mixing, the juice will flow out of the khinkali and they will not be as tasty.
- When the khinkali are cooked, when removing them from the pan, they can be doused with chilled boiled water. This will help stop the boiling process inside the product and prevent them from sticking to each other on the plate.
- Raw khinkali can be stored in the refrigerator for up to 12 hours, frozen in the freezer for 6 months. Boiled khinkali should be eaten within 2 days, and they can be stored in the broth in which they were cooked.
How long does it take to cook store-bought frozen khinkali with minced meat?
Semi-finished products with minced meat can be found in home cookeries and supermarkets that deal with food preparation. Typically, semi-finished products, which can be purchased at any store, are prepared using minced meat. This allows you to reduce the cost of the dish and include not only lamb, but also cheaper types of meat, as well as offal.
How long to cook store-bought frozen khinkali with minced meat:
- First you need to put a large pan on the fire and wait for the water to boil. After this, salt and various additives are added at the request of the chefs. After this, you need to very carefully, one by one, lay out the khinkali.
- As soon as the liquid boils along with the semi-finished products, it is necessary to reduce the heat and mix thoroughly. Moreover, it is necessary to mix from bottom to top, and not in a circle. Try not to mix too vigorously, so as not to damage the thin shell of the dough. After this, you need to wait for the khinkali to float up and time it for 12-15 minutes. After this time, the semi-finished products are ready.
Please note that semi-finished products with minced meat take approximately 12 minutes to cook. If you are preparing homemade semi-finished products with minced meat, it is recommended to cook them longer, for 18 minutes.
Minced meat contains larger pieces of meat that take a little longer to cook. Do not overcook foods under any circumstances; excessive exposure to water causes the dough to become soggy and excessively soft, which leads to rupture of the dough shell. As a result, liquid leaks out, and the product becomes not very tasty and not so juicy.
Goodies
With cheese
You can cook frozen khinkali in a pan not only with meat filling, but also with dairy products. Preparing an authentic dish will require the presence of unsweetened Georgian “Suluguni”. If you don’t have one, you can take another type of cheese that can melt easily.
Composition of ingredients
To create a treat you will need:
- butter - 3 tbsp. l.;
- premium flour - 250–300 g;
- suluguni - 400 g;
- egg yolk - 1 pc.;
- drinking water - 100 ml;
- salt - according to preference.
Step-by-step cooking process
Sequence of preparation steps:
- The first step is to sift flour and salt into a bowl, add filtered water to the mixture, then knead the dough. This should be done very carefully, kneading the products for at least 15 minutes. It is especially important to achieve a cool mass so that the juicy and tender soft cheese filling does not affect the shell when freezing the product and subsequent cooking.
- The formed dough should rest for approximately 15–20 minutes.
- In the meantime, you need to coarsely grate the cheese, then combine it with the yolk and butter, and carefully mix the mass.
- Now you have to divide the dough into several “sausages”, cut them into small pieces, and roll out circles from each of them no thicker than 2 mm.
- Next, place portions of the cheese filling on the layers, approximately 1–1.5 tsp each, and connect the edges of the dough on top, trying to form at least 8–10 folds. Ideally there should be about 15–20.
- To preserve the juice inside the khinkali, you need to use a little Georgian “trick” - cut off the upper part of the formed “tail” with a sharp knife. This technique will “seal” the product and will not allow the juice to spill out during heat treatment.
- Decorated products should be immediately cooked or sent to the chamber, since the juicy filling can quickly soften the shell and make it vulnerable to heat treatment.
- Now you need to place the semi-finished products on a tray covered with film and put it in the freezer.
- The preparation of frozen products with cheese filling has certain features. They should be immersed in boiling water immediately after removal from the chamber.
- Each khinkal must be taken by the “tail”, carefully dipped into the seething mixture, then finally lowered into the water.
Portions should be cooked for no longer than 8–10 minutes, since the filling of the future meal is almost ready and does not require long cooking.
How to serve a dish
A particularly tasty option for consuming this Georgian treat would be melted butter served in a bowl, into which it is customary to dip the food before enjoying its incomparable taste.
How and how long to cook frozen steamed khinkali?
The easiest way to cook khinkali is by steaming. Initially, this dish was prepared using a double boiler.
How and how much to cook frozen steamed khinkali:
- Cooking in the machine completely eliminates the possibility of the dough shell breaking and juice leaking out. You can build a water bath yourself. For these purposes, take a pan of larger diameter, pour in water so that there is a distance of approximately 8 cm from the bottom.
- Please note that the water level may rise during boiling. Due to the bubbles, some of the liquid will fall into the colander. Place a colander or sieve on top and cover with a lid, wait until it boils. After this, place several khinkali in a colander, cover again and wait until the liquid boils.
- From this moment you need to time 15 minutes. The steaming temperature is slightly lower due to the gap between the pan and the lid. It is worth extending the steaming time to 20 minutes.
- Depending on the situation, you can taste the product and determine its readiness. The dough should be fairly firm, but not too soft. In this case, the minced meat should be juicy and fully cooked. This can be understood by the color of the filler. Ideal minced meat has a brownish-gray tint.
Homemade khinkali
With pork
It is recommended to cook frozen khinkali in a pan immediately after removing them from the chamber or when they remain on the table for a short time.
The products should not be allowed to completely thaw so that they do not lose their shape due to the penetration of juice from the tender minced pork into the shell.
Composition of ingredients
To prepare the dish you will need:
- fatty pork - 1.4 kg;
- onion - 4 pcs.;
- drinking water or broth - up to 300 ml (for minced meat);
- garlic cloves - 3 tsp;
- premium flour - 1 kg;
- parsley, cilantro, dill - 1 bunch each;
- table salt - 3 tsp.
Step-by-step cooking process
Step by step food creation:
- Initially, you need to rinse the greens and meat well.
- The pork should be cut into as small cubes as possible. To facilitate the process of preparing chopped minced meat, it is recommended to keep the product in the freezer for up to 15–20 minutes before chopping.
- After this, you should add chopped herbs with a knife or torn by hand, table salt, coarse pepper, chopped garlic to the meat, then mix the mass well and put it in the refrigerator to infuse.
- In the meantime, you have to prepare the dough. To do this, you need to combine salt and filtered water in a bowl, completely dissolve the spice in it, then add the sifted flour, and then knead a stiff and elastic dough that does not stick to your hands.
- The formed lump must be kept in the refrigerator for approximately 1–1.5 hours. During this time, it is advisable to knead this mass again.
- Now you should form thick sausages from the dough, divide them into small pieces, roll each into flat cakes up to 3 mm thick.
- All that remains is to place portions of dough on the circles, seal the edges with beautiful “skirts” with small “tails”, then send the pieces on the selected surface to the freezer. The ideal result is achieved by kitchen appliances with the No Frost system with uniform circulation of cold air in the chamber.
- When the products are sufficiently frozen, their further storage is best done in bags.
- In order to boil such a semi-finished product, you need to boil at least 3 liters of drinking water in a large saucepan, salt the liquid after it starts boiling, then carefully lower a portion of frozen khinkali.
- After about 1–2 minutes. You need to use a silicone spatula to help the “bags” rise from the bottom, then cook the food for 10–15 minutes. depending on the formed sizes.
If there is noticeably less water in the dish, it is necessary to replenish the amount of liquid to the required volume, wait for a new boil, and only then continue preparing the next portions.
What can I add?
It is better to cook khinkali in a saucepan with drinking water and add laurel leaves, which will provide frozen products with a piquant spicy aroma.
How to serve a dish
The traditionally presented treat was presented without any sauces, so as not to overwhelm the aroma and taste of the filling and juice. If desired, you can serve the treat in the broth left over from cooking the food, sprinkling the food with a variety of herbs.
How and how long to cook frozen khinkali in a slow cooker?
There are several ways to prepare khinkali in a slow cooker. To do this, you can use the steam mode.
How and how much to cook frozen khinkali in a slow cooker:
- If products are cooked under the influence of boiling water, use the “soup” mode. To steam khinkali in a multicooker, you need to set the appropriate “Steam” cooking mode. Pour water into the bowl up to the indicated mark, place a mesh or container with holes on top.
- Grease with vegetable oil and place khinkali on top, holding them by the tails. Cover with a lid and cook in the “Steam” mode for 20-30 minutes. This time is enough for the products to cook. Usually the time is chosen taking into account the time it takes for water to boil.
- To cook khinkali, you can use the “Soup” mode. Pour in half a bowl of water, set the “Soup” mode. Open the lid the moment the water starts to boil. This usually happens 10-15 minutes after turning on the device. As soon as this happens, place the khinkali in the water, close the lid and cook for 20-30 minutes. Indeed, khinkali can take longer to cook in a slow cooker than on the stove.
- This is due to the fact that usually in the “Soup” and “Steam” mode the temperature is not 100 degrees, but 90. This produces a large amount of water vapor, but it is not too hot and not at all the same as when cooking in a pan on the stove , for a couple. This improves the appearance of the product and prevents the dough shell from tearing. It is the high temperature that contributes to the soaking of the dough and its boiling. As a result, the filling and juice from the semi-finished products are poured into the water in which they are cooked.
For a couple
Khinkali in Georgian
Exquisitely designed products with a corrugated dough shell, tasty filling with a large content of appetizing juice have become an iconic dish of Georgian cuisine.
Creating such a culinary miracle is not very easy, but it is quite possible with a little patience and following the stages of the technological process.
Composition of ingredients
The table shows the components needed to prepare khinkali:
| Grocery list | Quantity |
| For the test | |
| Table salt | 2 tsp. |
| Drinking water | 380–400 ml |
| Premium flour | 1 kg |
| For filling | |
| Beef | 300 g |
| Bulb onions | 2 pcs. |
| Pork | 300 g |
| Svan salt | 1 tsp. |
To minimize the risk of dough rupture during heat treatment of frozen products, regular premium flour should be replaced with a similar product with an optimally high gluten content, which will make the filling shell more elastic and able to resist deformation and cracks.
Step-by-step cooking process
Sequence of stages of creating a dish:
- First, you need to completely dissolve the salt in cold drinking water in a spacious bowl, then add the sifted flour to the mixture, and then knead a very stiff dough, denser than dumplings.
- If there is not enough flour, you should add the bulk product. Its volume depends on the quantitative content of gluten, which determines the quality of the dough.
- When a tight ball is formed, it needs to be wrapped in film, then placed in the refrigerator.
- After 2 hours, you have to repeat the kneading, then send the product back into the cold.
- In the meantime, you can start filling. The meat must be washed, dried with disposable towels, cut into thin plates, which, in turn, must be divided into strips, then into small cubes. This is how chopped minced meat is prepared. To facilitate this work, it is permissible to use a home harvester with a grid of the largest cross-section.
- The resulting mass must be seasoned with salt and pepper, gradually adding water or broth. For 1 kg of meat you need to add at least 1 tbsp. liquids.
- Now you need to take out the dough, roll it out into a flat cake up to 0.5 cm thick, and use a glass or small saucer to cut out circles with a diameter of approximately 5–7 cm.
- To facilitate the formation of products, you will need to place the cake between your thumb and forefinger, connected in the form of a circle. Then you should place a portion of minced meat on the formed workpiece, press it inside the resulting “bag”, and then squeeze the “neck”, twisting the “tail” on top.
- When all the components have been used, the khinkali should be placed on a tray covered with cling film and the semi-finished product should be placed in the freezer.
- To cook a frozen product, boil filtered water in a large saucepan. At the same time, you need to remove the workpiece from the chamber.
- When the liquid begins to boil, you need to salt it (1 teaspoon of spice per 3 liters of water), then lower a portion of the product into boiling water.
Cook frozen khinkali in a saucepan without stirring for 15–20 minutes. depending on the thickness of the dough, the amount and composition of the filling placed.
What can I add?
Georgian food was traditionally prepared without the addition of greens, which was due to the mountainous living conditions of the people. Today the dish is supplemented with fragrant herbs and various spices, for example, utskho-suneli. To obtain a juicy and tender filling, it is recommended to add a little heavy cream to its composition, and for flavor - the desired amount of garlic.
How to serve a dish
The treat must be presented hot on a wide, elegant plate, sprinkled with fresh and coarse black pepper, generously pouring melted butter over the food. You are supposed to eat food without cutlery, holding it by specially made “tails.” The main thing is to drink all the fragrant juice, to the last drop.
How much and how to cook khinkali in the microwave?
The above described fairly familiar, standard methods for preparing khinkali.
How much and how to cook khinkali in the microwave:
- However, there are ways that students can use when there is no constant access to the stove. A microwave is suitable for these purposes.
- Place the khinkali in a container, pour in water so that it covers the product. Now you need to cover with a lid and set the microwave for 15 minutes, selecting a power of 800 W, or maximum heat.
- This time will be enough for the dough crust to remain quite dense, but the minced meat is cooked, becomes soft and a large amount of juice is released.
Before cooking
What to do to prevent khinkali from sticking?
During the cooking process, khinkali may stick to the pan or mesh. That is why it is necessary to adhere to certain rules so as not to spoil the food.
What to do to prevent khinkali from sticking:
- The dough sticks to the pan due to temperature changes. When the khinkali are cold, they sink down, and due to the temperature difference, the surface of the dough seems to be fried to the pan.
- To prevent this from happening, even before the khinkali begin to boil, after immersion in water, they must be mixed. This must be done until they float to the surface. When the khinkali are on the bottom and the heat is quite strong, there is a risk of the dough shell sticking and breaking. Khinkali can also stick during cooking on a special grid in a slow cooker or double boiler. Usually, for these purposes, the mesh is simply lubricated with vegetable oil.
- To prevent the khinkali from sticking together after cooking, you need to pour cold water over it. Try to place on a plate that has been greased with oil. This will prevent the khinkali from sticking to the surface. This way, the juice will remain inside and the khinkali will not burst, which is often the case during the cooking process.
Ready dish
Why do khinkali tear when cooked?
The best option for preparing this dish is steaming. This is the most reliable way to prevent the dough from breaking.
Why do khinkali tear when cooked?
- This often occurs due to repeated freezing. Therefore, check the products at the time of purchase. It should not be dark in color or show visible signs of damage.
- Repeated defrosting and freezing can cause holes to form during the cooking process.
- Never turn on excessive heat; cook over low heat. Do not overcook, as prolonged exposure to water will cause the dough to break.
Ready dish
From the following articles you will learn how to prepare:
- Eggs Benedict
- How to properly and tasty cook juicy khinkali?
- Egg scramble
- Korean zucchini
- Chicken roll
- Curd balls
To enjoy such a dish, you don’t need to go to Georgia; you just need to buy semi-finished products in a store. If you believe the statements of connoisseurs of Georgian cuisine, this dish combines the first and second. After all, inside the khinkali there is broth and meat. In Georgia, the dish is eaten with hands, because according to the rules it is necessary that the liquid does not leak out of the shell, but gets to its destination. It is necessary to take the product by the tail and carefully bite it, turning it over to one side so that the broth does not leak out. Next, the broth is drunk and only after that you need to eat the minced meat along with the dough. In modern conditions, semi-finished products are sold that are prepared from both minced meat and minced meat.
Helpful information
We are preparing an adapted version of khinkali. The original recipe consisted of an elastic dough based on flour and water, stuffed with a large amount of herbs and cheese - this was all that shepherds could find in distant pastures. Many people fell in love with this dish due to the bright taste of the filling, to which a lot of onions, herbs and fresh meat are traditionally added. Now we know how to cook frozen khinkali in a pan, and we can practice making manti.
- Manti are also prepared with vegetable filling, but many still prefer meat filling.
Learn how to cook manti with meat and juicy gravy. - The recipe differs from the classic one, but many prefer it. The dish turns out juicy and tasty. And if the minced meat turns out to be a bit dry, there are a few secrets that can be used to improve the situation.
- For cooking, cooks use special utensils - mantyshnitsa.
But you can prepare it according to a step-by-step recipe with photos. Their taste will definitely not suffer from this.
Armed with the knowledge you have gained, you will definitely cook juicy khinkali in a saucepan even after freezing. Leave your feedback and advice in the comments, and also tell us how useful the information was for you.
