Watering can device
The watering can has one type of jet, or maybe several. In this case, there are position switches on the handle or disk. The consumer regulates the water flow independently, setting it conveniently for himself.
Shower Heads
A shower head with a mode switch, as in the photo, has a number of advantages. Water for washing is supplied in different modes:
- ordinary;
- massage;
- comfortable.
It is possible to save water consumption. Shower heads with one operating mode do not have additional functions. A sanitary device with two modes is designed for washing and massage.
The shower head is easy to install. Its surface is usually made of hard plastic. Inside the housing there is a round-shaped structure with flow swirlers.
The water supply chamber is covered with a mesh. On the top circle there is a mode switch. With its help, one or two chambers of the swirler are opened, the rest are closed.
Shower heads from different manufacturers
There are a variety of shower heads available on the market today. For example, Grohe, Hansgrohe, Croma and others. They differ in appearance, but are similar in function. They are made mostly of plastic. The material is lightweight, various designs and additional functions are possible.
There are designer devices - pencils, their appearance is made at the expense of convenience. These are Hansgrohe watering cans (Croma 100, RaindanceSelect, AxorStarck).
watering can pencil Hansgrohe
The AmPm hand shower has a shower head without a hose. The number of jet modes may vary. Small watering cans AmPm have a simple design. Installing large shower heads requires skill. Often consumers prefer an overhead shower with a simple system. In terms of design, the installation of an overhead shower is not very modern. But it is easy to use.
Hand shower AmPm
An overhead shower in cabins with a tray will require a high-capacity siphon. You can choose shower heads from Grohe, Croma, HansgroheRaindance.
If the watering can is clogged
Many watering cans have mesh filters to trap small foreign elements of the water supply. Without a filter, the nozzle may become clogged from the inside and then you will have to disassemble the device.
Disassembling a standard model watering can
Special cleaning agents can be used to clean limescale deposits.
You can buy a shower system with a Grohe Freehander diverter with two shower heads.
system with Grohe Freehander switch
Shower heads such as Damixa “Contour” have a switch for 5 modes. When installed, it is easily connected to a flexible hose. A DamixaContour watering can with function 1 can last 10 years.
With RubClean shower heads, the nozzles are easily cleaned of limescale and dirt; there is no need to disassemble the mixer. You can simply wipe the rubber nozzles with your finger.
With the Hansgrohe RaindanceSelect shower head, the shower spray is activated with just one touch.
The nozzles of the AmPm nozzle are made of plastic. They have a small diameter, so they become clogged with salts and scale. Filters will save you from constant repairs.
Step by step disassembly
To disassemble a shower head with a switch, you need the following tools:
- Phillips-head screwdriver;
- adjustable or gas wrench No. 1;
- pin key.
If the pin key was not included in the kit, you can make it yourself.
When disassembling you need to be careful, try not to damage the gaskets or lose small parts.
Procedure for disassembling the shower head: (Watch the video)
- Turn off the shower and the faucet setting. Remove the watering can from the hose by unscrewing the nut.
- The diffuser grid panel has a circle with indentations. Unscrew the panel from right to left with a special key or scissors with rounded ends.
- Under the panel there is a swirl box secured with a screw. Unscrew it with a Phillips screwdriver.
- Remove the grid circles with a common center and the switch. There may be dividers and partitions under the diffuser; they must be carefully removed. Then remove the swirler.
- Remove the switch spring.
- The swirl box can be detachable or one-piece. The solid box cannot be repaired.
Thus, disassembling a shower head with a mode switch is not particularly difficult.
After replacing the parts, reassemble the shower head in the reverse order. First, we insert the swirl housing, tighten the screws, install the diffusers and tighten the central panel.
It is possible to disassemble a Hansgrohe shower head. It should be remembered that it has hose fastenings with latches, and not with threads. Therefore, ordinary hoses for the mixer will not work. Hansgrohe watering cans require special hoses.
Thus, the principle of disassembling shower heads depends on its design. Simple watering cans are easy to disassemble, but watering cans with switches are more difficult. There are also those that cannot be disassembled.
Cleaning the watering can from hard limescale deposits
You can do it in two ways - simple and more complex. You probably have a natural question: why resort to a more complex method? It’s simple - this option will allow you to better clean the watering can from dirt. We will look at both cleaning options, you can choose the one you like best.
How to clean limescale from a shower head without resorting to using strong chemicals, which can simply damage your plumbing. Of course, there is a way out. Regular table vinegar is suitable for this. It is able to effectively cope with limescale without damaging the surface of the watering can.
So, the first method is the simplest; in most cases it is suitable when your shower head cannot be disassembled. Yes, this also happens, because the design of the shower may not be dismountable.
For cleaning you will need:
- 9% table vinegar;
- small plastic bag;
- tape or tape.
Take a bottle of regular table vinegar and a plastic bag.
Before starting the procedure, make sure the package is intact. To do this, just fill it with water and hold it suspended for about a minute. If you do not notice any leakage, then it can be used.
In the question of how to clean a shower head from limescale, there is one nuance - the amount of vinegar used. If there is too little of it, then you will not be able to achieve an acceptable result.
The amount of vinegar depends on the diameter of the mesh. The most common diameter is 60 mm. 300 g of liquid will be enough. Place the body of the watering can on a holder that is attached to the wall. Make sure that the entire structure is held tightly. Then pour vinegar into a plastic bag and place it on a watering can.
Make sure that the entire mesh and the larger half of the watering can are completely immersed in the solution. If necessary, add vinegar to the bag.
The next step is to secure the bag to the holder using electrical tape or tape.
We leave the structure for the whole night. The next morning you will be pleasantly surprised: the mesh will be completely free of limescale.
Methods for disassembling a shower head, tips
prev-post Previous article Faucets with shower for the bathroom, tips for choosing
A shower is a comfortable and easy-to-use plumbing fixture used in almost any apartment or house. It is often used even by owners of summer cottages, and with its help it is possible to take water procedures on the street in the summer. An indispensable condition for creating a comfortable shower is the use of a watering can. It is this that ensures the distribution of the water flow into separate streams. Due to the use of low-quality water in the water supply, the main parts of this device are constantly clogged, so repair of the shower head is often required. To do this, it is important to figure out how to disassemble the shower head and assemble this device. At the first sign of a blockage, you should immediately begin repairing and cleaning the watering can, since if this is not done promptly, the blockage will increase, so in the future a complete replacement of the element and even the hose will be required.
Parsing the watering can
To clean the shower head as much as possible, it is recommended to remove and disassemble the plumbing fixtures.
Currently widely used:
- ordinary watering cans;
- products with the ability to switch operating modes.
Disassembling a standard watering can
A typical shower head consists of the following elements:
- device body;
- rubber gasket for tightness;
- diffuser;
- fixing bolt;
- decorative plug.
To disassemble a shower head from Grohe or another manufacturer that is not equipped with different operating modes, you must:
- Disconnect the shower head from the shower hose. As a rule, the procedure can be performed by hand, without the use of tools. However, with prolonged use of plumbing equipment, the fixing nut may “stick.” In this situation, you will need an adjustable wrench to disconnect;
Disconnecting from the hose
- Using a screwdriver or other sharp object, remove the decorative plug from the fixing bolt located in the center of the diffuser;
Device
Before the actual process, it is important to understand how the shower head is disassembled, and for this we study its structure. Initially, it is important to decide whether the watering can is stationary or equipped with a flexible hose. If there is the first option, then it can be ceiling or wall.
If there is a product equipped with a hose, then it can be fixed:
- brackets to the wall;
- using special fittings, represented by special brackets, and it is in them that the structure is installed, and the fittings are fixed using a fixed rod located vertically.
Bracket Rod
The structure consists of elements:
- stub;
- screw holding the mesh;
- the mesh itself;
- body made from different materials;
- pad.
Shower head device
The advantage of using fittings is that they can be adjusted in height, so each user of a plumbing fixture independently determines the optimal direction of water flow.
Required Tools
It is necessary to disassemble this structure with suitable tools, and they are usually available in every home. These include:
- regular screwdriver;
- thin and sharp knife;
- crosshead screwdriver;
- molecular glue.
If you have a fairly complex model, it may require a special three-pin wrench to ensure optimal dismantling of the case. As a rule, such models are sold complete with this tool, so there is no need to purchase it separately.
Required tools for disassembly
The shower breaks for 2 reasons: a manufacturing defect or (most often) a blockage due to low-quality tap water. There is no point in postponing repairs: if you act slowly, the situation will only get worse. Then a complete replacement of the nozzle will be required.
You need to prepare the tools:
- screwdriver (flat or Phillips depending on the screw);
- knife;
- adjustable wrench.
Shower head disassembly technology
How to disassemble a shower head? This process is considered quite simple and understandable, so even without experience it will not be difficult to carry out the work. The procedure is divided into successive stages:
- the watering can is disconnected from the hose, and to do this it is enough to unscrew the element. If the product is new, then this process will not cause difficulties, but if it has been used for a long time, then usually a lot of scale and alkali have accumulated at the joint, so the process causes difficulties. It is often possible to unscrew the watering can only with a gas wrench;
- Direct disassembly of the element begins. There is a plug in its center. It should be dismantled, and it is quite easy to pry it off with an ordinary sharp knife. As a rule, there are no obstacles to removing it;
- After removing the plug, the screw will be revealed. It is this that holds the mesh, and it is quite difficult to unscrew it, since usually a lot of sediment accumulates here due to the use of low-quality water. First, the recess is cleaned with a blade, after which the screw is unscrewed;
- Then you can begin to disconnect the mesh from the body. This work is carried out carefully, since if you make sudden movements, the gasket can easily be damaged. Although this element has a low cost, the difficulty lies in finding the gasket of the right size and thickness.
First, remove the plug. Under the plug there is a screw that needs to be unscrewed. Disassembled shower head
Thus, if you follow the instructions exactly, you will get a disassembled element consisting of several parts. After completing the process, it will be easy to clean them from dirt and blockages.
Cleaning
Various methods can be used to clean a shower head, and you can use all methods at once to achieve the best result. Solutions used for these purposes:
- using vinegar - for this process you need to prepare a regular container with 9 percent vinegar. The amount of solution depends entirely on the diameter of the mesh, and the most common designs are with a diameter of 5 or 6 cm. Therefore, 300 g of vinegar is used. The solution is poured into a container, where the mesh and other parts of the structure are then lowered. It is advisable to keep them in vinegar overnight;
- the use of citric acid - this method is considered more efficient, since this product quickly copes with various blockages. To do this, it is also necessary to lower the mesh into a container with citric acid, and then boiling water is poured, and the part should be completely hidden in the solution. You need to wait for the water to cool, so it will take about 20 minutes. Next, bubbles will begin to appear, after which the mesh will be pulled out. It is cleaned quite easily and quickly after this procedure with a standard toothbrush. This is due to the fact that the plaque softens, so it is easily detached from the mesh.
You can use vinegar or citric acid to clean the shower head.
Thus, cleaning a watering can is a simple process that involves using standard solutions available in almost every home.
Assembly
Assembly is performed in exactly the same way as disassembly, only in reverse order. To do this, the mesh is placed in the housing and then secured with a screw.
It is recommended to initially purchase a new screw, since the old fastener is usually no longer suitable for further use. Then the plug is inserted and the watering can is screwed to the hose.
Thus, cleaning the watering can is easy if you figure out how to disassemble and reassemble it. If the room has a switch from the shower to the tap, then often problems with the flow of water are associated with it, so repair work has to be carried out.
Cleaning
Existing cleaning methods allow the use of folk remedies. For example, vinegar will do a great job of removing deposits on mesh and screw threads. To do this, the elements of the device should be immersed in the solution for 8 – 12 hours. After which the parts are washed and dried.
Treatment with citric acid, which softens hardened water stones, gives good results. At the same time, boiling water is added to the container. It is recommended to keep the parts in the composition until the mixture cools, but no more than 20 minutes. Remaining plaque is removed with a brush.
It is better to clean metal watering cans with special products.
Assembly is a simple process. All parts are connected in the reverse order and secured with screws.
Watering can repair
Today, there is a shower in almost every apartment and private house. It is present even among owners of suburban areas and dachas, even if not in the house, then in the form of a shower stall on the street. It doesn’t matter what the design is, one detail is common - the presence of a watering can. Due to contamination of the water, the presence of various chemical elements in it, or simply ordinary blockage, the water pressure weakens over time or even stops flowing completely. In connection with this problem, many people wonder how to disassemble a shower head.
Sometimes, due to contamination of the water, it is necessary to disassemble the shower head and clean it, so that in the future you do not have to change the hose, which can break from pressure due to a clogged shower head.
Despite the apparent complexity, in reality everything is very simple. Of course, if your neighbor is a plumber, then you are just lucky. And those who want to do the repairs themselves and save money will have to, in addition to tools, arm themselves with the necessary knowledge about the work process.
Shower switch repair
What should you do if trouble happens with other parts? Each of them is important, and the mode switching mechanism is an equally important part of the shower head.
If water starts to leak, this is a reason to think about repairing the device. But before you start work, it is necessary to diagnose the cause of the breakdown, because it can be both large and small. For example, tightening a nut is not as important as replacing any important part of the device. However, the switch in the mixer is something without which it is difficult to imagine the normal functioning of the device. This mechanism blocks the water flow and prevents the spontaneous flow of liquid. It connects the hose and spout.
The switch has three positions: one is a stop position, and the other two change the direction of flow, that is, they are responsible for the supply of hot or cold water. The shower mode is also blocked and vice versa. But in the event of a malfunction, it is impossible to properly regulate the water flow.
There are several types of shower switches, the characteristics of which determine the repair actions.
- Suberic. Today it is extremely rare and is almost never used.
- Push-button or pull-out. Nowadays it practically never occurs. It is divided into two types: automatic and manual. Used to mix cold and hot water.
- Cartridge. The most modern type of switches. Unfortunately, it has a drawback - if it malfunctions, you will have to replace it with a new one.
- Spool The most common part among all existing ones.
- Flag. Changes the direction of water flow when it turns in one direction or another.
Watering cans: general information
Before starting repairs and cleaning the device, I would like to draw your attention to the types and some features of using watering cans.
They differ in the presence of:
- stationary watering cans;
- the presence of a flexible shower hose.
The first option, in turn, comes in ceiling and wall types. The second implies 2 methods of fastening:
If there is limescale on the rubber gaskets, they must be wiped with a regular cloth.
- Using brackets fixed permanently to the wall.
- Using fittings - special brackets in which shower heads are installed, and the device itself is secured using a vertical fixed rod. At the same time, it is possible to adjust the height.
Both options, where there is a flexible hose, allow the shower head to change the angle of inclination and rotate around its axis. This allows the desired direction of the water jet. In this case, if necessary, you can simply remove the watering can (for example, you need to wash the walls, tiles, or it’s just more convenient to take a shower).
Also, some have watering cans that do not have wall mounting. They simply lie in special forks on the faucets. But using such a shower design is not always convenient (you need to constantly hold it).
Ceiling and wall stationary watering cans are non-removable and have a device for supplying water to the walls; mixers are installed in a place where it is most convenient and practical for use.
How to disassemble a shower head
Before you start the process, prepare the necessary tools:
- screwdriver;
- paper clip, wire or regular needle;
- rag;
- soldering iron;
- mini drill or screwdriver with a small drill;
- knife
The first thing you need to start with is disassembling the shower head itself. It should be borne in mind that if you have an old shower system, the divider will simply unscrew. If the design is modern, then there is a self-tapping screw, closed with a decorative plug. Therefore it needs to be removed.
- Take any sharp object (awl, knife) and pry it by the edges. If there is a recess designed for this, there will be no problems. Otherwise, you'll have to tinker a little.
- Then use a screwdriver to unscrew the existing screw and move the diffuser to the side.
- Next, you need to clean the holes in the shower head. Everything is elementary - for this you need a needle or a paper clip that needs to be straightened.
- After completing this process, rinse everything with high-pressure water.
If there is limescale on the rubber, you can wipe these areas with a regular rag.
After the structure is completely disassembled, all parts should be thoroughly rinsed under water and everything should be reassembled in the reverse order.
You can assemble the structure. At the same time, do not forget about the rubber gasket between the divider and the watering can itself, or rather its body.
But in this way you will only be able to disassemble a system that has been in operation relatively recently. What if you have had it for several years? In this case, the self-tapping screw will not unscrew. It will simply crumble, and in the end there will be nothing to cling to with a screwdriver. But there is a way out here too.
- Take a drill and drill a hole in the center of the self-tapping screw (diameter about 2 mm). You can wiggle the drill a little. This way you will get a cone-shaped gap.
- Turn on the soldering iron and, after waiting for it to heat up, apply it to the screw. The plastic around will begin to soften. And here is the most important thing: before everything has cooled down, insert a screwdriver into the oval and unscrew the screw.
- Everything can be cleaned and put back together.
Just an important nuance - prepare a new screw according to the size of the previous one. It can be found at any hardware store.
By following the above recommendations, you can easily carry out such an event with your own hands. And with the money saved from doing the renovation yourself, buy something for the bathroom (you can’t buy much, but a rug on the floor will come in handy in any case). Good luck!
How to repair a crack in a shower cabin Foam generator for washing Connecting an instantaneous water heater to the electrical network Do-it-yourself summer shower (drawings) Steam generator for a shower cabin Toilet for a country toilet Corrugation for a toilet How to install a water heater in a bathroom Drain for a shower Assembling a shower cabin with your own hands
Steps
Part 1 Preparing the workspace
- 1 Prepare all necessary materials. To get the job done effectively, you'll need a blanket or tarp, an adjustable wrench, pliers, and a new shower head. It also doesn't hurt to have fum tape on hand. All necessary materials can be purchased at a hardware store.
- 2 Make sure the shower is turned off. Make sure that the shower taps are closed and securely locked in the closed position, otherwise water may pour on you during the work process.
- There is no need to shut off the water supply to the room, this is unnecessary.
- 3 Place a blanket or tarp underneath. Place a blanket or tarp over the bottom of the bathtub or shower floor to prevent small parts of the shower head from accidentally falling into the drain and to protect the bathtub or floors from possible falling tools or materials.
- If you want to be extra careful, you can even seal the drain with tape to prevent small parts from accidentally falling past the blanket or tarp.
Part 2 Replacing the shower head
- 1 Remove the old shower head. Wrap the cloth over the cone nut of the hose on the shower head. Set up the adjustable pliers and use them to grasp the conical nut through the fabric to hold it while you unscrew the watering can. Then wrap another napkin around the base of the watering can and grab it with an adjustable wrench. Turn the shower head counterclockwise to completely disconnect it from the hose.
- In some cases, shower heads can be unscrewed quite easily and this operation can be done directly by hand. Try first unscrewing the watering can without tools; if it doesn't work, grab some tools and napkins to do the necessary work.
- 2 Clean the threads of the conical nut of the shower hose. Use a clean cloth to wipe the threads of the hose cone nut. You can additionally use an old toothbrush to clean the threads and remove accumulated dirt and rust from them.
- Be sure to remove any remaining old fum tape from the thread.
- 3 Wind the fum tape onto the threads of the new shower head. Wrap the threads of the new shower head with 2-3 layers of fum tape, winding it tightly in a clockwise direction and making sure it fits properly into the grooves of the threads. The fly should be wound clockwise so that when screwing on a new shower head, it does not slip off the thread.
- Be sure to press the tape into the thread grooves.
- 4 Connect the new shower head to the hose. Place the new shower head against the conical nut of the shower hose and turn it clockwise by hand to secure it in place. Once the connection is tight, use cloths, pliers, and an adjustable wrench to finally tighten the shower head. Wrap the cone nut of the hose and the base of the shower head with tissue paper. Using pliers, wrap the tapered nut through the fabric. Use an adjustable wrench to grasp the base of the shower head through the fabric and turn it clockwise until it stops.
- This procedure can be used to replace both mobile hose-mounted shower heads and fixed wall-mounted shower heads. The only difference may lie in the design of the threaded connection between the shower head and the water supply (in wall-mounted showers, the conical nut may be absent as a separate element). Further instillation directions will likely be included when you purchase the hand-held shower head.
- 5 Turn on the water to check the operation of the shower head. Switch the faucet to shower mode and check for unexpected leaks. If leaks are detected, turn off the water and reconnect the shower head, rewinding it with fum tape - this time try to tighten it tighter.
- When tightening the watering can, be careful not to tighten it too tightly and damage the threads.
How to disassemble a shower head with a switch with your own hands?
Menu
- home
- Site Map
- Contacts
09/08/2017
In the modern accelerated world, a shower is the basis of human hygiene. For comfortable water procedures, the use of a watering can is required. But nowadays, an ordinary shower, based on distributing the flow of water into several jets, is gradually becoming a thing of the past. Its place is taken by multi-mode watering cans, the flow of water in which can be adjusted and modified to create comfortable conditions when washing.
The advantages of such devices:
- Multi-variant water supply: normal mode, massage, comfortable.
- Save water by simply choosing the option with the minimum required supply.
- Easy installation - connecting shower equipment with a switch is similar to connecting with a conventional one.
Variety of shapes and sizes of shower heads
Modern nozzles can vary in shape and size. Shower heads are produced in the following shapes:
- rectangular and square;
- triangular;
- round and oval.
The size of the watering can is determined by its area of application. For example, those who like to bring down a whole “waterfall” on themselves choose “tropical rain” models, the working area of which is about 50 cm2. Connoisseurs of the classics choose standard manual watering cans, the diameter of which does not exceed 6-8 cm.
The ergonomics of the product is also important. Therefore, when choosing a model, twirl it in your hands to check how convenient it will be in everyday life.
Some stores have a special stand where the consumer can check the functionality of the device by placing his palm under the stream
In terms of practicality, those watering cans in which modes are switched using a button are much more convenient. It's much safer for your hands. And besides, rotary mechanisms are beginning to become a thing of the past.
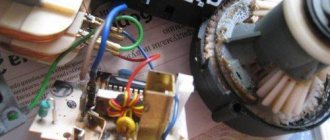
Watering can device with switch
This watering can is usually a body made of hard plastic, inside of which there is a round-shaped structure equipped with several concentric flow swirlers. Moreover, each of them works for its own regime. The swirlers are installed in the housing according to the “matryoshka” principle and, with rare exceptions, are united by a common housing.
The flow force can increase or decrease depending on the diameter of the swirler and the cross-section of the chamber openings. This achieves different pressures of the water flow at the outlet of the chamber.
On the outside, the water supply chamber is covered with a mesh, which also influences the formation of the stream: for example, intermittent or with the addition of air bubbles. This is achieved by using various kinds of artificial barriers and movable flow dividers.
The mode switching mechanism itself is installed on the outer circumference of the watering can; as a rule, it is multi-sectional. Its task is to open one or two chambers of the swirler, blocking the rest. This achieves switching modes and combining them if necessary.
How is it arranged?
If water does not flow out of some holes, this means that the watering can is clogged. The problem should be addressed as quickly as possible. Otherwise, the device will become completely unusable, and you will have to purchase a new one.
Watering cans come in several varieties.
- Stationary. They are divided into wall and ceiling models.
- On a flexible hose. Can be fixed using brackets and a fixed rod.
These features influence the progress of work in their own way. However, the structure of a shower head is almost always the same.
It includes the following components:
- body, which can be made of any materials;
- multilayer liquid swirler. Sometimes it can be combined with a common body;
- water supply chamber;
- a mesh that covers the chamber and influences the flow formation;
- fixing screw;
- pad;
- mode switching mechanism.
When the structure of the device has become clearer, you can proceed directly to the work itself.
Step-by-step disassembly instructions
To work, you will need a Phillips screwdriver, an adjustable or gas wrench No. 1, and a special pin wrench for disassembling the shower head. Often this key comes in a set. If you don’t have one, you can make it yourself or use improvised items.
When disassembling the shower body yourself, it is recommended to be extremely careful and put small parts and structural elements aside separately. When dismantling rubber gaskets, they must be handled with extreme care to avoid damage. Do not forget about the presence of a spring in the housing.
So, the algorithm is as follows:
- Turning off the shower, removing the shower head from the flexible hose. This is done quite simply: unscrew the nut at the junction with the hose. Before doing this, you must turn off the shower mode on the mixer.
- In order to disassemble the watering can with the switch, you need a special key. If you look closely at the diffuser mesh panel, you will see 3-5 recesses on the central circle intended for dismantling. The panel unscrews from right to left. You can unscrew the central panel of the shower screen with a special key; if it is not available, you can use scissors with rounded ends for this purpose. But it is best to use a key, this will keep the surface of the mesh intact, without scratches or defects.
- After removing the central panel, you can see the swirl box underneath, which is secured in the center with a screw. Unscrew it with a Phillips screwdriver.
- Remove the concentric circles of the shower screen and the switch. Pay special attention to the movable diffusers and flow diffusion baffles that may be located under the diffuser. When opening the mesh, they must be carefully removed. Then remove the swirler from the watering can. Pay attention to the rubber gaskets; they must be handled very carefully.
- Below the swirl ring is usually the switch spring. Removing the case must be done carefully to avoid its loss.
- The swirl box can be one-piece, not subject to repair, or detachable, with 2-3 plastic latches; in this case, opening the box is not recommended. The latches are quite weak and may not withstand brute force. Screw connections are less common.
Assembly after repair or replacement of parts is carried out in the reverse order: the swirl body is inserted, the screw is tightened, concentric mesh diffusers are installed, and the central panel is tightened. After which the watering can is connected to a flexible hose.
After disassembly, be sure to rinse the inside of the holes in the mesh; usually, during use of the shower, so-called water stone forms in them - a deposit of mineral elements and rust found in tap water.
Popular posts
- Chair for dressing table Chairs for dressing tables in Moscow - 189 Products Company from Moscow, delivery 29643 a In…
- Silicone sanitary sealant Silicone sanitary sealant white in Moscow - 1491 products Company from Moscow, delivery (tomorrow) 140...
- Shelf in the hallway Currently, there are a huge number of different options for shelves in the hallway, and this is directly ...
- Insulation of the floor in a wooden Insulation of the floor in a wooden house from below: materials and installation technology SHARE ON SOCIAL NETWORKS One of the common…